Category Archives: Desserts

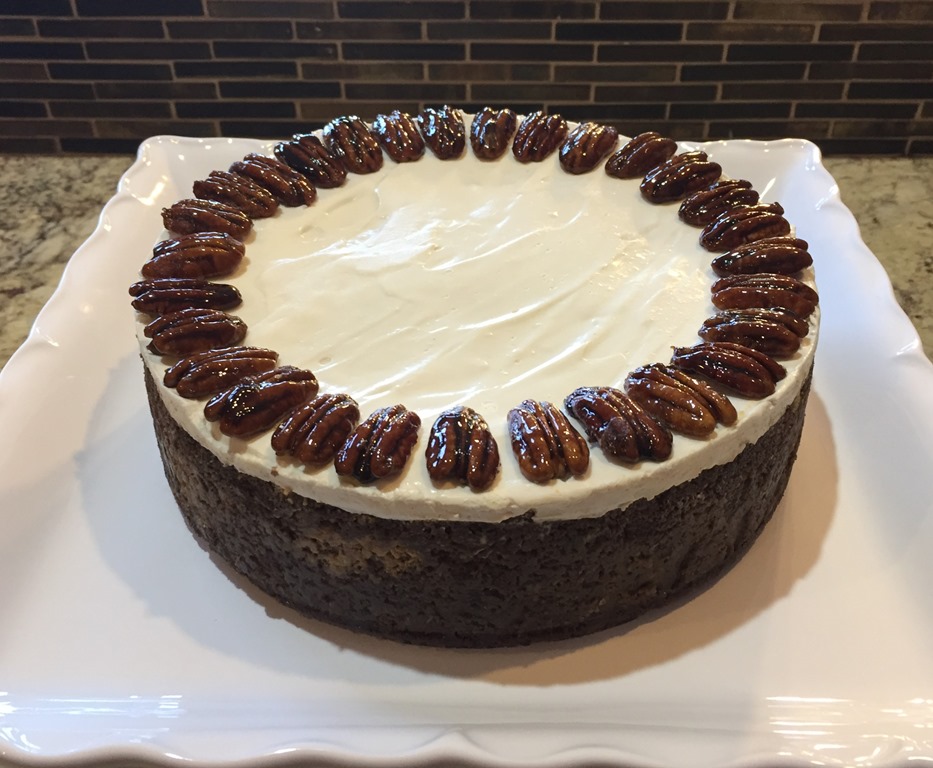
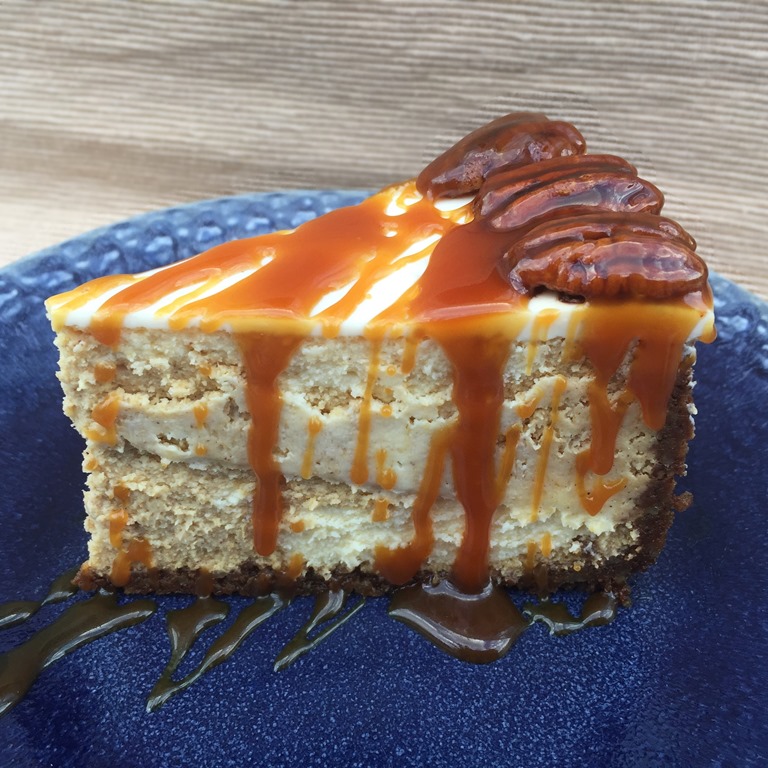
Swirled Pumpkin Cheesecake with Candied Pecans and Salted Caramel

Swirled Pumpkin Cheesecake 3

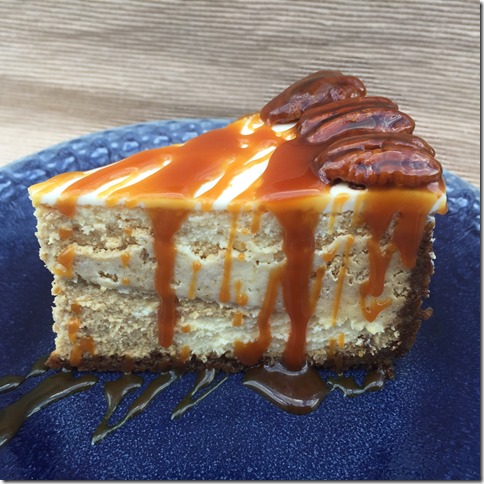
A delicious make-ahead dessert for Thanksgiving or other fall parties. This cheesecake starts with a lemon gingersnap crust and is filled with swirled layers of pumpkin and vanilla cheesecake.

To send it over the top, the cheesecake is garnished with candied pecans and then salted caramel is drizzled over individual slices. Even my cheesecake-averse daughter asked for this to show up on the Thanksgiving menu again this year.

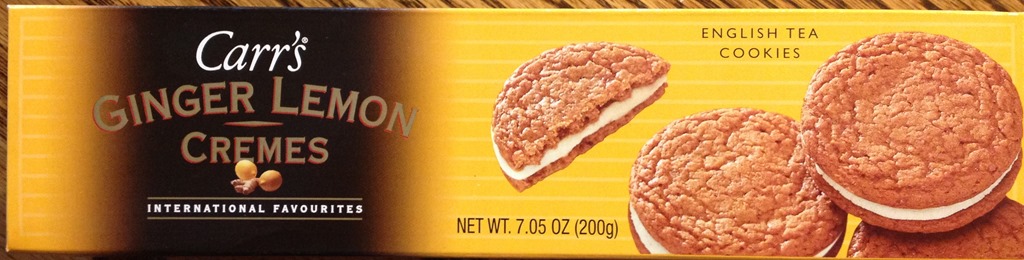
The Lemon Gingersnap Crust is made from these cookies:
Layered Pumpkin Cheesecake with Butterscotch Sauce 3

Swirled Pumpkin Cheesecake 2

For detailed information about baking a cheesecake in a water bath, see this post: Creamy Citrus Cheesecake

Just before serving, arrange the candied pecans around the outside edge of cheesecake. The pecans will get soft if they are put on the cheesecake and refrigerated too far ahead of time.

Swirled Pumpkin Cheesecake 1

Don’t skip the salted caramel. It really makes this an extraordinary dessert. And if there is any leftover, it is perfect for drizzling on ice cream, waffles, or just about anything.

Salted Caramel Sauce

Swirled Pumpkin Cheesecake with Candied Pecans and Salted Caramel Drizzle

Swirled Pumpkin Cheesecake 3

Lemon Gingersnap Crust
1 (7 oz) pkg Carr’s Ginger Lemon Cremes
½ cup pecans
2 Tbs butter, melted

Process cookies and pecans in a food processor until finely ground. Add melted butter and mix. Press into the bottom and halfway up the sides of a 9” springform pan. Refrigerate for about 20 minutes while preparing filling.

Pumpkin Cheesecake Layer
2 (8 oz) packages cream cheese, softened
¾ cup sugar
1 cup pumpkin puree
2 Tbs flour
1 tsp cinnamon
¼ tsp allspice
⅛ tsp each ground nutmeg and ground cloves
pinch of salt
2 whole eggs plus 1 egg yolk
1 tsp vanilla extract

Mix all ingredients with an electric mixer until smooth. (You can also substitute 1 ½ tsp pumpkin pie spice for the other spices)

Vanilla Cheesecake Layer
2 (8oz) packages cream cheese, softened
¾ cup sugar
pinch of salt
2 whole eggs plus 1 egg yolk
2 tsp vanilla extract

Mix all ingredients with an electric mixer until smooth.

Preheat oven to 350°F. Wrap springform pan in a double layer of foil. Place springform pan in a larger roasting pan.

Pour half of pumpkin filling into crust.  Slowly pour half of the vanilla filling over top of the pumpkin batter. Use a knife or spatula to gently swirl. Repeat with remaining pumpkin and vanilla batters. Swirl again.

Fill roasting pan (not springform pan!) with very hot (almost boiling) water to about 1-2 inches deep.

Bake cheesecake in the water bath for about 80 minutes. (Cover top of cheesecake with foil if it begins to brown before it is set.) When it is cooked, the cheesecake will have puffed significantly, and the middle will still be slightly jiggly, but not soupy. Remove pan from water bath and run a sharp knife around the sides, but do not remove ring.

Cheesecake Topping Layer:
1 cup sour cream
2 Tbs sugar
½ Tbs lemon juice
1 tsp vanilla extract

While cheesecake is baking, combine sour cream, sugar, lemon juice and vanilla in a small bowl. Pour over hot (cooked) cheesecake and let stand at room temperature for 60 minutes. Cover cheesecake pan (do not remove sides) with plastic wrap, taking care not to touch the surface of the cheesecake. Chill for at least four hours, preferably overnight.

Candied Pecans:
½ cup brown sugar
1 Tbs water
¼ tsp salt
¼ tsp cinnamon
3 cups pecan halves

Place a large piece of parchment paper or non-stick foil on the countertop.

Combine sugar, water, salt, and cinnamon in a skillet. Cook over medium heat until mixture comes to a full boil. Stir in pecans. Cook, stirring constantly, for 2-3 minutes. Spread pecans on parchment paper/foil. While still hot, use 2 forks to separate pecans into a single layer so that pecans are not touching. Cool completely.

Just before serving, arrange candied pecans around the outside edge of cheesecake.

Salted Caramel Drizzle:
1 cup sugar
6 Tbs butter, softened and cut into tablespoon-sized chunks
½ cup heavy cream
½ – 1 tsp flaky or coarse sea salt
1 tsp vanilla (and/or seeds scraped from 1 vanilla bean)

Place sugar in a medium to large saucepan (mixture will bubble up and expand as cool ingredients are added to the hot pan, so use a large pan). Cook over medium heat until sugar just begins to melt. Stir gently, trying to keep sugar crystals off of the sides of the pan. Continue to cook, stirring occasionally, until sugar melts completely and is a medium amber color (about 350°F if you use an instant-read thermometer). Reduce heat to low and quickly whisk in butter chunks, stirring constantly.

Stir in cream, stirring constantly until smooth. Stir in salt and vanilla. Pour caramel immediately into a glass jar or heat-safe bowl to cool. Do NOT scrape sides or bottom of the pan with a spatula. If you do, you are likely to get sugar crystals into your nice smooth caramel. If the caramel has formed crystals while cooking, you can pour it from the pan through a fine sieve into the jar to remove any crystals before cooling.

Caramel can be kept in a covered jar at room temperature for several weeks.

Drizzle  individual slices with Salted Caramel.

NoEmptyChairs.me

2 Comments

Filed under Desserts

Sugar-Free Strawberry Cheesecake

Sugar Free Strawberry Cheesecake 6

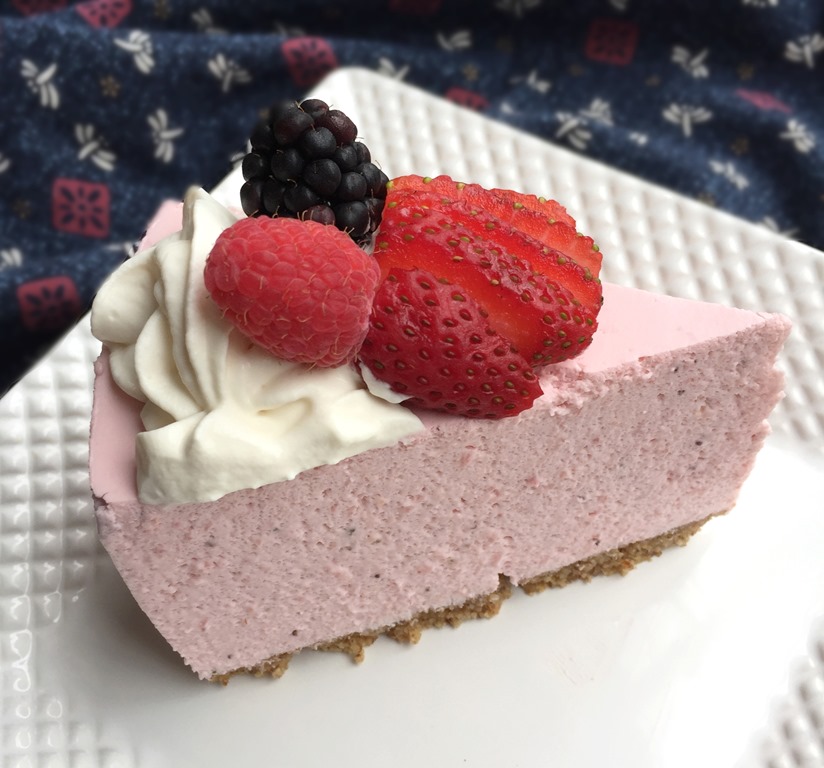
This sugar-free strawberry cheesecake may have just jumped onto my list of all-time favorite desserts, even those full of sugar.

This is a no-bake cheesecake that is easy to put together. Made with fresh strawberries, it is a fabulous summer dessert that won’t heat up the kitchen.

It is light and airy, not dense like a baked cheesecake. I sweetened it with stevia and erythritol, but you can easily substitute real sugar. But for those watching their carb and sugar intake, this is a wonderfully satisfying dessert. My kids don’t even miss the sugar!

Sugar Free Strawberry Cheesecake 4

I made it in a 9” springform pan, and it completely filled the pan for a nice tall cheesecake. You could make it in a little bit larger pan instead if you don’t want quite as thick of slices.

I garnished the cheesecake with some whipped cream and fresh berries. A wonderful light and summery dessert.

Sugar Free Strawberry Cheesecake 3

RECIPE:

Sugar-Free Strawberry No-Bake Cheesecake

Sugar Free Strawberry Cheesecake 6

Crust:
¾ cup whole almonds (roasted and salted)
¼ cup whole pecans
¼ cup rolled oats
3 Tbs butter, melted
10 drops of liquid stevia

Filling:
3 (8 oz) packages cream cheese, at room temperature
1 cup sour cream
2 tsp vanilla extract
¾ cup erythritol
½ tsp liquid stevia
½ cup cool water
2 (1 oz) packages unflavored gelatin
1 quart (4 cups) whole strawberries, hulled
1 cup heavy cream

Garnish:
1 cup heavy cream
1 Tbs cream cheese, at room temperature
½ tsp vanilla extract
5 drops liquid stevia
Whole strawberries, and/or other berries (raspberries, blackberries)

Crust:
Preheat oven to 350°F.

Place almonds, pecans, and oats in a food processor; blend until finely ground. Add butter and stevia  and pulse until combined. Lightly spray 9” springform pan with baking spray (I like coconut oil spray for this). Press crust mixture onto bottom of pan. Bake for 10 minutes. Cool completely.

Filling:
In a large mixing bowl, beat cream cheese until smooth. Add sour cream, vanilla, erythritol, and stevia and beat again until smooth.

Place cool water in a separate bowl; sprinkle gelatin over water. Let sit for 5 minutes, or until gelatin has softened. Microwave for 15 seconds, or until gelatin has dissolved.

Place strawberries in a food processor. Blend until very finely chopped (mixture will be slightly liquidy). Add gelatin mixture to food processor and pulse until mixed. Add chopped strawberries to cream cheese mixture and beat until smooth. Taste mixture and add additional sweetener, if needed.

In a separate mixing bowl, whip 1 cup cream until stiff peaks form. Fold into filling.

Pour mixture over cooled crust in the springform pan. Refrigerate for at least 4-6 hours or until firm.

Garnish:
Combine cream, cream cheese, vanilla, and stevia in a mixing bowl and beat until stiff peaks form. Pipe onto top of chilled cheesecake and garnish with fresh berries.

NoEmptyChairs.me

1 Comment

Filed under Desserts

Chocolate Covered Strawberries Cake

Chocolate Covered Strawberries Cake 1

Last week, we attended a Boy Scout fundraising auction. I made a few items to contribute, including this Chocolate Covered Strawberries Cake. It is a 4-layer chocolate cake filled with Strawberry Swiss Meringue Buttercream icing. And garnished with chocolate covered strawberries.

There were sooo many delicious looking desserts at the auction. Not a good time to be on a low-carb diet.

Chocolate Covered Strawberries Cake 3

Since I didn’t actually get to cut and eat this cake, I don’t have an inside picture, but it looks similar to this Chocolate Raspberry Truffle Cake:

Chocolate Raspberry Truffle Cake 5

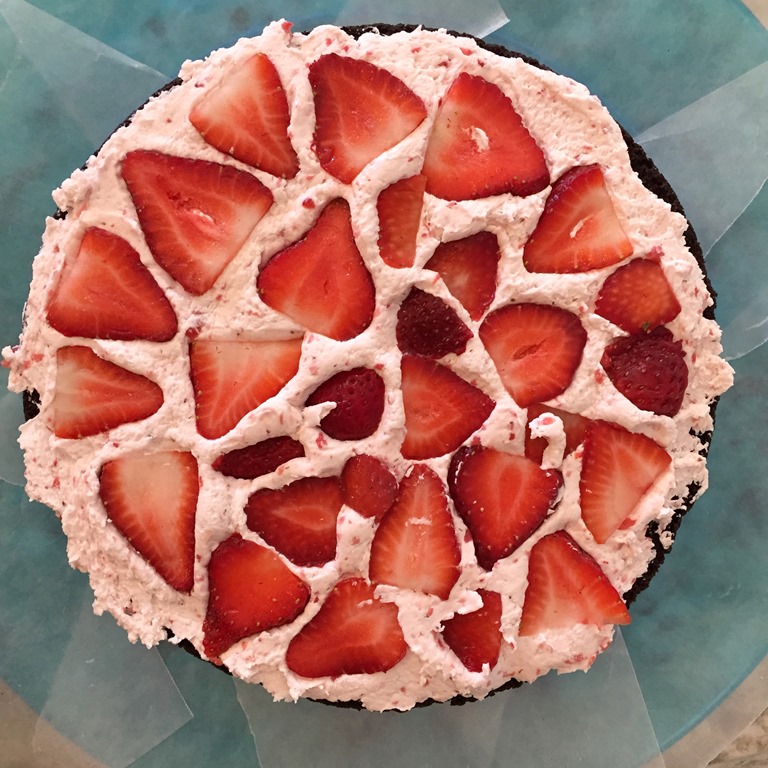
except that I added sliced fresh strawberries in between the layers with the icing:

Chocolate Covered Strawberries Cake 2

RECIPE:

Chocolate Covered Strawberries Cake

Chocolate Covered Strawberries Cake 1

Ingredients (recipes below):
Chocolate Layer Cake
Strawberry Swiss Meringue Buttercream
Chocolate Ganache
Chocolate Covered Strawberries

Chocolate Layer Cake
2 cups flour
½ cup regular cocoa powder
½ cup Dutch process cocoa (or Hershey’s Special Dark)
1 ½ tsp baking soda
½ tsp salt
¾ cups (1 ½ sticks) unsalted butter, softened
1 cup sugar
1 cup brown sugar
3 eggs, at room temperature
2 tsp vanilla extract
1 ½ cups buttermilk

Preheat oven to 350°F. Lightly grease 2 9” cake pans; line bottom of pans with parchment paper. Grease paper and then dust entire pan with cocoa powder.

Combine flour, cocoa powders, baking soda and salt. Mix with a whisk. In a large mixing bowl, beat butter and sugars for 5 minutes. The mixture should be very pale and fluffy. Beat in eggs and vanilla. Add flour mixture alternately with buttermilk, beginning and ending with flour mixture. Beat just until smooth.

Divide batter into prepared pans and bake for 28-30 minutes or until toothpick comes out clean. Cool in pans for 10 minutes. Invert onto wire racks, remove parchment paper and cool.

Cooled cake layers can be wrapped in plastic wrap and frozen until you are ready to assemble them. (For this cake, if you are freezing the layers: cut each layer in half before freezing to make 4 layers).

Strawberry Swiss Meringue Buttercream Icing
1 ½ cups egg whites (about 12 large egg whites, or use pasteurized egg whites that come in a carton)
2 ½ cups sugar
pinch of salt
3 cups unsalted butter (6 sticks), at room temperature**
1 Tbs vanilla extract
about 1 ½ cups Strawberry Puree (see recipe below)
about 2 cups sliced fresh strawberries (set aside for cake assembly)

In the top of a double boiler, stir together  egg whites, sugar and salt. Bring water in bottom of double boiler to a low simmer; cook until the temperature of the egg whites reaches 160°F and sugar is completely dissolved (rub mixture between fingertips-it should not feel gritty). Mixture will be foamy and not a uniform consistency.

Transfer the egg white mixture to the bowl of a stand mixer. With the whisk attachment, whip until meringue is completely cooled and glossy peaks form, about 10 minutes. DO NOT ADD BUTTER UNTIL BOTH THE BOWL AND FROSTING ARE COMPLETELY COOL. Switch mixer attachment from the whisk to paddles. Add butter 1-2 Tablespoons at a time until incorporated. Mixture may appear curdled at times. Continue beating until butter is fully incorporated and frosting is fluffy and smooth.  This will take about 10 minutes.  Add vanilla and beat smooth. Add strawberry filling and beat until frosting is a uniform color.

**BUTTER NOTE: butter should be room temperature soft, but not overly soft. If the butter is too cold, it will not incorporate well into the meringue, and you will have butter chunks. If the butter is over-soft, it will cause the icing to curdle while beating-this is okay, it isn’t ruined: it will just take longer (more beating) for the frosting to become smooth. If icing still won’t set, place in the fridge for 20 minutes, and then beat again.

Strawberry Puree:
2 cups whole fresh strawberries, hulled
2 Tbs sugar

Process strawberries in a food processor until very finely chopped, but not completely liquefied. Mix in sugar.

Chocolate ganache:
4 oz bittersweet chocolate, chopped (about ½ cup, slightly heaping)
½ cup heavy cream
2 Tbs corn syrup

Place the chopped chocolate into a small bowl and set aside. In a Pyrex measuring cup or microwavable bowl, combine the heavy cream and corn syrup. Heat for 30-45 seconds; stir. Pour the hot cream over the chopped chocolate. Let sit for one minutes, then stir until smooth.

Chocolate Covered Strawberries:
Fresh strawberries
Chocolate and vanilla melting chocolates

Melt chocolate and vanilla melting chocolates in separate bowls. Dip strawberries in melted chocolate and place on waxed paper.

Place remaining melted chocolates in Ziploc bags and poke a hole in one corner of each bag. Drizzle strawberries with contrasting chocolate.

Let chocolate harden completely before placing on cake.

Cake Assembly:
Completely cool cake layers. Cut each layer in half to make 4 layers. Prepare frosting and ganache.

Place waxed paper strips along edges of serving plate. Place one cake layer, cut side up, on the serving plate. Waxed paper strips should cover the exposed part of the plate, but not be too far under the cake layer. Spread cake with a layer of strawberry icing. Press sliced fresh strawberries into icing. Top with another cake layer. Repeat with frosting and remaining cake layers. Ice entire cake with a thin crumb coat of icing. Refrigerate cake for 2o minutes to set slightly (optional). Create a smooth finish with remaining icing over entire cake (top of cake should be completely flat).

Drizzle cake with ganache, letting it drip down the sides. Refrigerate cake.

Decorate top and base of cake with chocolate covered strawberries.

Storage:  Store cake in refrigerator.

NoEmptyChairs.me

2 Comments

Filed under Desserts

Clotted Cream (in an Instant Pot)

Clotted Cream 3

Clotted cream is a delicious British condiment. Perfect for topping scones, muffins, cornbread, bagels: anything that you might put butter, cream cheese, or whipped cream on. Or try a dollop on oatmeal with fresh fruit for a wonderful breakfast treat.

Clotted cream’s texture and taste lie somewhere between whipped cream and butter. So: the best of both worlds.

Vanilla Scones 3

Clotted cream is made by heating cream and keeping it at a low temperature while the fat solids separate from the thinner milk and whey. Maintaining a consistent low heat for a long time is the perfect job for an Instant Pot.

The hardest part of making clotted cream is finding heavy cream that is NOT ultra-pasteurized. Most grocery stores in the US do not carry cream that isn’t ultra-pasteurized. (You can use regular pasteurized cream, but not ultra-pasteurized. The cream will not clot the same.) I bought mine at a local farmer’s market. Some Whole Foods stores also carry it.

**Save the thinner milk/whey that is left after separation to use in other recipes where you would use milk.

Clotted Cream 2-2

RECIPE:

Clotted Cream (in an Instant Pot)

Clotted Cream 3

4 cups heavy cream, not ultra-pasteurized

1. Pour cream into the Instant Pot and close lid (use glass lid if you have one).
2. Set Instant Pot to Yogurt and then Boil (press the Yogurt button, then press Adjust until it says Boil).
3. When the Boil cycle finishes, use a thermometer to check that the cream has reached 180°F. Repeat step if cream has not reached 180°F.
4. Return lid (glass) to pot and press Keep Warm button. Leave at Keep Warm for 8 hours.
5. Turn off Instant Pot and set insert on a cooling rack. Cool to room temperature. Do not stir.
7. Cover with glass lid or plastic wrap and refrigerate for 8-12 hours. Do not stir.
8. Remove from fridge. The clotted cream will have thickened and risen above a layer of milk/whey.
9. Use a spoon to scoop out a small section of clotted cream from the side of the pot, and place in a bowl. Carefully pour off the milk/whey at the bottom of the pot (keep to use in other recipes that call for milk or whey). Scoop the remaining clotted cream out into bowl. Stir back in a little whey if you want a thinner texture.
10. Store clotted cream in the refrigerator or freezer. For a softer texture, remove clotted cream from refrigerator about 30 minutes before serving.

Yield: about 2 cups clotted cream

NoEmptyChairs.me

7 Comments

Filed under Appetizers, Breakfast/Brunch, Condiments/Sauces, Desserts, Instant Pot, Tips and Tutorials

Vanilla Scones

Vanilla Scones 1

For our Scottish themed book group meeting, I made a variety of different Scottish foods, more of which I will share here shortly.

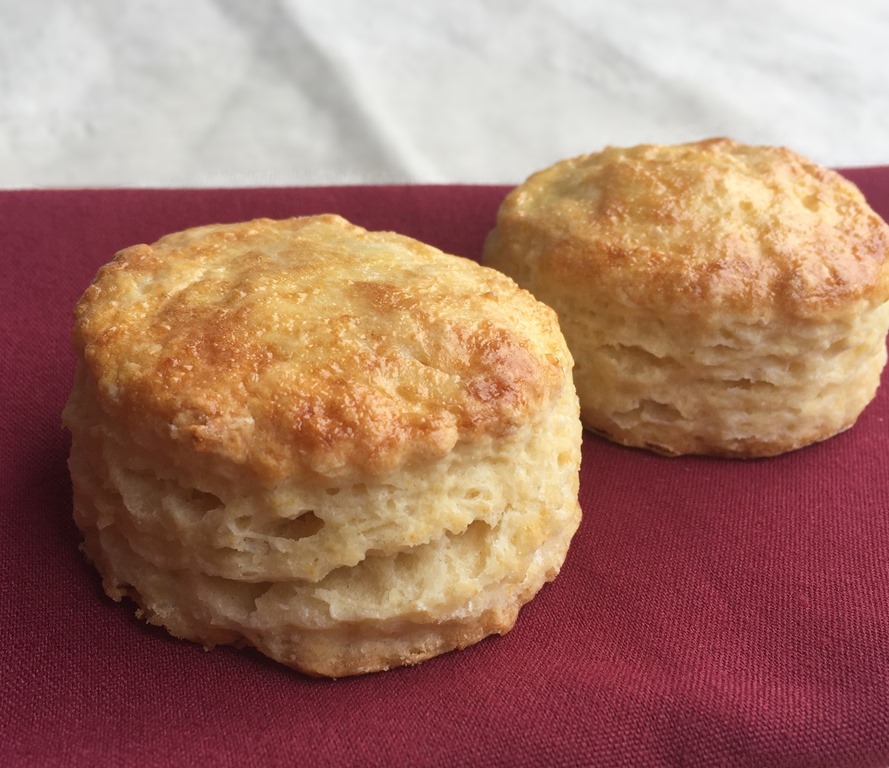
Scottish (or English) scones are a light, tender biscuit that can be adapted to many different flavors. Scones can be a savory food or a dessert. Or breakfast, or a snack, or just about anything you want them to be.

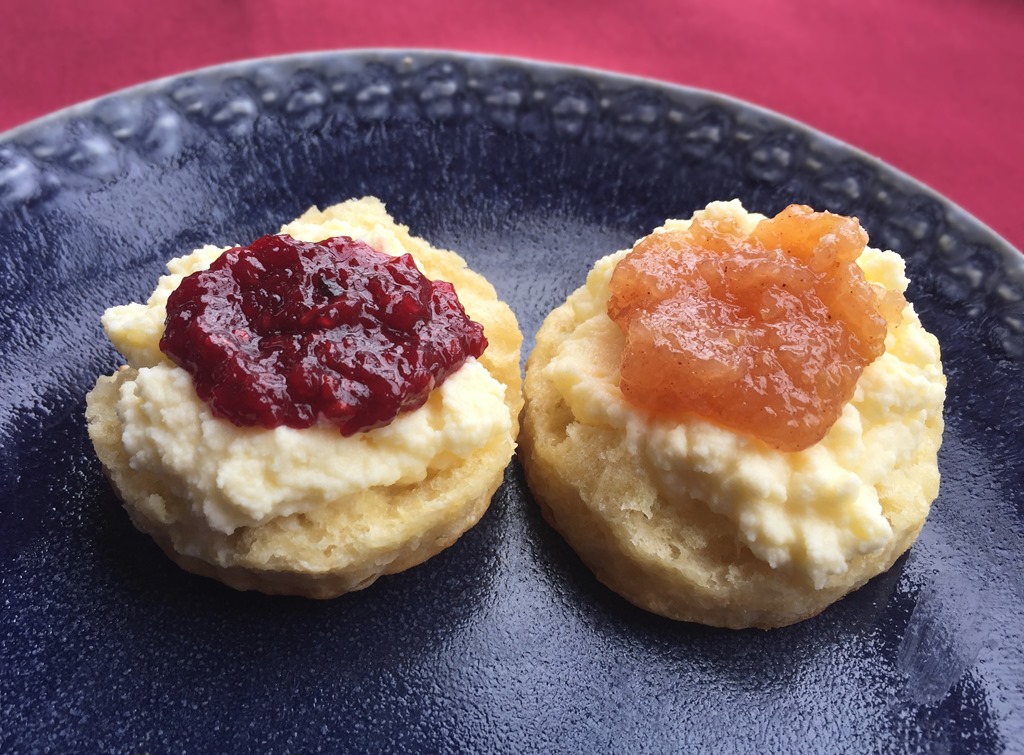
These vanilla scones, while not sweet themselves, are more of a dessert food. Especially if you serve them with Clotted Cream (or whipped cream) and jam. They also make a great base for Strawberry Shortcake.

I served them with a Homemade Clotted Cream (made in an Instant Pot) and Homemade Red Raspberry Jam and Cinnamon Pear Jam.

Vanilla Scones 3

Scones can also easily be frozen either before or after baking.

To freeze before baking: Prepare scone dough. Cut out scones and place on a baking sheet lined with foil. DO NOT brush with egg wash. Freeze until firm. Place into Ziploc bag or freezer container and store in freezer. Place frozen scones on a baking sheet lined with parchment paper or silicone mat. Let sit at room temperature for 30 minutes. Brush tops of scones with egg wash. Bake at 400°F for 16-18 minutes.

To freeze after baking: Prepare and bake scones. Cool completely and place on a baking sheet lined with foil. Freeze until firm. Place into Ziploc bag or freezer container and store in freezer. Place frozen scones on a baking sheet lined with parchment paper or silicone mat. Let sit at room temperature for 30 minutes. Bake at 300°F for 10-12 minutes.

RECIPE:

Vanilla Scones

Vanilla Scones 1

2 cups flour
2 Tbs sugar
2 tsp baking powder
½ tsp salt
6 Tbs unsalted butter
½ cup buttermilk
2 Tbs heavy cream
1 egg
1 tsp vanilla extract
1 vanilla bean, split and seeds scraped (optional)
Egg Wash: 1 egg + 1 Tbs cream

Clotted Cream and Jams, to serve

Preheat oven to 400°F. Line a baking sheet with parchment paper or silicone mat.

In a large bowl, mix flour, sugar, baking powder, and salt. Cut cold butter into dry ingredients until mixture resembles coarse crumbs. **SEE NOTE BELOW

In a separate bowl or Pyrex measuring cup, mix together buttermilk, 2 Tbs cream, egg, vanilla extract, and vanilla bean seeds. In a small bowl, mix together egg wash and set aside.

Make a well in the dry ingredients and pour in buttermilk mixture. Use a rubber spoon to gently mix, until most of the dry ingredients are mixed in.

Turn dough out onto a flour coated surface and pat and/or roll dough to about 3/4” thick. Use a scone or biscuit cutter to cut into rounds. Place on prepared baking sheet. Gently reroll scraps to make additional scones.

Brush tops of scones with egg wash. Bake for 15-18 minutes, or until golden brown.

Serve scones with clotted cream and jam.

**NOTE: To easily cut butter into dry mixture, freeze one stick of butter for 30 minutes. Fold back the paper wrapper to the 6Tbs mark and use the coarse blades of a cheese grater to grate the butter directly into the dry ingredients. Use a rubber spatula to fold butter shreds into mixture.

Yield: about 12 scones

**TO FREEZE SCONES:

Scones can be frozen either before or after baking.

To freeze before baking: Prepare scone dough. Cut out scones and place on a baking sheet lined with foil. DO NOT brush with egg wash. Freeze until firm. Place into Ziploc bag or freezer container and store in freezer. Place frozen scones on a baking sheet lined with parchment paper or silicone mat. Let sit at room temperature for 30 minutes. Brush tops of scones with egg wash. Bake at 400°F for 16-18 minutes.

To freeze after baking: Prepare and bake scones. Cool completely and place on a baking sheet lined with foil. Freeze until firm. Place into Ziploc bag or freezer container and store in freezer. Place frozen scones on a baking sheet lined with parchment paper or silicone mat. Let sit at room temperature for 30 minutes. Bake at 300°F for 10-12 minutes.

NoEmptyChairs.me

Leave a comment

Filed under Breads, Breakfast/Brunch, Desserts

9th Annual Twelve Days of Christmas Cookies Recap

Here is a list of the twelve cookies from this year. I hope that you all enjoy the rest of this Christmas season with family and friends.

Scroll to the bottom for links to the previous 8 years of cookies.

Almond-Toffee-Sandies-3_thumb1

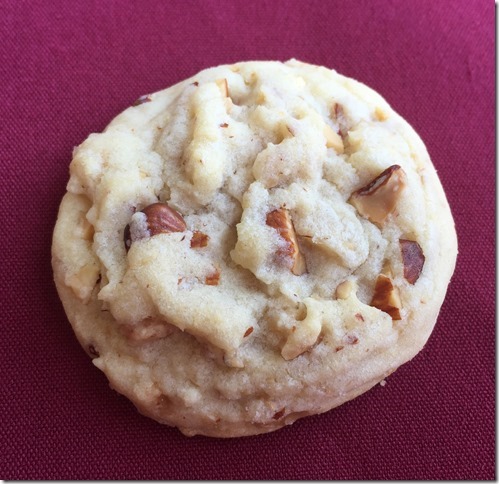
DAY 1: Almond Toffee Sandies

Cream Cheese Chocolate Chip Cookies_thumb[2]

DAY 2: Cream Cheese Chocolate Chip Cookies

Brown-Sugar-Cinnamon-Squares-1_thumb

DAY 3: Brown Sugar Cinnamon Squares

Roasted Spiced Pecans_thumb[1]

DAY 4: Roasted Spiced Pecans

Chocolate Thumbprints_thumb[2]

DAY 5: Chocolate Thumbprints with Homemade Caramel Filling

Chewy-Pecan-Cheesecake-Cookies_thumb[3]

DAY 6: Chewy Pecan Cheesecake Cookies

Almond-Butter-Cookies-1_thumb2

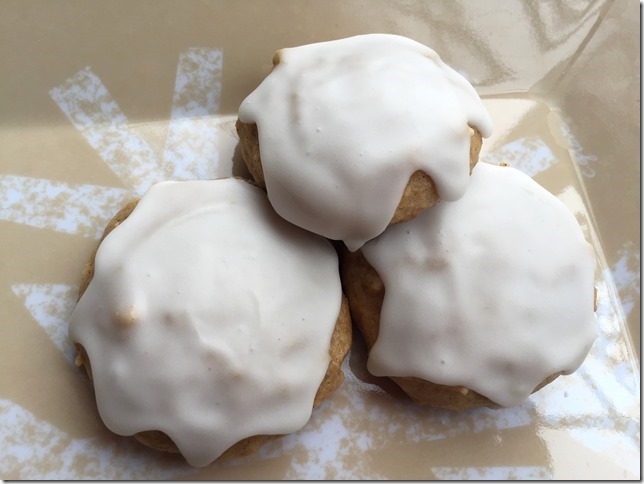
DAY 7: Glazed Almond Butter Cookies

German-Lebkuchen_thumb2

DAY 8: German Lebkuchen

Lemon-Cake-Mix-Cookies_thumb2

DAY 9: Lemon Cake Mix Cookies

Salted Caramel Bars_thumb[2]

DAY 10: Salted Caramel Bars

Dark Chocolate Cream Cheese Cookies 2_thumb[3]

DAY 11: Dark Chocolate Cream Cheese Cookies

Pumpkin Cranberry Bread 2

DAY 12: Pumpkin Cranberry Bread

Lots More Christmas Cookies and Treats:

1st Annual Twelve Days of Christmas Cookies (2009)

2nd Annual Twelve Days of Christmas Cookies (2010)

3rd Annual Twelve Days of Christmas Cookies (2011)

4th Annual Twelve Days of Christmas Cookies (2012)

5th Annual Twelve Days of Christmas Cookies (2013)

6th Annual Twelve Days of Christmas Cookies (2014)

7th Annual Twelve Days of Christmas Cookies (2015)

8th Annual Twelve Days of Christmas Cookies (2016)

3 Comments

Filed under Cookies, Desserts