Category Archives: Tips and Tutorials

Clotted Cream (in an Instant Pot)

Clotted Cream 3

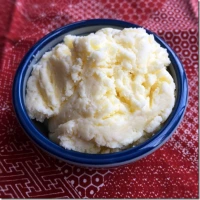
Clotted cream is a delicious British condiment. Perfect for topping scones, muffins, cornbread, bagels: anything that you might put butter, cream cheese, or whipped cream on. Or try a dollop on oatmeal with fresh fruit for a wonderful breakfast treat.

Clotted cream’s texture and taste lie somewhere between whipped cream and butter. So: the best of both worlds.

Vanilla Scones 3

Clotted cream is made by heating cream and keeping it at a low temperature while the fat solids separate from the thinner milk and whey. Maintaining a consistent low heat for a long time is the perfect job for an Instant Pot.

The hardest part of making clotted cream is finding heavy cream that is NOT ultra-pasteurized. Most grocery stores in the US do not carry cream that isn’t ultra-pasteurized. (You can use regular pasteurized cream, but not ultra-pasteurized. The cream will not clot the same.) I bought mine at a local farmer’s market. Some Whole Foods stores also carry it.

**Save the thinner milk/whey that is left after separation to use in other recipes where you would use milk.

Clotted Cream 2-2

RECIPE:

Clotted Cream (in an Instant Pot)

Clotted Cream 3

4 cups heavy cream, not ultra-pasteurized

1. Pour cream into the Instant Pot and close lid (use glass lid if you have one).
2. Set Instant Pot to Yogurt and then Boil (press the Yogurt button, then press Adjust until it says Boil).
3. When the Boil cycle finishes, use a thermometer to check that the cream has reached 180°F. Repeat step if cream has not reached 180°F.
4. Return lid (glass) to pot and press Keep Warm button. Leave at Keep Warm for 8 hours.
5. Turn off Instant Pot and set insert on a cooling rack. Cool to room temperature. Do not stir.
7. Cover with glass lid or plastic wrap and refrigerate for 8-12 hours. Do not stir.
8. Remove from fridge. The clotted cream will have thickened and risen above a layer of milk/whey.
9. Use a spoon to scoop out a small section of clotted cream from the side of the pot, and place in a bowl. Carefully pour off the milk/whey at the bottom of the pot (keep to use in other recipes that call for milk or whey). Scoop the remaining clotted cream out into bowl. Stir back in a little whey if you want a thinner texture.
10. Store clotted cream in the refrigerator or freezer. For a softer texture, remove clotted cream from refrigerator about 30 minutes before serving.

Yield: about 2 cups clotted cream

NoEmptyChairs.me

7 Comments

Filed under Appetizers, Breakfast/Brunch, Condiments/Sauces, Desserts, Instant Pot, Tips and Tutorials

Roasted Pumpkin (Squash) Seeds

What to do with all of the seeds from your recently carved Jack-o-Lantern or roasted pumpkins and winter squash? Whatever you do, don’t throw them away! Save them for a super delicious (and nutritious) snack that will keep you out of your kids’ Halloween candy.

Seeds from any variety of winter squash or pumpkin can be roasted and eaten.

Scrape pumpkin/squash and remove pulp and seeds.

Separate seeds from pulp, discarding pulp. Rinse the seeds and pat dry with paper towels or a dishtowel. Place the dry seeds in a shallow pie plate or roasting pan.

Seeds can be cooked immediately, or allowed to further dry first. Drying the seeds longer will make them less chewy, more crisp. This will help if you tend to get things stuck in your teeth or dental work.

To dry, let seeds air dry in a shallow pan for several hours up to several days, stirring occasionally, to keep them from sticking to one another.

Stir in seasonings and roast seeds until they are a golden brown.

Roasted pumpkin, butternut squash and acorn squash seeds.

Roasted Delicata squash seeds (small yellow squash with green stripes). These are especially delicious. Very tender.

RECIPE:

Roasted Pumpkin or Squash Seeds

2 cups rinsed and dried pumpkin or winter squash seeds
2 Tbs butter
1 Tbs Worcestershire sauce
1/4 tsp salt
1/4 tsp garlic powder
1/4 tsp onion powder
1/8 tsp hot (spicy) Hungarian paprika

Place seeds on a foil lined (I like non-stick foil) baking sheets. Preheat oven to 350°F.

Melt butter and stir in remaining seasonings. Pour over seeds in pan and stir until well coated.

Roast for about 15 minutes, stirring every 5 minutes, until seeds are golden brown. Cool completely before storing in an airtight container.

Yield: 2 cups roasted seeds

NoEmptyChairs.me

1 Comment

Filed under Appetizers, Tips and Tutorials

How to Roast Pumpkins and Winter Squash

DSC03886

Winter squash is a wonderfully versatile vegetable, but can be intimidating if you are unfamiliar with cooking it.

To use winter squash in recipes, roasting is a great way to get tender squash with deep flavor without the excess water that comes from boiling.

A few of the varieties of winter squash that you can choose from (pictured):

  • pumpkins (smaller will be less stringy)
  • butternut squash
  • acorn squash
  • delicata squash

DSC03861_DSC03870.JPG Crop

  • Preheat oven to 425°F.
  • Wash the outside of the squash to remove any dirt. Dry.

DSC03874

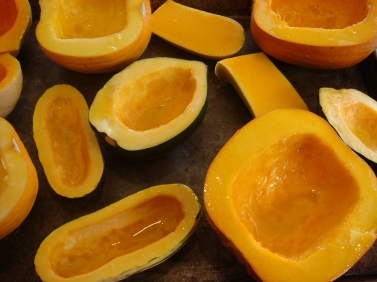
  • Cut squash in half using a large sharp knife. If your butternut squash is really large, or you do not have a large knife, you can cut the butternut squash in half crosswise first (right at the point where the neck begins) and then in half lengthwise. The narrower neck of a butternut squash does not have any seeds, just the rounder base.
  • Remove seeds and stringy pulp from inside the squash. Save those seeds for roasting! They are the best part of the squash (Yes-you can roast squash seeds too, not just pumpkin seeds).

DSC03880

  • Place squash cut side up on a rimmed baking sheet. Brush inside of squash halves with olive oil.

DSC03886

  • Turn squash over, cut side down, on the baking sheet.

DSC03887

  • Bake at 425°F for about 30 minutes, depending on the size of your squash or pumpkin. Check softness by turning squash over and piercing with a fork. The squash flesh should be soft, but not mushy.

DSC03893

  • Cool 10-15 minutes, until cool enough to handle. Scoop flesh out of shell. Puree or dice for use in recipes. Squash is easily frozen in Ziploc freezer bags. Freeze in 1 cup portions (be sure to label your bags with how much of what kind of squash you put in them).

Recipes using roasted squash/pumpkins:

Squash Equivalents:

  • 1 pound peeled squash = 1 cup cooked, pureed
  • 2-1/2 pounds whole squash = about 2-3/4 to 3 cups pureed
  • 1 large (15 to 20 pounds) pumpkin = about 5 quarts (20 cups) of cooked, pureed pumpkin
  • 1 large butternut squash or 1 medium sugar/pie pumpkin = about 2-3 cups pureed

Leave a comment

Filed under Side Dishes, Tips and Tutorials

How To . . . Make Your Own Pie Crust Shield

DSC05352-1

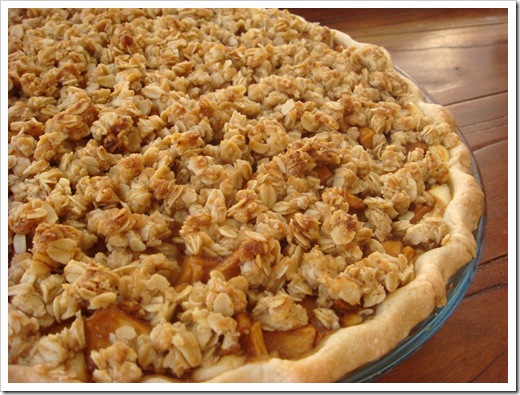
Getting ready to bake a ton of pies for Thanksgiving? Tired of burnt edges to your pie crusts, but don’t want to spend major $$ to buy commercial pie crust shields? Frustrated with trying to arrange foil strips and then nursing burnt fingers when the strips fall off in the oven?

Making your own pie crust shield is super easy, cheap, and will keep your fingers blister-free. And you won’t be tempted to curse in frustration at foil strips that just don’t stay put. Oh- and you will end up with perfectly browned pie crusts.

111010 073-1

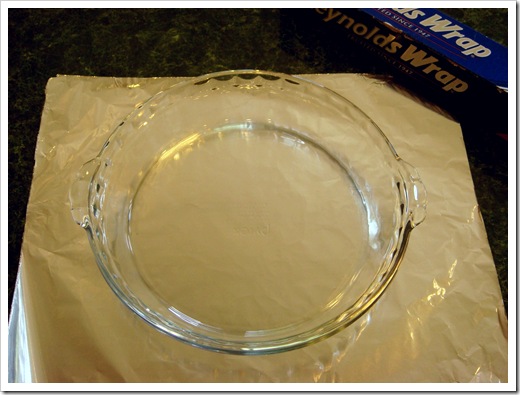
To make you own pie crust shield you need the following: aluminum foil, scissors, pencil and the pie plate you will be baking in.

Set your pie plate, right side up, on a square of foil that is 2-3” larger than your pie plate.

060610 002-1

Trace the bottom of your pie plate (the smaller side).

060610 003-1

Set pie plate aside and cut out the inner circle.

060610 005-1

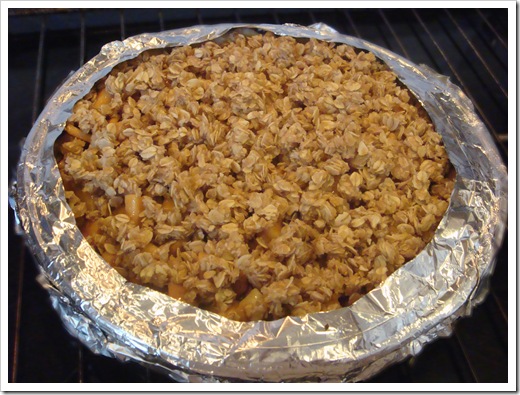
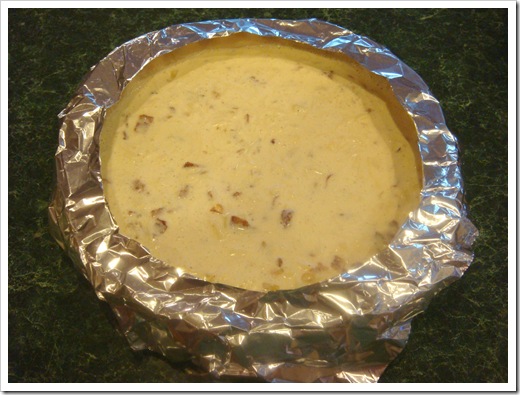
You can trim the corners on the outside edge, but I usually just leave them. Fill your pie crust, then set foil ring over the edge of the unbaked pie. Gently fold down outer edges, being careful not to squish all of that edge-crimping you worked so hard on!

111010 068-1

DSC05362-1

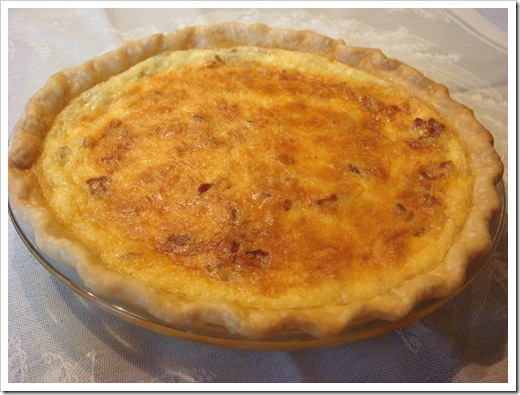
Bake pie, or quiche, with the pie shield on. Five minutes before the end of the cooking time, carefully remove shield. If the edges are not brown enough, leave shield off and bake until edges are golden brown. If the edges are browned, replace shield and continue cooking until quiche/pie is cooked through.

111010 073-1

DSC05383-1

Uses for Pie Crust Shield:

7 Comments

Filed under Breakfast/Brunch, Desserts, Tips and Tutorials

Twelve Days of Christmas Cookies: Cranberry Orange Buttermilk Cookies

Cranberry Orange Cookies 3

DAY 9: Cranberry Orange Buttermilk Cookies

Cranberries and oranges are flavors that pair so well together. This is a soft cookie with a cake-like texture topped with an orange glaze. I like that they are not overly sweet.

A note on storing glazed cookies: The glaze will continue to set as the cookies sit at room temperature, but it does not become hard enough to stack the cookies, especially in humid climates. To store these cookies (or other frosted/glazed cookies, allow the glaze to set at room temperature for at least an hour. Then place the glazed cookies  in a single layer on a baking sheet and place in the freezer until completely frozen. Transfer the completely frozen cookies to a tupperware container and store in the freezer. To serve, remove individual frozen cookies from the freezer and allow them to thaw in a single layer (not stacked).

My kids usually skip the thawing step. They just grab cookies straight from the freezer and eat them.

RECIPE:

Cranberry Orange Buttermilk Cookies

Cranberry Orange Cookies 3

½ cup dried cranberries
1 ½ cups  flour
Zest of half of an orange (about ½ tsp), use other half in glaze
¼ tsp baking soda
¼ tsp salt
6 Tbs butter, softened
¾ cup sugar
1 egg
½ tsp vanilla extract
1/3 cup well-shaken buttermilk

Glaze:
1 cup powdered sugar, sifted
1 Tbs fresh squeezed orange juice
1 Tbs heavy cream
Zest of half of an orange (about ½ tsp)

Preheat oven to 350°F.

Put the dried cranberries in a small bowl with about 1 cup of  hot (but not boiling)  water. Allow them to sit for 5 minutes; drain.

In a medium bowl, whisk together the flour, orange zest, baking soda and salt.

In a mixing bowl, beat the butter and sugar until creamy. Add the egg and vanilla, and beat well to mix. Mix in the flour mixture and the buttermilk alternately in batches at low speed, beginning and ending with the flour. Mix in the dried cranberries.

Drop the dough by tablespoons onto baking sheets. Bake at 350°F for 10-11 minutes. Cool the cookies on the baking sheet for 1 minute; then transfer them to a wire rack. Cool cookies completely.

For the glaze, whisk together the sifted powdered sugar, orange juice, cream and orange zest. Add additional juice or sugar until glaze is spreading consistency. Use an offset spatula or the back of a spoon to spread the glaze over the cooled cookies.

STORAGE NOTE: The glaze will continue to set as the cookies sit at room temperature, but it does not become hard enough to stack the cookies, especially in humid climates. To store these cookies (or other frosted/glazed cookies, allow the glaze to set at room temperature for at least an hour. Then place the glazed cookies  in a single layer on a baking sheet and place in the freezer until completely frozen. Transfer the completely frozen cookies to a tupperware container and store in the freezer. To serve, remove individual frozen cookies from the freezer and allow them to thaw in a single layer (not stacked).

Makes about 2 dozen cookies.

(Adapted from TwoPeasAndTheirPod)

NoEmptyChairs.me

Leave a comment

Filed under Cookies, Desserts, Tips and Tutorials

How to . . . Blind Bake a Piecrust

Blind Bake Crust 3

“Blind Baking” is a term for baking a pie crust with no filling. This pre-baked crust is used for any pie that is not cooked in the oven with its filling: pies with cream or custard fillings, ice-cream pies, lemon meringue pie, strawberry pie.

When you bake a pie crust without a filling, it tends to have bubbles form in the bottom part of the crust, or the sides sink and fall into the center of the crust. To keep this from happening, you need to bake the crust in two steps: first with something weighing down the bottom of the crust, and then without the weights to finish cooking the crust. Here is a quick How To… on blind baking a perfect crust.

Blind Bake Crust 4

Start with any crust recipe. Here is one that I like for an All Butter Pie Crust. Place in your pie plate and flute the edges. When you flute your edges, press down slightly on the indentations where the crust touches the top edge of the pan to keep it from sliding down the sides as it bakes.

Blind Bake Crust 3

Place a square of foil in the bottom of your crust. I like to use non-stick foil (non-stick side touching the crust) to keep it from sticking to the bottom of the crust. Extend the foil slightly up the sides of the crust, but do not cover the fluting on the edges. Add about 1-2 cups of DRIED beans to your foil bowl. You can also buy pie weights (either loose or on a chain), but beans are a great cheap alternative.

Bake the weighted crust at 400°F for 10 minutes.

Blind Bake Crust 2

Remove the beans and foil and prick the bottom of the crust with a fork.

Pie Crust Shield 1

Place a pie crust shield on the edges of your crust to keep them from overcooking while you bake the crust again. You can buy a pie crust shield or make your own. Here is an easy HOW TO on making one that is just the right size for your pie plate: Make Your Own Pie Crust Shield.

Blind Bake Crust 1

Bake empty crust for an additional 10 minutes, or until golden brown. Be sure to cool crust completely before filling.

Instructions:

How to Blind Bake a Piecrust

Blind Bake Crust 3

  • Prepare pie crust and place in pie plate. Flute edges, if desired.
  • Line bottom of pie crust with foil (I like non-stick foil), extending foil slightly up the sides of the crust. Add 1-2 cups dried beans, or use pie weights.
  • Bake at 400°F for 10 minutes.
  • Remove beans or weights and foil. Prick bottom of crust with a fork. Place a pie crust shield over the edges of the crust and bake for an additional 10 minutes, or until golden brown.
  • Cool completely before filling.

NoEmptyChairs.me

Leave a comment

Filed under Desserts, Tips and Tutorials