Tag Archives: strawberries

Sugar-Free Strawberry Cheesecake

Sugar Free Strawberry Cheesecake 6

This sugar-free strawberry cheesecake may have just jumped onto my list of all-time favorite desserts, even those full of sugar.

This is a no-bake cheesecake that is easy to put together. Made with fresh strawberries, it is a fabulous summer dessert that won’t heat up the kitchen.

It is light and airy, not dense like a baked cheesecake. I sweetened it with stevia and erythritol, but you can easily substitute real sugar. But for those watching their carb and sugar intake, this is a wonderfully satisfying dessert. My kids don’t even miss the sugar!

Sugar Free Strawberry Cheesecake 4

I made it in a 9” springform pan, and it completely filled the pan for a nice tall cheesecake. You could make it in a little bit larger pan instead if you don’t want quite as thick of slices.

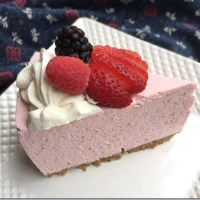
I garnished the cheesecake with some whipped cream and fresh berries. A wonderful light and summery dessert.

Sugar Free Strawberry Cheesecake 3

RECIPE:

Sugar-Free Strawberry No-Bake Cheesecake

Sugar Free Strawberry Cheesecake 6

Crust:
¾ cup whole almonds (roasted and salted)
¼ cup whole pecans
¼ cup rolled oats
3 Tbs butter, melted
10 drops of liquid stevia

Filling:
3 (8 oz) packages cream cheese, at room temperature
1 cup sour cream
2 tsp vanilla extract
¾ cup erythritol
½ tsp liquid stevia
½ cup cool water
2 (1 oz) packages unflavored gelatin
1 quart (4 cups) whole strawberries, hulled
1 cup heavy cream

Garnish:
1 cup heavy cream
1 Tbs cream cheese, at room temperature
½ tsp vanilla extract
5 drops liquid stevia
Whole strawberries, and/or other berries (raspberries, blackberries)

Crust:
Preheat oven to 350°F.

Place almonds, pecans, and oats in a food processor; blend until finely ground. Add butter and stevia  and pulse until combined. Lightly spray 9” springform pan with baking spray (I like coconut oil spray for this). Press crust mixture onto bottom of pan. Bake for 10 minutes. Cool completely.

Filling:
In a large mixing bowl, beat cream cheese until smooth. Add sour cream, vanilla, erythritol, and stevia and beat again until smooth.

Place cool water in a separate bowl; sprinkle gelatin over water. Let sit for 5 minutes, or until gelatin has softened. Microwave for 15 seconds, or until gelatin has dissolved.

Place strawberries in a food processor. Blend until very finely chopped (mixture will be slightly liquidy). Add gelatin mixture to food processor and pulse until mixed. Add chopped strawberries to cream cheese mixture and beat until smooth. Taste mixture and add additional sweetener, if needed.

In a separate mixing bowl, whip 1 cup cream until stiff peaks form. Fold into filling.

Pour mixture over cooled crust in the springform pan. Refrigerate for at least 4-6 hours or until firm.

Garnish:
Combine cream, cream cheese, vanilla, and stevia in a mixing bowl and beat until stiff peaks form. Pipe onto top of chilled cheesecake and garnish with fresh berries.

NoEmptyChairs.me

1 Comment

Filed under Desserts

Chocolate Covered Strawberries Cake

Chocolate Covered Strawberries Cake 1

Last week, we attended a Boy Scout fundraising auction. I made a few items to contribute, including this Chocolate Covered Strawberries Cake. It is a 4-layer chocolate cake filled with Strawberry Swiss Meringue Buttercream icing. And garnished with chocolate covered strawberries.

There were sooo many delicious looking desserts at the auction. Not a good time to be on a low-carb diet.

Chocolate Covered Strawberries Cake 3

Since I didn’t actually get to cut and eat this cake, I don’t have an inside picture, but it looks similar to this Chocolate Raspberry Truffle Cake:

Chocolate Raspberry Truffle Cake 5

except that I added sliced fresh strawberries in between the layers with the icing:

Chocolate Covered Strawberries Cake 2

RECIPE:

Chocolate Covered Strawberries Cake

Chocolate Covered Strawberries Cake 1

Ingredients (recipes below):
Chocolate Layer Cake
Strawberry Swiss Meringue Buttercream
Chocolate Ganache
Chocolate Covered Strawberries

Chocolate Layer Cake
2 cups flour
½ cup regular cocoa powder
½ cup Dutch process cocoa (or Hershey’s Special Dark)
1 ½ tsp baking soda
½ tsp salt
¾ cups (1 ½ sticks) unsalted butter, softened
1 cup sugar
1 cup brown sugar
3 eggs, at room temperature
2 tsp vanilla extract
1 ½ cups buttermilk

Preheat oven to 350°F. Lightly grease 2 9” cake pans; line bottom of pans with parchment paper. Grease paper and then dust entire pan with cocoa powder.

Combine flour, cocoa powders, baking soda and salt. Mix with a whisk. In a large mixing bowl, beat butter and sugars for 5 minutes. The mixture should be very pale and fluffy. Beat in eggs and vanilla. Add flour mixture alternately with buttermilk, beginning and ending with flour mixture. Beat just until smooth.

Divide batter into prepared pans and bake for 28-30 minutes or until toothpick comes out clean. Cool in pans for 10 minutes. Invert onto wire racks, remove parchment paper and cool.

Cooled cake layers can be wrapped in plastic wrap and frozen until you are ready to assemble them. (For this cake, if you are freezing the layers: cut each layer in half before freezing to make 4 layers).

Strawberry Swiss Meringue Buttercream Icing
1 ½ cups egg whites (about 12 large egg whites, or use pasteurized egg whites that come in a carton)
2 ½ cups sugar
pinch of salt
3 cups unsalted butter (6 sticks), at room temperature**
1 Tbs vanilla extract
about 1 ½ cups Strawberry Puree (see recipe below)
about 2 cups sliced fresh strawberries (set aside for cake assembly)

In the top of a double boiler, stir together  egg whites, sugar and salt. Bring water in bottom of double boiler to a low simmer; cook until the temperature of the egg whites reaches 160°F and sugar is completely dissolved (rub mixture between fingertips-it should not feel gritty). Mixture will be foamy and not a uniform consistency.

Transfer the egg white mixture to the bowl of a stand mixer. With the whisk attachment, whip until meringue is completely cooled and glossy peaks form, about 10 minutes. DO NOT ADD BUTTER UNTIL BOTH THE BOWL AND FROSTING ARE COMPLETELY COOL. Switch mixer attachment from the whisk to paddles. Add butter 1-2 Tablespoons at a time until incorporated. Mixture may appear curdled at times. Continue beating until butter is fully incorporated and frosting is fluffy and smooth.  This will take about 10 minutes.  Add vanilla and beat smooth. Add strawberry filling and beat until frosting is a uniform color.

**BUTTER NOTE: butter should be room temperature soft, but not overly soft. If the butter is too cold, it will not incorporate well into the meringue, and you will have butter chunks. If the butter is over-soft, it will cause the icing to curdle while beating-this is okay, it isn’t ruined: it will just take longer (more beating) for the frosting to become smooth. If icing still won’t set, place in the fridge for 20 minutes, and then beat again.

Strawberry Puree:
2 cups whole fresh strawberries, hulled
2 Tbs sugar

Process strawberries in a food processor until very finely chopped, but not completely liquefied. Mix in sugar.

Chocolate ganache:
4 oz bittersweet chocolate, chopped (about ½ cup, slightly heaping)
½ cup heavy cream
2 Tbs corn syrup

Place the chopped chocolate into a small bowl and set aside. In a Pyrex measuring cup or microwavable bowl, combine the heavy cream and corn syrup. Heat for 30-45 seconds; stir. Pour the hot cream over the chopped chocolate. Let sit for one minutes, then stir until smooth.

Chocolate Covered Strawberries:
Fresh strawberries
Chocolate and vanilla melting chocolates

Melt chocolate and vanilla melting chocolates in separate bowls. Dip strawberries in melted chocolate and place on waxed paper.

Place remaining melted chocolates in Ziploc bags and poke a hole in one corner of each bag. Drizzle strawberries with contrasting chocolate.

Let chocolate harden completely before placing on cake.

Cake Assembly:
Completely cool cake layers. Cut each layer in half to make 4 layers. Prepare frosting and ganache.

Place waxed paper strips along edges of serving plate. Place one cake layer, cut side up, on the serving plate. Waxed paper strips should cover the exposed part of the plate, but not be too far under the cake layer. Spread cake with a layer of strawberry icing. Press sliced fresh strawberries into icing. Top with another cake layer. Repeat with frosting and remaining cake layers. Ice entire cake with a thin crumb coat of icing. Refrigerate cake for 2o minutes to set slightly (optional). Create a smooth finish with remaining icing over entire cake (top of cake should be completely flat).

Drizzle cake with ganache, letting it drip down the sides. Refrigerate cake.

Decorate top and base of cake with chocolate covered strawberries.

Storage:  Store cake in refrigerator.

NoEmptyChairs.me

2 Comments

Filed under Desserts

Homemade Marshmallow Fluff

Strawberries and Toasted Marshmallow Fluff

When you have a  kid that hates chocolate, you have to get creative with your campfire treats.

Dipping fresh strawberries in homemade marshmallow fluff and toasting them over the fire on a roasting stick sure makes up for not liking the s’mores that everyone else is eating.

In fact, you may have to guard your fruit ‘n fluff from the s’mores eaters who think they are the ones getting the short end of the roasting stick!

Marshmallow Fluff

Marshmallow fluff is easy to make yourself, but does require a candy thermometer. It is so much better than the stuff you buy in a jar! And toasting it makes it even more delicious. You can coat most fruits with the fluff for toasting. Try things like strawberries, fresh pineapple, mangos, bananas, mandarin orange segments, kiwi fruit. Or even chunks of pound cake.

Another benefit: you can swap out the vanilla extract with something more exotic, like lemon, coconut, orange, or almond extract to give your fluff a fun new flavor. Mango chunks dipped in coconut flavored fluff = YUM!

We may have even been known to make this in the winter, toasting our fluff-coated-fruit over sterno cans.

RECIPE:

Homemade Marshmallow Fluff

Strawberries and Toasted Marshmallow Fluff

3/4 cup sugar
3/4 cup (9 oz) light corn syrup
1/3 cup water
Pinch of salt
3 egg whites
1/2 tsp cream of tartar
2 Tbs sugar
1 tsp vanilla extract (or other flavored extract: lemon, orange, almond, coconut)

Mix 3/4 cup sugar, corn syrup, water, and salt in a small saucepan. Bring to a boil over medium heat. Use a spatula to scrape edges of pan as it cooks. Attach a candy thermometer to the side of the pan and continue to cook until mixture registers 240°F on the thermometer. Remove from heat.

While sugar mixture is cooking, place egg whites and cream of tartar in a large mixing bowl (a stand mixer works best). Beat until egg whites are foamy. Slowly add 2 Tbs sugar and continue to beat until soft peaks form.

Turn mixer onto low speed and slowly pour the hot syrup into the mixing bowl. Once all of the syrup has been mixed in, increase mixer speed and beat for 3-5 minutes, or until mixture forms stiff peaks. Add vanilla (or other flavored extract) and beat for an additional minute.

Store marshmallow fluff in the refrigerator.

FOR TOASTED FLUFF-COVERED FRUIT:

Dip fruit (strawberries, fresh pineapple, mangos, bananas, mandarin orange segments, kiwi fruit, etc) in the marshmallow fluff. Place on a roasting stick and cook over an open flame until lightly toasted.

NoEmptyChairs.me

Leave a comment

Filed under Candy, Desserts

Strawberry Nutella Muffins

051711 074-1After bringing these muffins to our early morning seminary class, I have had several requests for the recipe. So I am going to take a break from days full of never-ending weeding in my yard and nights full of endless softball games to share them with you. Strawberries are just beginning to arrive at the farmers markets and pick-your-own farms here in western PA, so it is a perfect time to make these muffins. And everything tastes better with a little Nutella swirled in!

051711 045-1

I found this recipe on Two Peas & Their Pod, and just couldn’t resist making them. The only changes that I made to the recipe were to add more strawberries than called for, and probably more Nutella. I didn’t actually measure the Nutella; I just scooped it out of the jar to put in the center of the muffins.

As with most muffin batters, to keep them from being dry and dense, you do not want to overstir the batter. There should still be some streaks of flour in the batter.

051711 038-1

Fill the muffin cups halfway with batter. Place a dollop (about a tablespoon: I just used a soup spoon straight from the jar) of Nutella on the batter. You do not need to spread it around. Nutella can be kind of thick at room temperature. I warmed the Nutella first in the microwave for about 30 seconds. This made it really easy to drizzle the Nutella from a spoon onto the batter. My jar was almost empty, so I just heated the Nutella in the jar. If you are only using part of your jar, you might want to spoon some into a small bowl before heating it.

051711 035-1

Top with another scoop of batter, until the muffin cups are about 3/4 full. Sprinkle with Turbinado sugar. This is a coarse raw sugar. You could use regular sugar if you don’t have it, but turbinado sugar does make a nice crystally (I’m sure that’s not a real word, but it should be) crust.

051711 041-1

These are best served warm while the Nutella is soft and gooey.

051711 081-1

Here is the original recipe from Maria, with my notes at the end on the slight changes that I made.

RECIPE:

Strawberry Nutella Muffins

051711 074-1

1 ½ cups all-purpose flour
½ teaspoon salt
2 teaspoons baking powder
½ cup sugar
¼ cup canola oil
1 large egg
1/3 cup buttermilk
1 teaspoon vanilla extract
1 cup chopped fresh strawberries
1/3 cup Nutella
Turbinado sugar, for sprinkling on top of muffins

1. Preheat oven to 350°F. Line a muffin tin with paper liners or grease well. Set aside.

2. In a medium bowl, whisk together the flour, salt, baking powder, and sugar.

3. In a small bowl, combine canola oil, egg, buttermilk, and vanilla. Use a fork or whisk and mix until well combined.

5. Incorporate the wet ingredients into flour mixture.  Add slowly and gently stir, you don’t want to over mix.  The batter will be thick. Carefully fold in the strawberries.

6. Fill each muffin cup half way with batter. Next, add a small spoonful of Nutella to each muffin cup. Cover the Nutella filling with the remaining batter. Sprinkle each muffin with turbinado sugar.

7. Bake muffins for 17-20 minutes, or until muffins are golden brown and a toothpick comes out clean. Remove the muffins from the pan and let cool on a cooling rack.

Makes 9 muffins

Kelly’s notes: I used coconut oil instead of canola oil. I didn’t measure the Nutella, I just used a spoon and scooped straight from the jar, but I probably used a little more than 1/3 cup. I heated the Nutella for about 30 seconds in the microwave before using (to make for easier drizzling). I also used more strawberries than called for (about 1 ¼ – 1 ½ cups). I ended up with 12 muffins, and I needed to bake mine for 23 minutes before they were cooked through.

Recipe from Two Peas & Their Pod

NoEmptyChairs.me

3 Comments

Filed under Breads, Breakfast/Brunch, Desserts

Strawberries & Cream Sponge Cake Roll

As I mentioned yesterday, this is one of my very favorite cakes. I have been baking it since I was in high school. Back then, my main sources of recipe inspiration (in addition to a wonderful mother from whom I am still inspired) were two Southern Living Annual Cookbooks. From the 80s. I have adapted this recipe somewhat from the original recipe (and often make it sugar-free and whole grain), and I still love it just as much now as I did then.

This cake is light, full of fruit, and not overly sweet. I love whipped cream as a frosting because you can easily control how sweet it is without compromising texture. This is also a cake that is easy to make healthier with some simple substitutions (see recipe at end of post). By substituting a gluten free flour (oats, brown rice, etc) this is easily made gluten free as well.

A sponge cake is made mostly of eggs with just enough flour to stabilize it, and just enough sugar that it doesn’t taste like an omelet.

Roll cakes look much more complicated than they really are, so for those who may not be familiar with baking and putting together this kind of cake, I have included a few more process pictures. This technique can also be used to make jelly-rolls, pumpkin roll cakes (another of my favorites!), Christmas Yule logs, ice-cream filled roll cakes.

The one thing that my kids don’t like about this cake is that the beaters are no fun to lick! Large amounts of raw eggs, no matter how much they’ve been whipped and what other ingredients have been thrown in, still taste pretty bad. Luckily, something magical happens in the oven, leaving you with a moist, airy cake just begging for a creamy, fruity filling.

Start by beating 5 egg whites until stiff peaks form (with a little salt and cream of tartar-for stabilization). You should be able to turn your bowl upside down and have the egg whites not run onto the counter (just be careful testing this as you go along!)

Beat your egg yolks separately, then gently fold them into the egg whites with a little flour and powdered sugar. This is one cake that I do sift my powdered sugar and flour for. It makes a huge difference in being able to incorporate them quickly into the batter without lumps. I measure first, then sift them directly into the egg white bowl.

The batter should still be pretty thick when you are done, but will lose a little of the  volume.

Use wax paper to line a jelly-roll pan (baking pan that is about 10×15”, but you can use a size that is a little larger as well; 9×13” is too small). Leave some hanging over the edges. Spray the wax paper with baking spray (I use the kind for baking that has flour in it).

Spread your batter into the pan, making sure to spread it all the way to the edges. This batter will not melt or spread as it cooks, so try to get it even on the top.

Bake for 10-12 minutes, or until set. It should not brown. The cake below is actually just a little overdone (it still tasted great though!)

While the cake is baking lay a linen (or fuzz-free) dishtowel on the counter. Dust a small amount of powdered sugar onto the towel in a rectangle just larger than your baking pan (I use a sifter again-actually just a mesh strainer). Turn the hot cake upside down onto the towel (wax paper side up). Gently peel off the waxed paper.

Roll the cake up in the towel, beginning at the narrow end.

Cool completely on a rack.

Unroll cooled cake (leave on towel) and spread with sliced fruit. This is one quart of sliced strawberries mixed with 2 Tbs sugar. I like to let the fruit/sugar mixture sit for a few minutes before spreading it onto the cake so that the sugar dissolves.

Beat 2 cups of whipped cream until stiff. Sweeten to taste. Spread half of the whipped cream over the berries, until the berries are just barely covered. Leave a small section on one of the narrow ends uncovered. As you roll the cake, some of the filling will push to the end. This keeps too much from leaking out.

Beginning at the narrow end, roll cake again. Place on a serving platter, seam side down.

Frost with remaining whipped cream. Garnish with whole strawberries, if desired.

Slice and serve. Store in the refrigerator.

You could make this with different kinds of fruit; fresh berries work especially well.

Another use for the cake: Bake as directed and let cool without rolling. Cut cake into small squares and use as a base for an English Trifle.

RECIPE:

Strawberries and Cream Sponge Cake Roll

5 egg yolks
1 tsp vanilla
5 egg whites
½ tsp cream of tartar
¼ tsp salt
¾ cup sifted powdered sugar
½ cup flour
Powdered Sugar
1 quart strawberries, sliced
2 Tbs sugar
2 cups whipping/heavy cream
½ tsp vanilla
2-3 Tbs powdered sugar
Whole strawberries for garnish

Preheat oven to 350°F. Line a 15×10” jellyroll pan (or cookie sheet with sides) with wax paper and spray with cooking spray (Cooking spray w/flour in it for baking works great).

Beat egg yolks until light and lemon colored. Stir in vanilla. Beat egg whites until foamy. Add cream of tartar and salt, beating until stiff. Fold in ¾ cup powdered sugar. Fold in egg yolk mixture. Fold in flour. Spread batter in pan. Bake at 350°F for 10-12 minutes (do not let cake brown).

Using a fine mesh strainer, sift a small amount of powdered sugar on a linen towel. Turn hot cake out onto towel. Carefully peel off waxed paper. Roll up cake in the towel. Cool on a wire rack.

Combine strawberries and 2 Tbs sugar; let sit for 5 minutes. Beat whipping cream until foamy. Add 2-3 Tbs powdered sugar and ½ tsp vanilla, beating until soft peaks form. Unroll cake. Spread cake with berries, then half of the whipped cream. Reroll cake. Place on a serving plate. Frost with remaining whipped cream. Garnish with whole strawberries. Chill until serving time.

Sugar Free/Whole Grain/Gluten Free Alternative: Substitute Stevia, Splenda, or erythritol for the sugar (use Splenda or erythritol in the cake; stevia does not provide the bulk the cake needs, but is fine for sweetening the filling), and oat flour, rice flour or finely ground whole wheat flour (white wheat, preferably) for the white flour. The whole wheat flour obviously isn’t gluten free, but you can substitute most other gluten free flours, or a blend of flours for the white flour.

NoEmptyChairs.me

4 Comments

Filed under Desserts

Happy Birthday

This weekend marks two milestone birthdays around here. One year ago, I started this humble little blog. That weekend also happened to be my 39th birthday. I will leave it to you mathematicians to figure out how old that makes me today. From here on out I think I will start counting my age in blog-years instead of actual years since my birth.

Since I started blogging a year ago, there are 2 questions that I get asked a lot. Why did I decide to start a blog? and Why did I name my blog “No Empty Chairs”?

With a growing family of 7 competing for computer time on one home computer, I don’t usually get much time to just “surf the net”. I usually have a specific purpose for using the computer. One day several years ago, I was looking for a recipe for a specific dish. And I came across my very first food blog (Kalyn’s Kitchen). A whole new world opened up to me that day! I had no idea there were so many people out there writing about food. I was instantly hooked. I followed links to find other great food blogs. I set up an iGoogle home page so that I could follow RSS feeds, and know when my favorite bloggers posted new recipes. I rarely commented, but loved the wealth of information and new recipes to try. I bookmarked (and cooked) tons of new recipes.

Until last year, starting my own blog was something that I thought about, but only as a far off dream. After all-I have no photographic skills or equipment; no real culinary training; I’m a math geek not a creative writer; and I felt like I had no time to really call my own, especially with little kids still home all day, big kids with their own schedules later in the day, and a full-time responsibility at church. But I did love to cook; still love to cook.

Cooking and mealtimes have always meant so much more to me than just filling a physical need for nourishment. Food and meals (and of course treats!) are a way of connecting as family and friends, a way to share both happiness and tragedy, and a vehicle for showing love and gratitude. Family mealtime, dinner in particular, is one family tradition that I have always been adamant about. I learn more about my children at family meals than at any other time during the day. And what better way to entice your children to sit and talk than to provide them with foods they love (okay-they rarely ALL love every item in every meal, but it is getting a little better as they get a little older).

For years I have collected and organized in various ways our “Family Recipes”, the food that our family loves to eat. Some are new recipes found in cookbooks or magazines (or blogs!) and some are treasured favorites from family and friends. Some are things that I have created myself. I had always planned to find the “perfect” way to pass these on to my children as part of their connection to their past, something like a family cookbook. Blogging is my newest attempt at creating that lasting link for them. One that can continue to grow.

So about a year and a half ago, I started to find myself thinking about blogging more and more. Composing posts in my head as I cooked, or planned meals. Lying awake in bed at night wondering what I would call a blog. And then usually dismissing all of those thoughts with doubts and reasons why I would never really do it- lack of time, lack of skills: both photographically and computer/technology related.

Which brought me to my 39th birthday.  A perfect time for reflection and self-analysis. And maybe just a little bit of panic! Our family was gathered around the TV in the family room watching the General Conference broadcast from our church. Elder Henry B. Eyring of the Quorum of the Twelve Apostles was speaking. His talk was on the perfect example of Jesus Christ, and ways that we should pattern our lives after Him. He talked about a gravestone near his home with the inscription, “Please, no empty chairs”. As he spoke about this woman’s desire for her family to be together throughout eternity, a great overwhelming feeling came to me that this is exactly what I want as well. I want no empty chairs at my eternal table. So I will start with No Empty Chairs at my kitchen table. I want my family (and friends and neighbors) to WANT to sit around my table. To share life, with all of its joys and trials, as we share the nourishment and joy of food.

And so I invite you to fill a chair at our table, as I share the food that feeds both the body and soul in our home and helps cement bonds of family unity and friendship. Welcome to No Empty Chairs. I’ve saved you a seat.

No Empty Chairs Signature2

For those of you who have dragged yourselves through such a long-winded post, I share my favorite birthday cake:

Strawberries and Cream Sponge Cake Roll

5 egg yolks
1 tsp vanilla
5 egg whites
½ tsp cream of tartar
¼ tsp salt
¾ cup sifted powdered sugar
½ cup flour

Powdered Sugar

1 quart strawberries, sliced
2 Tbs sugar
2 cups whipping/heavy cream
½ tsp vanilla
2-3 Tbs powdered sugar
Whole strawberries for garnish

Preheat oven to 350°F. Line a 15×10” jellyroll pan (or cookie sheet with sides) with wax paper and spray with cooking spray (Cooking spray w/flour in it for baking works great).

Beat egg yolks until light and lemon colored. Stir in vanilla. Beat egg whites until foamy. Add cream of tartar and salt, beating until stiff. Fold in ¾ cup powdered sugar. Fold in egg yolk mixture. Fold in flour. Spread batter in pan. Bake at 350°F for 10-12 minutes (do not let cake brown).

Using a fine mesh strainer, sift a small amount of powdered sugar on a linen towel. Turn hot cake out onto towel. Carefully peel off waxed paper. Roll up cake in the towel. Cool on a wire rack.

Combine strawberries and 2 Tbs sugar; let sit for 5 minutes. Beat whipping cream until foamy. Add 2-3 Tbs powdered sugar and ½ tsp vanilla, beating until soft peaks form. Unroll cake. Spread cake with berries, then half of the whipped cream. Reroll cake. Place on a serving plate. Frost with remaining whipped cream. Garnish with whole strawberries. Chill until serving time.

Sugar Free/Whole Grain Alternative: Substitute Stevia, Splenda, or erythritol for the sugar (use Splenda or erythritol in the cake; stevia does not provide the bulk the cake needs, but is fine for sweetening the filling), and oat flour, rice flour or finely ground whole wheat flour (white wheat, preferably) for the white flour. The whole wheat flour obviously isn’t gluten free, but you can substitute most other gluten free flours, or a blend of flours for the white flour.

NoEmptyChairs.me

__

For detailed cake prep pictures and directions, see THIS POST


3 Comments

Filed under Desserts, Uncategorized