A simple but delicious quiche full of flavorful caramelized onions and crispy bacon.

RECIPE:
A simple but delicious quiche full of flavorful caramelized onions and crispy bacon.
RECIPE:
Filed under Breakfast/Brunch

Summer is in full swing, which means it is prime zucchini season. Pair this quiche with a salad for a perfect summer meal that can be eaten hot or cold.
For a perfectly browned crust, bake the quiche with a pie crust shield. It is easy to Make Your Own:

For a low carb version, just bake this quiche without a crust in an 8-inch square baking dish.

Some ideas for salads to serve alongside this quiche:


Chopped Caprese Salad
Greek Summer Salad
Chipotle Lime Quinoa and White Bean Salad
Thai Cucumber Salad
RECIPE:

Single pastry crust for 9” pie plate
1 ½ cups heavy cream
4 eggs
½ tsp salt
¼ tsp pepper
1/8 tsp ground cayenne or Ancho chile pepper
1 Tbs butter
½ cup finely chopped onion
1 cup chopped zucchini
1 cup chopped cooked ham
¼ cup fresh grated Parmesan
1 ½ cups shredded Swiss, cheddar, or Gruyere cheese
Preheat oven to 425°F. Prepare pastry crust and place in 9” pie plate (deep dish, if possible).
In a medium bowl, use a whisk to mix cream, eggs, salt, pepper, and cayenne pepper. Set aside.
Heat butter in a skillet. Add onion and cook for 2 minutes. Add diced zucchini and cook until crisp-tender (about 3 minutes). Place vegetables in a mixing bowl and stir in diced ham. Cool slightly. Stir in shredded cheese. Spread filling evenly into unbaked crust. Pour egg mixture over filling. Use a spatula or fork to remove any large air pockets.
If desired, cover the crust of the quiche with a pie crust shield. Bake at 425°F for 20 minutes. Reduce heat to 350°F and bake an additional 30 minutes, or until knife inserted in center comes out clean. Allow to set at room temperature 5-10 minutes before cutting and serving.
NoEmptyChairs.me
Filed under Breakfast/Brunch, Main Dishes, Side Dishes

Getting ready to bake a ton of pies for Thanksgiving? Tired of burnt edges to your pie crusts, but don’t want to spend major $$ to buy commercial pie crust shields? Frustrated with trying to arrange foil strips and then nursing burnt fingers when the strips fall off in the oven?
Making your own pie crust shield is super easy, cheap, and will keep your fingers blister-free. And you won’t be tempted to curse in frustration at foil strips that just don’t stay put. Oh- and you will end up with perfectly browned pie crusts.

To make you own pie crust shield you need the following: aluminum foil, scissors, pencil and the pie plate you will be baking in.
Set your pie plate, right side up, on a square of foil that is 2-3” larger than your pie plate.

Trace the bottom of your pie plate (the smaller side).

Set pie plate aside and cut out the inner circle.

You can trim the corners on the outside edge, but I usually just leave them. Fill your pie crust, then set foil ring over the edge of the unbaked pie. Gently fold down outer edges, being careful not to squish all of that edge-crimping you worked so hard on!


Bake pie, or quiche, with the pie shield on. Five minutes before the end of the cooking time, carefully remove shield. If the edges are not brown enough, leave shield off and bake until edges are golden brown. If the edges are browned, replace shield and continue cooking until quiche/pie is cooked through.

Uses for Pie Crust Shield:
Filed under Breakfast/Brunch, Desserts, Tips and Tutorials
At our house, quiche is a year round food. In the winter, I pair it with soup for a hearty meal, and in the summer it stands more on its own, usually accompanied by a fresh, crisp salad.
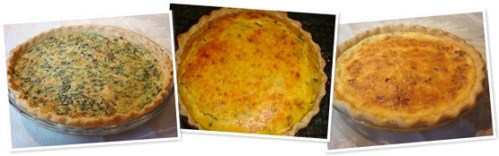
As a family of seven, we are a two-quiche dinner family. Which works out well for everyone, because I will make one “good” quiche, chock full of vegetables, and another “plain” quiche, a standard Quiche Lorraine, with just bacon and cheese. So whichever kids don’t like my vegetables of choice that day are made happy with the plain, boring variety.
 Quiche is a great way to use fresh, seasonal vegetables, especially prolific summer garden veges. It is also a good way to use small amounts of leftovers (both veges and meat like chicken or ham).
 The following quiche recipe is completely adaptable to whatever meat and vegetable you have on hand. The only real recipe alteration you need to watch for is the amount of cream you use. For low-moisture add-ins (like bacon, sausage, chicken, onions, asparagus, broccoli), 2 cups works well. For high-moisture items (ham that has not been sautéed, spinach, zucchini, tomatoes). reduce the amount of cream to 1 ½ cups or your quiche will not set correctly.


To keep the crust on my quiches (and pies!) from browning too quickly, I like to use pie crust shields over the edges. I have one commercial pie crust shield, but as I am always making two quiches at a time, for the second quiche, I make my own shield out of foil. I used to try using foil strips, but they always shifted when I tried to add additional strips, or move the pie in/out of the oven, causing me great frustration. So ….
How To . . . Make Your Own Pie Crust Shield Out of Foil
Set your pie plate, right side up, on a square of foil that is 2-3” larger than your pie plate.
Trace the bottom of your pie plate (the smaller side).
Set pie plate aside and cut out the inner circle.
You can trim the corners on the outside edge, but I usually just leave them. Fill your pie crust, then set foil ring over the edge of the pie. Gently fold down outer edges, being careful not to squish all of that edge-crimping you worked so hard on!
Bake pie, or quiche, with the pie shield on. Five minutes before the end of the cooking time, carefully remove shield. If the edges are not brown enough, leave shield off and bake until edges are golden brown. If the edges are browned, replace shield and continue cooking until quiche/pie is cooked through.

—–
RECIPE:
Pastry crust for 9” pie plate
2 cups cream**
4 eggs
½ tsp salt
1/8 tsp pepper
Pinch of ground cayenne or Ancho chile pepper (optional)
1-2 cups chopped cooked meat (ham, bacon, chicken, sausage)
—–and/or vegetables (onions, green onions, peppers, spinach,
—–zucchini, broccoli, mushrooms, asparagus, tomatoes, etc)
½ cup fresh grated Parmesan (plus optional 2-3 Tbs for garnish)
1-1 ½ cups additional shredded cheese (Swiss, cheddar, Gruyere,
—–pepper-jack, feta, cream cheese-cubed, etc)
**NOTE: Use less cream (about 1 ½ cups) if meat/vegetables are very moist
Preheat oven to 425°F.
Prepare pastry crust and place in 9” pie plate (deep dish, if possible).
In a medium bowl, mix cream, eggs, salt, pepper, and cayenne pepper (if using).
Prepare meat and vegetable filling: chop and sauté meat and vegetables like onions, peppers, zucchini, mushrooms; lightly steam broccoli; green onions, asparagus, tomatoes, and spinach can be used raw, but frozen spinach should be thawed and drained to remove as much liquid as possible. Cool cooked vegetables slightly.
Combine meat, vegetables, Parmesan and additional cheeses in a mixing bowl. Spread evenly in pie crust. Pour cream/egg mixture over filling. Use a spatula or fork to remove any large air pockets.
If desired, cover the crust of the quiche with a pie shield. Bake at 425°F for 15 minutes. Reduce heat to 350°F and bake an additional 30 minutes, or until knife inserted in center comes out clean. Allow to set at room temperature 5-10 minutes before serving.
OPTIONAL: Sprinkle hot cooked quiche with 2-3 Tbs grated Parmesan as soon as it comes out of the oven.
—–
SPINACH QUICHE: I used about 1 cup cooked, crumbled bacon, 1 onion, sautéed, and 1 box of frozen spinach, drained and then squeezed to remove excess moisture. I used only 1 ½ cups cream and ½ cup each Swiss and sharp cheddar cheeses.
QUICHE LORRAINE: I used 1 ½ cups cooked, crumbled bacon and 1 onion, sautéed. I used 2 cups of cream and 1 ½ cups Swiss cheese.
PUMPKIN QUICHE: See recipe here
NoEmptyChairs.me
Filed under Breakfast/Brunch, Main Dishes

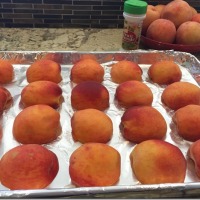
Fall vegetables and fruit have such wonderful deep colors! We recently purchased several bushels of squash, pumpkins, and apples and it has been fun finding ways to use them. As colder weather sets in I love roasting squash and making good hearty soups that taste and smell fabulous and warm up the house all at the same time. For dinner one night this weekend I roasted a bunch of squash and pumpkins and made a pumpkin quiche and a creamy winter squash soup with a subtle Thai flavor.

Pumpkin Quiche with Bacon & Asparagus
For the quiche, I used my standard quiche recipe, substituting one cup of mashed pumpkin for one cup of cream in the recipe. I used half of a small roasted sugar pumpkin (try roasting your own squash-it is wonderful!)

 I used an immersion blender to mix the remaining cup of cream with the pumpkin and then added that to the egg and cheese mixture (I used Swiss and Parmesan), tossed in some cooked, crumbled bacon, sautéed onions and garlic, and chopped asparagus and baked it in a pie crust.
The resulting quiche had only a very mild pumpkin flavor, but it had a wonderful texture and color.
.
.
.
 .
.
This would be a great way to sneak extra veges into your family’s diet without them ever knowing! And it is so much healthier than the original recipe.
.
Next time I want to try this with a butternut squash, which has a slightly stronger taste and even more brilliant color!
.
.
 Thai Winter Squash Soup
I loved this soup! I used four different varieties of winter squash for this: half of a small pumpkin, an acorn squash, a butternut squash and a delicata squash (the small yellow one with green stripes). Any combination of squash would work fine. In trying to come up with a recipe, I didn’t want an overly bland soup, but I also didn’t want to overpower the roasted squash flavor by using really strong flavors, or making it too spicy.
 I started by roasting all of my squash and then coarsely chopping them (I took the lazy approach to chopping and scooped the cooked squash into a large 4 cup Pyrex measuring cup and then ran a knife through it to help pack down the squash to get a full 4 cups).
.
 .
.
In a stockpot, sauté some onions and garlic in coconut oil or olive oil.
.
.
.
 .
.
When they are soft, stir in the cooked, chopped squash and two chopped apples (they lend a nice sweetness to the soup).
.
.
Thin mixture by adding 2 cups of chicken broth, one can of coconut milk, and one cup of cream (for a wonderful richness). Cook until apples and squash are very soft. Use an immersion blender to create a smooth soup. Use can also use a blender, but you will have to work in batches. I added a mild Thai flavor to this soup by stirring in 2 tsp Thai red curry paste and 1 tsp fresh grated ginger. I also added a small amount of fresh thyme and some chopped Thai basil from our garden, now growing inside (chopped cilantro would also be great). Add additional chicken broth if soup is too thick.
 We garnished this with some toasted pine nuts (sauté pine nuts in 1 Tbs coconut oil or butter until lightly browned).
RECIPES:

Unbaked Single Pie Crust
4 slices bacon
1 small onion, chopped
2 cloves garlic, minced
½ cup chopped asparagus
1 cup cooked, mashed pumpkin
1 cup heavy cream
4 eggs, lightly beaten
1 cup shredded Swiss cheese
½ cup shredded Parmesan cheese
½ tsp salt
¼ tsp pepper
Preheat oven to 425°F.
Chop bacon and cook until crisp. Remove from pan. Drain grease, reserving 1 Tbs of drippings in the pan. Sauté onion and garlic until softened, but not browned. Remove from heat. Stir in chopped asparagus. Cool slightly.
Mix mashed pumpkin and cream well (an immersion blender works great). Mix in eggs, cheeses, salt, and pepper. Stir in cooled bacon/vegetable mixture.
Pour into unbaked pie crust. Bake at 425°F for 15 minutes. Reduce heat to 350°F and bake for an additional 30 minutes, or until set. Cover edges of crust with foil or pie crust shield if they brown too quickly. Cool 10 minutes before slicing.
NoEmptyChairs.me

2 Tbs coconut oil or butter
1 large onion, chopped
4 whole garlic cloves
4 cups cooked, mashed winter squash
(I used pumpkin, butternut, acorn and Delicata)
2 apples: peeled, cored and chopped
2 cups chicken broth
1 can coconut milk
1 cup heavy cream
1 ½ tsp salt (adjust to taste)
1/8 tsp ground coriander
2 tsp Thai red curry paste
1 tsp fresh minced ginger
1 tsp minced fresh thyme leaves
2 Tbs chopped fresh Thai basil (or chopped cilantro-I would use more of the cilantro, probably ¼ cup)
Toasted pine nuts
Heat coconut oil (or butter) in a stockpot. Sauté onion and garlic until soft. Add cooked squash and apples. Cook for 5 minutes. Stir in chicken broth and coconut milk and cook until apples are tender, about 10 minutes. (You could also use uncooked, diced squash and cook longer, until squash is very tender).
Blend soup to make a smooth puree (using an immersion blender or regular blender).
Add cream, salt, coriander, curry paste, ginger and thyme leaves. Cook 10-15 minutes, adding additional chicken broth if the soup is too thick.
Stir in Thai basil or cilantro just before serving.
Garnish with toasted pine nuts.
NoEmptyChairs.me
Filed under Breakfast/Brunch, Main Dishes, Soups/Stews/Curries


White Chocolate Raspberry Swirled Cheesecake

Mango Jalapeño Jam

Chicken Shawarma with Lemon Turmeric Rice
Coconut Cream Pie Bars

Strawberry Nutella Muffins

Greek Seven Layer Dip

Lemon Meringue No-Bake Cheesecake

Ham & Zucchini Quiche

Vietnamese Fresh Spring Rolls

Creamy Citrus Cheesecake