Tag Archives: baking

Chocolate Covered Bat and Mummy Cookies

10-13-12 056-1

Mummy Cookies have long been a tradition for Halloween baking at our house. It is our only Halloween baking tradition. Until today! We have now added chocolate covered bat cookies to our short list of Halloween favorites.

I added mint extract to a chocolate cut-out cookie recipe and covered the cookies in a dark chocolate coating. These quickly became the adult favorite. Neither Brian nor I are a big fan of white chocolate. But a cookie that tastes like a Girls’ Scout Thin Mint cookie? Absolutely!

10-13-12 040-1

I used an orange gel icing for the eyes, but it didn’t set firmly. Next time I will use a bright orange melted colored candy coating to make eyes. I had a pale green colored chocolate that I thought would look nice, but it was too pale, so I went with the gel icing.

10-13-12 057-1

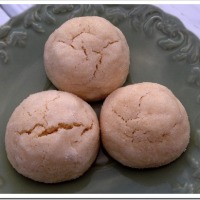
A naked bat ready to take the plunge:

10-13-12 004-1

These white chocolate covered chocolate mummies are still the kids’ favorite (except for Little A- I usually make a few vanilla mummies for him, and he picks the eyes off).

DSC02967

10-13-12 035-1


For recipe and details on making Mummy Cookies, click HERE.

RECIPE:

Chocolate Covered Bat Cookies

  • Servings: about 4 dozen
  • Print

10-13-12 056-1

2 ½ cups flour
1 cup unsweetened Dutch-process cocoa powder
1 tsp baking soda
1 tsp baking powder
1 tsp salt
10 Tbs butter, softened
1 ½ cups sugar
2 large eggs
2 large egg yolks
1  tsp pure peppermint extract, optional
about 2 pounds dark chocolate, coarsely chopped
colored candy coating or frosting for eyes

Preheat oven to 325°F. Line a baking sheet with parchment paper or a silicone mat.

Whisk flour, cocoa powder, baking soda, baking powder, and salt in a bowl. In another bowl, beat butter and sugar with a mixer on medium-high speed for 1 minute. Reduce speed to medium-low, and add eggs and peppermint extract. Slowly add flour mixture, and beat until just incorporated.

Divide dough in half and place on two large pieces of plastic wrap. Wrap dough securely in the plastic wrap and refrigerate until firm, at least 1-2 hours, or several days.

When ready to bake, place dough on a new piece of plastic wrap. Press with hands to make a thick disk of dough. Place another piece of plastic wrap over dough and use a rolling pin to flatten dough to about 1/4 inch. Remove top piece of plastic wrap and cut out cookies with a cookie cutter.

Bake cookies for 10 minutes, or until dry to the touch. Cool 2 minutes on baking sheet before transferring cookies to wire racks to cool.

Melt chocolate in a heatproof bowl in the microwave or in a double boiler (melt chocolate slowly). Dunk cookies into melted chocolate. Use a fork to turn the cookie over in the chocolate. Pick up the cookie with the fork, let excess chocolate drip off, and gently scrape bottom against edge of bowl. Place on parchment (or waxed paper)-lined baking sheets. Let chocolate harden. (TIME SAVING NOTE: You can also just use your fingers to hold the cookie and only dunk the top and sides of the cookie, gently scraping the excess chocolate off of the top of the cookie before placing it on the parchment paper) To make eyes, place melted candy coating in a Ziploc or pastry bag. Poke a small hole in the end with a toothpick and pipe eyes onto bats.

Makes about 4 dozen, depending on the size of your cookies.

Cookie dough recipe adapted from Martha Stewart

NoEmptyChairs.me

3 Comments

Filed under Cookies, Desserts

Autumn Spiced Fall Leaf Cookies

Leaf Cookies (8)-2

Leaves are starting to change here in Pennsylvania, so it seems only right to reflect the changes outside with some multi-colored fall leaf cookies made with delicious warm autumn spices.

These cookies are actually easier to make than regular sugar cookies, because you don’t need to frost them. Colorful dough with a shiny glaze makes them beautiful all on their own. And much less sweet than a traditional sugar cookie.

I used a brown sugar cookie dough from Bake at 350 that is spiced with wonderful fall flavors like cinnamon, ginger and allspice. I like this dough for making these leaves because the dough doesn’t lose its shape as it cooks, so the cookies keep their sharp edges and leaf “veins” etched into the top.

To make multicolored leaf cookies:

Leaf Cookies (9)-1

Separate cookie dough into four portions. Place in Ziploc bags. Add gel food coloring (I like the Ateco brand)  to bags and knead until dough is a uniform color.

Leaf Cookies (10)-1

To make multicolored leaves, place small balls of different colored dough on a floured pastry mat. Press with hands to flatten and fill in spaces. Roll gently with a rolling pin to flatten evenly. Make sure that the seams between the different colors are all sealed.

Leaf Cookies (1)

Cut out leaves with cookie cutters and place on parchment paper or silicon mat lined baking sheets.

Leaf Cookies (2)-1

Use a sharp paring knife to draw veins into dough.

Leaf Cookies (3)-1

Baking leaves plain will result in a rustic, matted look to the leaves:

Leaf Cookies (4)-1

For a shiny finish on your cookies, brush with a glaze (add a little almond or orange extract for a great flavor) before baking:

Leaf Cookies (6)-1

As you re-roll the dough, the colors take on more of a tie-dyed or marbled look.

Leaf Cookies (5)-1

These cookies are great fun for kids, and really taste great.

RECIPE:

Spiced Brown Sugar Cut-Out Cookies

  • Servings: about 3 dozen
  • Print

Leaf Cookies (8)-2

3 cups flour
2 tsp baking powder
½ tsp salt
½ tsp ground cinnamon
¼ tsp ground ginger
1/8 tsp grated nutmeg
1/8 tsp allspice
½ cup sugar
½ cup light brown sugar, packed
1 cup (2 sticks) butter, at room temperature
1 large egg
1 tsp vanilla extract

Preheat oven to 350˚F.

In a medium bowl, combine the flour, baking powder, salt, and spices with a whisk to mix. (The amounts of spices given make a mildly spiced cookie. For a more pronounced flavor, increase spice amounts)

Using an electric mixer, mix the sugar, brown sugar, and butter.  Beat on medium-high speed until light and fluffy, 2-3 minutes.  Beat in the egg and vanilla.  On low speed, beat in the dry ingredients just until incorporated.  Dough will be stiff.

Line baking sheets with parchment paper or silicone baking mats.  On a lightly floured surface, roll the dough out to about ¼-inch thickness.  Cut out dough with cookie cutters and place on baking sheets.  Bake for 9-12 minutes, depending on the size of your cookie cutter. Decorate as desired.

Yield: about 3 dozen cookies using a 3” cookie cutter

To make Fall Leaves:

Leaf Cookies (2)-1

Additional ingredients:
Gel food coloring (I used red, green orange and yellow)
Glaze:
½ cup water
½ cup sugar
2 Tbs ClearJel or cornstarch
2 Tbs water
1 tsp almond or orange extract

Prepare cookie dough and divide into four portions. Place in Ziploc bags. Add gel food coloring (I like the Ateco brand) to bags and knead until dough is a uniform color. Place small balls of different colored dough on a floured pastry mat. Press with hands to flatten and fill in spaces. Roll gently with a rolling pin to flatten evenly. Make sure that the seams between the different colors are all sealed. Cut out leaves with cookie cutters and place on parchment paper or silicon mat lined baking sheets. Use a sharp paring knife to draw veins into dough. Baking leaves plain will result in a rustic, matted look to the leaves.

For a shiny finish on your cookies, prepare glaze: combine 1/2 cup each water and sugar in a small saucepan. Bring to a boil; boil 2 minutes. Stir together ClearJel or cornstarch and 2 Tbs water; stir into pan a little at a time until glaze just begins to thicken. Return to a boil and cook 1 minute. Remove from heat and stir in almond or orange extract. Brush lightly onto raw cookie dough (after cutting out and placing on baking sheets). Bake as directed above.

Fall leaves inspired by HGTV, as seen on Pinterest

Cookie dough recipe from Bake at 350

NoEmptyChairs.me

21 Comments

Filed under Cookies, Desserts

Triple Chocolate Nutella Zucchini Muffins

082012 023-1

We are still working on getting through the numerous monster zucchini that came out of our zucchini forest this summer.

082012 004-1

After a fall at a church young women camp, I spent most of the summer in this:

082012 044-1

I had spent a good portion of spring digging out old dirt and hauling in new topsoil to help rejuvenate our garden. The new soil made a huge difference and we ended up with zucchini plants that were almost as tall as me. I realize that at 5’2”, that is not a huge accomplishment, but for zucchini, I thought that was pretty impressive. Our garden is planted on a tiered hill, which was impossible for me to navigate in my new fashionable summer footwear. The plants were so tall that I had a really hard time getting my kids to wade through the jungle looking for squash. For some reason ratatouille and zucchini fritters (some of my favorites) were not a huge motivation for them to risk life and limb in the outback. However, when I switched to making zucchini brownies, pumpkin zucchini muffins and these chocolate zucchini muffins, I found I had ample volunteers!

And when they came across this little guy hiding out in the cucumber plants, they spent a good portion of the rest of the summer searching for living, crawling things in the garden.

082012 010-1

If you still have zucchini that you are working your way through, these muffins, spiked with Nutella and chocolate chips, make for a great breakfast (especially for a couple dozen awesome teenagers at 6am!) or a much appreciated lunchbox addition.

082012 012-1

RECIPE:

Triple Chocolate Nutella Zucchini Muffins

082012 023-1

3 eggs
¾ cup vegetable oil
1 cup Nutella
1 ½ cups brown sugar
½ cup buttermilk or kefir (or sour milk**)
2 tsp vanilla extract
2 cups grated zucchini
3 ½ cups flour
½ cup cocoa powder
2 tsp baking soda
1 tsp salt
1 tsp baking powder
½ tsp cinnamon
¼ tsp cardamom or nutmeg
1 cup chocolate chips

Preheat oven to 375°F. Line regular muffin pans with paper or foil cups. Or use large Reynolds Foil 3 ½” baking cups (these are self-standing-just arrange on a baking sheet).

In a large mixing bowl, combine eggs, oil, Nutella, brown sugar, buttermilk, and vanilla. Mix well. Stir in zucchini.

In a separate bowl, use a whisk to mix flour, cocoa, baking soda, salt, baking powder, cinnamon, and cardamom or nutmeg. Add mixed dry ingredients to wet ingredients in the mixing bowl and mix until just combined. Stir in chocolate chips. Spoon into muffin cups (fill about 3/4 full).

For regular muffins: Bake 15-18 minutes.
For large muffins: Bake 20-25 minutes.

Yield: About 36 regular muffins or 20 large muffins (made with 3 ½” baking cups)

**To make sour milk: place 1 tsp lemon juice or vinegar in a ½ cup measuring cup. Add milk to ½ cup line. Let sit 5 minutes.

NoEmptyChairs.me

2 Comments

Filed under Breads, Breakfast/Brunch, Desserts

Banana Chocolate Chip Muffins

112511 012-1

Looking for a banana muffin that is moist and full of banana flavor? This recipe (slightly adapted from Cook’s Illustrated) is your answer. It packs FIVE bananas into a single loaf of bread (or batch of 15-18 muffins).

I like bananas, but only if they are on the slightly green side. Once they are completely yellow or start to brown, I won’t touch them. I can push them on the kids for a little longer, but none of us are squishy banana fans. So I regularly have one or two bananas from a bunch that go “bad” before we eat them. So I peel and throw these overripe bananas into my freezer in Ziploc bags. Eventually those bags get to the bursting point, and I know I need to do some banana baking.

This recipe is one of our favorites. The bananas are cooked (in the microwave) until they are liquidy, and then the liquid is reduced to concentrate the banana flavor. You can add chocolate chips and/or chopped nuts to your liking.

112511 022-1

The muffins also freeze nicely if you happen to have A LOT of bananas to use up and want to make multiple batches!

RECIPE:

Banana Chocolate Chip Muffins (or Bread)

112511 012-1

1 ¾ cups flour
1 tsp baking soda
½ tsp salt
5 large very ripe bananas
½ cup (1 stick) unsalted butter, melted and cooled slightly
2 large eggs
¾ cup light brown sugar
1 tsp vanilla extract
1 cup chocolate chips
½ cup walnuts (optional)

Preheat oven to 350°F.  Line muffin tins with 15-18 paper liners, or grease muffin tins.

In a large bowl, whisk together flour, baking soda, and salt.

Place bananas in a microwave-safe bowl; cover with waxed paper. Microwave on high power until bananas are soft and have released liquid, about 5 minutes. Pour bananas into a strainer placed over a medium saucepan. Allow to drain, stirring occasionally, for 15 minutes. Set banana pulp aside.

Place the saucepan with the banana liquid over medium-high heat and cook until reduced to ¼ cup, about 5 minutes. Remove pan from heat and stir banana pulp into the reduced liquid. Mash with a potato masher or a fork until fairly smooth. Whisk in butter, eggs, brown sugar, and vanilla.

Pour banana mixture into flour mixture and stir until just combined. Gently fold in chocolate chips and walnuts, if using.

Pour batter into the prepared muffin tins. Bake for 15 minutes, or until toothpick comes out clean.

Makes 15-18 muffins

FOR BANANA BREAD: Spray a medium loaf pan with nonstick cooking spray. Pour batter into pan. Bake at 350°F for 55 to 70 minutes, or until toothpick comes out clean. Cool bread in pan on wire rack 15 minutes, then remove loaf from pan and continue to cool on a wire rack.

adapted from Cook’s Illustrated

NoEmptyChairs.me

Leave a comment

Filed under Breads, Breakfast/Brunch

Third Annual Twelve Days of Christmas Cookies Recap

Here’s a recap of this year’s
Twelve Days of Christmas Cookies

Happy Baking!

12-23-10 061-1

DAY 1: Christmas Cherry Cookies

080710 021-1

DAY 2: Blueberry Crumb Bars

11211-1

DAY 3: Cherry Shortbread Squares

042611 093-1

DAY 4: Chinese Almond Cookies

12-12-10 013-1 DAY 5: Chocolate Covered Pretzels

100711 006-1 DAY 6: Nanaimo Bars

051711 010-1

DAY 7:Sugar Cookie Bars

11311 010-2 DAY 8: Maple Cookies

 113011 010-2

DAY 9: Chocolate Walnut Puddle Cookies (Gluten Free)

120111 001-2

DAY 10: Chocolate Peppermint Cookies

1205112 021-1  DAY 11: Cranberry Orange Pinwheels

120511 002-2 DAY 12: Candy Cane Kisses Cookies

Enjoy a wonderful sugar-laden faith-filled Christmas season!

Still need more cookie ideas? Try these:

First Annual Twelve Days of Christmas Cookies(2009)

Second Annual Twelve Days of Christmas Cookies (2010)

7 Comments

Filed under Cookies, Desserts

Twelve Days of Christmas Cookies: Candy Cane Kisses Cookies

120511 002-2 DAY 12: Candy Cane Kisses Cookies

Fun little Christmas colored cookies topped with candy cane flavored Hershey’s Kisses. These are great for making with kids. They love rolling the dough balls in colored sugar and pressing the Kisses into the warm cookies. I did find that the white chocolate kisses tend to collapse into themselves (melt) faster than the regular chocolate kisses. If you like this, press the Kisses into the cookies immediately after removing the cookies from the oven. If you want the Kisses to hold their shape, wait about 3 minutes before pressing the Kisses into the cookies. Don’t wait until they are completely cool, however, or the Kisses won’t “stick”.

These cookies are best made very small; they should be just barely bigger than the Kisses (after baking).

RECIPE:

Candy Cane Kisses Cookies

  • Servings: 4 dozen small cookies
  • Print

120511 002-2

1 bag Hershey’s Candy Cane Kisses
½ cup butter, softened
1 cup granulated sugar
1 ½ teaspoons vanilla extract
1 egg
2 cups all purpose flour
¼ teaspoon salt
¼ teaspoon baking soda
2 tablespoons milk
Red and Green colored sugar (about 3 Tbs each)

Preheat over to 350°F. Remove wrappers from about 4 dozen Kisses.

Beat butter, sugar, vanilla, and egg in a large bowl until well blended. Stir together flour, baking soda, and salt; add alternatively with milk to butter mixture, beating until well blended.

Shape dough into small 1-inch balls. Roll in red and/or green colored sugar. Place on ungreased cookie sheet.

Bake 8 – 10 minutes or until cookies are barely set. Remove from oven; cool for 3 minutes on the baking sheet. Press candy piece into center of each cookie. Remove from cookie sheet to wire rack. Cool completely.

Yield: about 4 dozen very small cookies.

Recipe from Hershey’s

NoEmptyChairs.me

5 Comments

Filed under Cookies, Desserts