Butterfly Cupcakes with Raspberry Swiss Meringue Icing

Butterfly Cupcakes 001

For bookgroup this month, we read Proof of Heaven, by Eben Alexander. It is an autobiographical account of neurosurgeon Dr. Alexander’s experience while he was in a coma. It is an interesting glimpse into his vision of the afterlife and how the experience changes him when he returns. We were meeting at my house this month and I wanted to tie our dessert into the book. So I decided to recreate the butterfly on the book cover which plays a roll in Dr. Alexander’s experience.

______Proof of Heaven   Butterfly Cupcakes 004

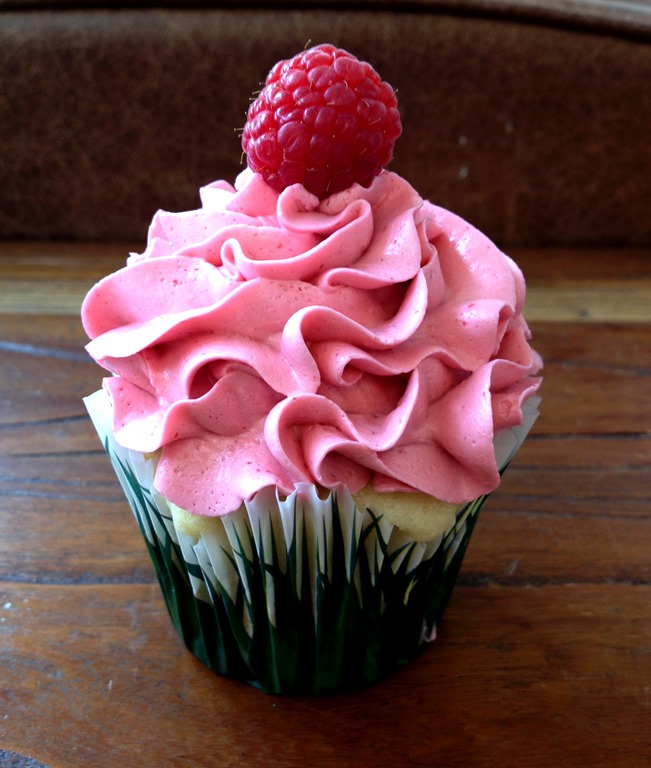
I ran out of steam (and time) after making 11 butterflies, so the rest I just topped with a fresh raspberry. I love these cupcake liners that look like a field of grass.

Butterfly Cupcakes 002

The cupcakes are made from a simple doctored white cake mix and are filled with a raspberry filling in the center. The icing is a Swiss Meringue Buttercream into which I beat some of the raspberry filling. No food coloring, just thickened raspberry puree.

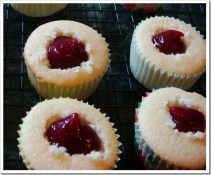
Here is a picture of similar white cupcakes with raspberry filling (before I replaced their little cake caps that I cut out to make holes):

Raspberry Filling

I first made these chocolate butterflies on cupcakes for Little J’s 6th birthday three years ago. Here is a link to a tutorial on making the butterflies:

HOW TO MAKE CHOCOLATE BUTTERFLIES

Butterfly Cupcakes 001

RECIPES:

White Cupcakes

Butterfly Cupcakes 002

White Cupcakes
  (from Our Best Bites)

1 box white cake mix (Duncan Hines)
1 cup flour
1 cup sugar
¾ tsp salt
4 egg whites (or 3 whole eggs if you don’t need it perfectly white)
1 1/3 cups water
2 Tbs vegetable oil
1 cup sour cream
1 tsp vanilla extract (use clear vanilla if you want a pure white cake)
1 tsp almond extract

Mix all dry ingredients with a whisk, then add wet ingredients. Beat with a mixer for two minutes until fluffy.

To make a round layer cake: Pour into greased, floured pans (fills two 8 or 9″ rounds) and bake according to cake package directions.

Tip:  When cakes come out, cool for 5 minutes on wire rack, then wrap securely with two sheets of plastic wrap (in a “+” sign). Allow to cool all wrapped up (keeps the moisture from evaporating out) then pop in freezer on a cutting board to keep them flat. Once they are frozen, they are super easy to frost and defrost in about half an hour.

To make cupcakes: fill paper liners ¾ full and bake according to box directions.  Makes 36 regular sized cupcakes.

NoEmptyChairs.me

Raspberry Filling
  • Servings: Makes about 1 ¾ cups filling (without seeds)
  • Print

Raspberry Filling

12 oz raspberries, fresh or frozen (about 2 ½ cups of not-crushed berries)
½ cup water
½ cup sugar
½ Tbs lemon juice
2-3 Tbs ClearJel or cornstarch
¼ cup cold water

In a heavy saucepan, combine raspberries, ½ cup water, sugar and lemon juice. Bring to a boil. Reduce heat and simmer for 5 minutes, crushing berries slightly with the back of a spoon. For a seedless sauce: strain the berries through a fine sieve, pushing the pulp through the sieve with the back of a spoon. Return seedless puree to the saucepan (rinse saucepan first if there are seeds clinging to the sides). Mix the cornstarch and water in a small bowl; stir into puree in the saucepan. Return mixture to a boil; lower heat and simmer for 1-2 minutes, or until slightly thickened and no longer cloudy. Chill before using.

Yield: about 1 ¾ cups filling (without seeds)

NoEmptyChairs.me

Raspberry Swiss Meringue Buttercream Icing

  • Servings: Frosting for 24 cupcakes or one 2-layer round cake
  • Print

Butterfly Cupcakes 002

1 cup egg whites (about 8 large egg whites, or use “Just Whites” carton of egg whites)
1 ½ cups sugar
pinch of salt
2 cups unsalted butter (4 sticks), at room temperature**
2 tsp vanilla extract (or use small amounts of other flavored extracts)
about 1 cup Raspberry filling (see recipe above)

In the top of a double boiler, stir together  egg whites, sugar and salt. Bring water in bottom of double boiler to a low simmer; cook until the temperature of the egg whites reaches 160°F and sugar is completely dissolved (rub mixture between fingertips-it should not feel gritty). Mixture will be foamy and not a uniform consistency.

Transfer the egg white mixture to the bowl of a stand mixer. With the whisk attachment, whip until meringue is completely cooled and glossy peaks form, about 10 minutes. DO NOT ADD BUTTER UNTIL BOTH THE BOWL AND FROSTING ARE COMPLETELY COOL. Switch mixer attachment from the whisk to paddles. Add butter 1-2 Tablespoons at a time until incorporated. Mixture may appear curdled at times. Continue beating until butter is fully incorporated and frosting is fluffy and smooth.  This will take about 10 minutes.  Add vanilla and beat smooth. Add raspberry filling and beat until frosting is a uniform color (start with about ¾ cup filling, beat, and then add more if you want a more pronounced raspberry flavor).

**BUTTER NOTE: butter should be room temperature soft, but not at the point of melting. If the butter is too cold, it will not incorporate well into the meringue, and you will have butter chunks. If the butter is over-soft, it will cause the icing to curdle while beating-this is okay, it isn’t ruined: it will just take longer (more beating) for the frosting to become smooth. If icing still won’t set, place in the fridge for 20 minutes, and then beat again.

Storage:  Store frosted cake at room temperature (frosted cake will be fine at room temp for several days).  This is a great icing that does not get “crusty” like a regular buttercream. To store leftover icing: store in a covered container in the refrigerator.  When ready to use, bring to room temperature and beat until light and fluffy.

Yield: frosting for a two-layer round cake or about 24 cupcakes

NoEmptyChairs.me

6 Comments

Filed under Desserts

Layered Chicken Taco Salad in Baked Tortilla Bowls

Layered Taco Salad 1

Sure, you can eat taco salad on a regular plate, but it is much more fun to eat it out of an edible tortilla bowl. Tortilla bowls are also a great enforcer of portion control. Have you ever noticed that when you layer taco salad on a plate it seems to grow well beyond your original intentions by the time you add all of the toppings you want? Tortilla bowls are the perfect solution, especially for the kids in my family who usually end up with a plateful of food they can never finish.

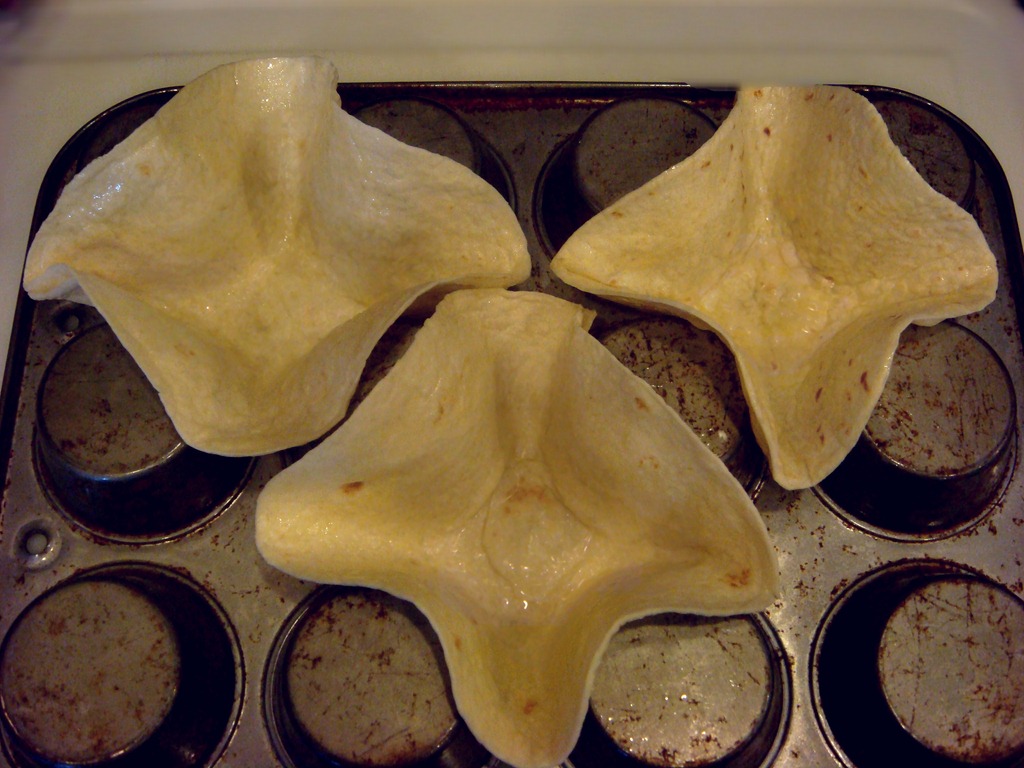
Intimidated by the thought of shaping and deep-frying tortillas? Me too. Good thing these are simple to make, and baked instead of fried. All you need is a super-old-scratched-and-rusty muffin pan.

Tortilla Bowls

To make your baked tortilla bowls, warm tortillas slightly in the microwave (just enough to soften). Spray both sides of tortillas lightly with olive oil cooking spray (or brush very lightly with oil). Turn a muffin tin upside down. Press tortillas into the spaces between muffin cups. Make sure the bottoms of the tortilla bowls are flat so that they will not wobble when served on a plate. Bake at 400F for 8-10 minutes, or until crunchy and just beginning to brown.

You can layer your regular taco salad fillings in the bowl (seasoned ground beef, cheese, lettuce, etc) or try this layered shredded chicken salad. It is similar to some of the semi-fast food Mexican restaurants where you build your own burrito/salad. There are layers of seasoned chili-cilantro rice, black beans, crock-pot cooked shredded chicken, and a cilantro ranch dressing.

Green Chili Cilantro Rice

This Green Chili Cilantro Rice is also great served alongside other Mexican dishes or grilled meats.

RECIPES:

Layered Chicken Taco Salad in Baked Tortilla Bowls

Layered Taco Salad 1

Crock-Pot Shredded Chicken
Green Chili Cilantro Rice
Tortilla Bowls
Cilantro Ranch Dressing
Black Beans – mix with 1 Tbs lime juice
Shredded Cheese
Corn
Lettuce
Chopped jalapenos or banana peppers
Salsa
Sour Cream

Place baked tortilla bowls on a plate. Layer with rice, black beans (these are really good mixed with 1 Tbs lime juice!), shredded chicken and other desired toppings. Top with cilantro ranch dressing and serve.

Crock-Pot Shredded Chicken
2 lb boneless chicken breasts or tenderloins
1 cup prepared Italian salad dressing
½ cup salsa
1 Tbs taco seasoning
2 cloves garlic, minced

Stir together all ingredients in a crock pot. Cook on low for 6-8 hours, or until chicken can easily be shredded. Shred chicken, stir in sauce from pot and serve. If the sauce is too thin (this will especially happen if you use chicken that is injected with broth), shred chicken and return to crock pot, then cook on high with the lid OFF until sauce thickens.

Green Chili Cilantro Rice
1 ¾ cup chicken broth (or water+2tsp chicken bouillon)
1 can (4 oz) diced mild green chilies, undrained
2 cloves garlic, minced
2 Tbs olive oil
½ tsp salt (omit salt if using bouillon)
1 cup Basmati rice (or other long grain variety rice)
½ cup chopped fresh cilantro

Combine broth, green chilies, garlic, olive oil and salt in a saucepan. Bring to a boil. Stir in rice, cover, and simmer over low heat for 20-25 minutes, or until rice is cooked. Stir in chopped cilantro. This can also be cooked in a rice cooker: combine all ingredients except cilantro in rice cooker and cook according to directions; stir in cilantro.

Tortilla Bowls
Flour tortillas
Olive oil (or olive oil cooking spray)
Muffin tin

Warm tortillas slightly in the microwave (10-15 seconds; just enough to soften). Spray both sides of tortillas lightly with olive oil cooking spray (or brush very lightly with oil). Turn a muffin tin upside down. Press tortillas into the spaces between muffin cups. Make sure the bottoms of the tortilla bowls are flat so that they will not wobble when served on a plate. Bake at 400°F for 8-10 minutes, or until crunchy and just beginning to brown.

Cilantro Ranch Dressing
1 package ranch dressing mix
1 cup mayonnaise
½ cup buttermilk or regular milk
2 tomatillos** or 4 Tbs green salsa
½ bunch of cilantro (about 1 cup chopped)
2 cloves garlic
1 lime, juiced
1-2 jalapenos (with or without the seeds; with seeds=spicier)

Combine all of the ingredients in a blender or food processor. Blend until well mixed. Refrigerate for 1-2 hours before serving for optimal flavor.

**Optional: Roast tomatillos for 20 mins at 400°F before adding them to the blender. If you are using a spicy green salsa instead of the tomatillos, go easy on the jalapenos.

NoEmptyChairs.me

2 Comments

Filed under Main Dishes, Salads, Tips and Tutorials

Partying with Penguins

Penguin Cake 3

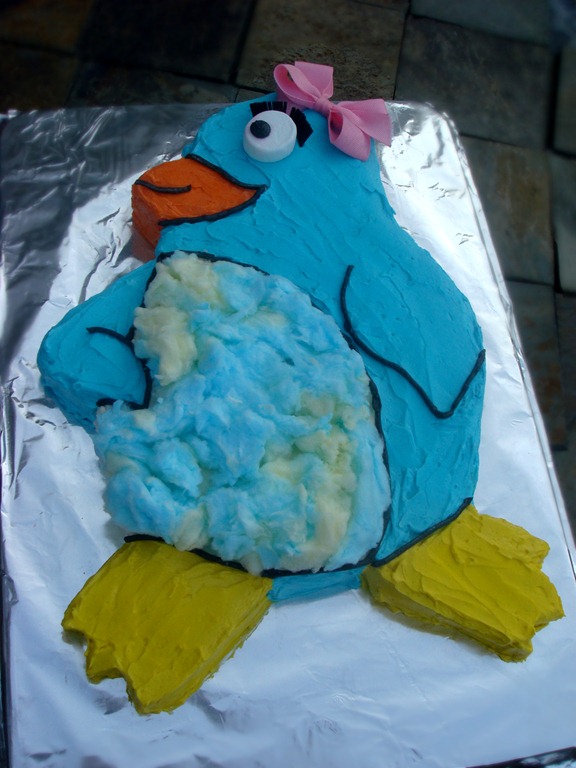
Today is my baby girl’s 9th birthday. We worked together to create this fun Penguin Cake. She has a delicious cotton candy belly.

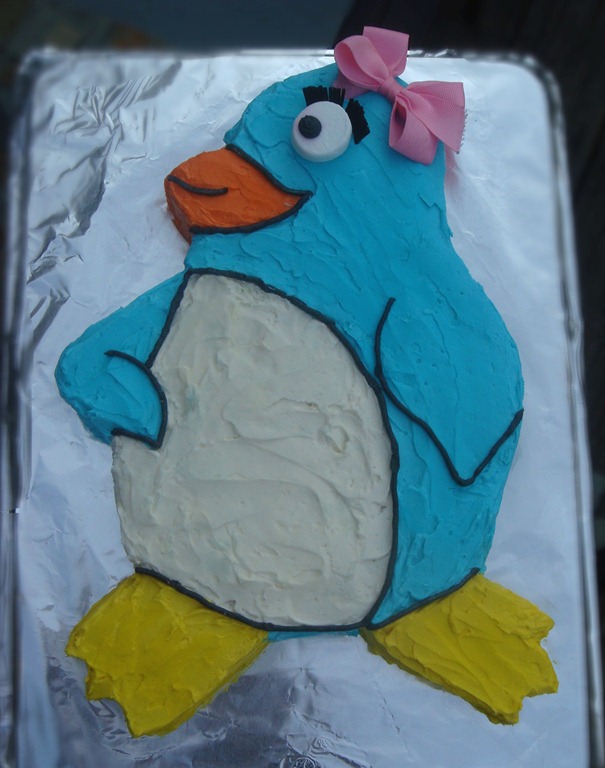
Here is the penguin without the cotton candy:

Penguin Cake 1

We love having Little J in our family. She is just as sweet as her penguin friend.

Penguin Cake 4

Happy Birthday Little J

We love you always!


Inspiration for cake from an Australian Women’s World Cookbook magazine from 1998. Cake frosted with this Buttercream Frosting (with the addition of orange extract).

Leave a comment

Filed under Desserts, Kids' Cakes

Easter Resurrection Rolls

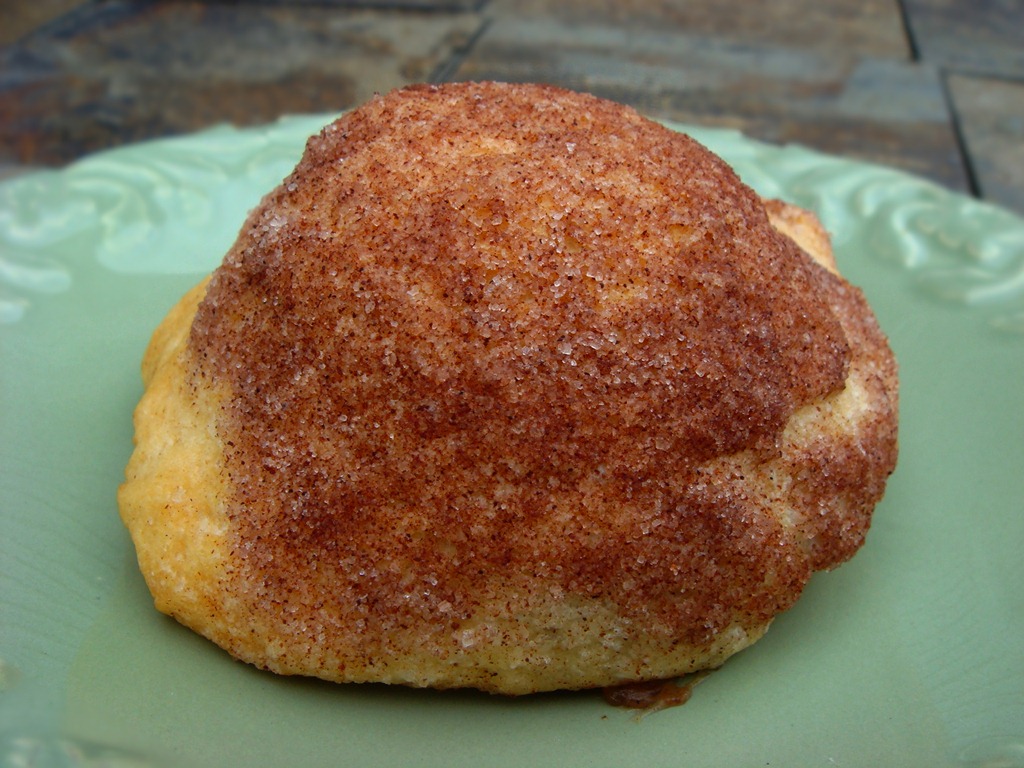
Resurrection Rolls 1

It is hard to believe this is Easter weekend when the weather has been doing this all week:

Spring Snow 3-25-13 (2)

So we are spending our Easter break skiing instead of mulching and gardening, which is certainly making the kids happy!

When not on the slopes, we have been enjoying some of our favorite Easter food traditions, including dying eggs (and eating egg salad) and making these sweet rolls which remind us of the symbols of the resurrection.

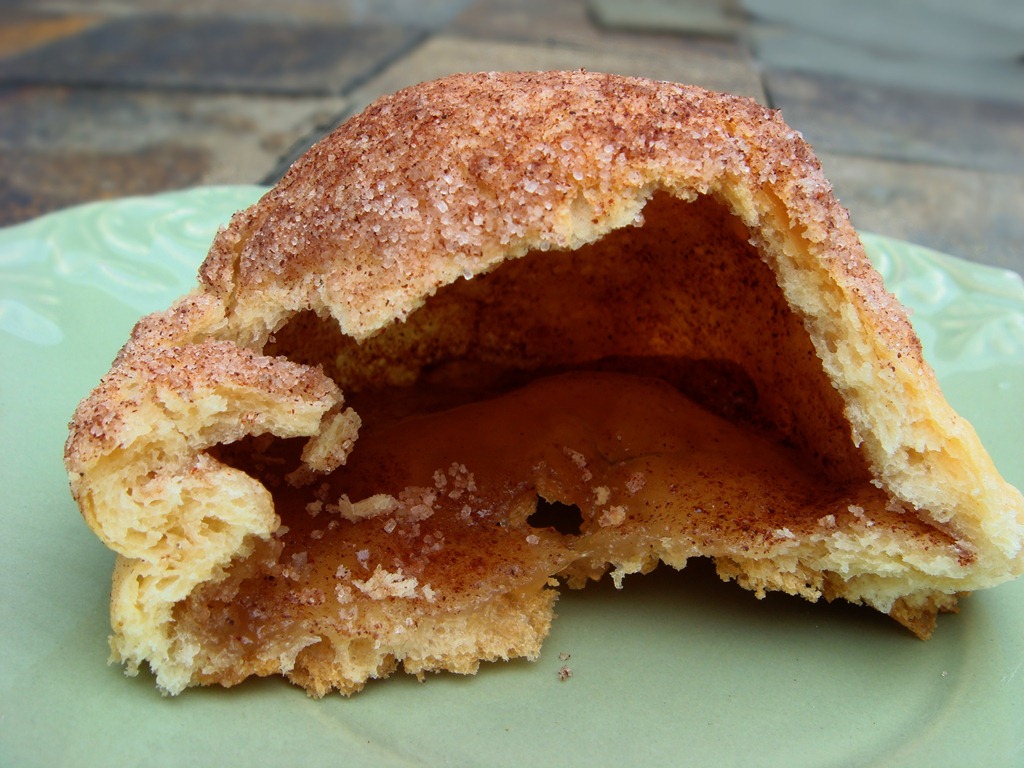
These hollow rolls, symbolic of the empty tomb on Easter morning, are a good way to teach young kids about the resurrection. Made from packaged crescent rolls, marshmallows and cinnamon sugar, they are also easy for kids to make themselves.

Symbolism:
White marshmallow = body of Jesus (perfect)
Melted butter = oils used to anoint Jesus’ body
Cinnamon = spices used to anoint Jesus’ body
Crescent roll (well sealed) = sealed tomb
Hollow roll (after baking) = empty tomb after Christ’s resurrection

To make rolls:

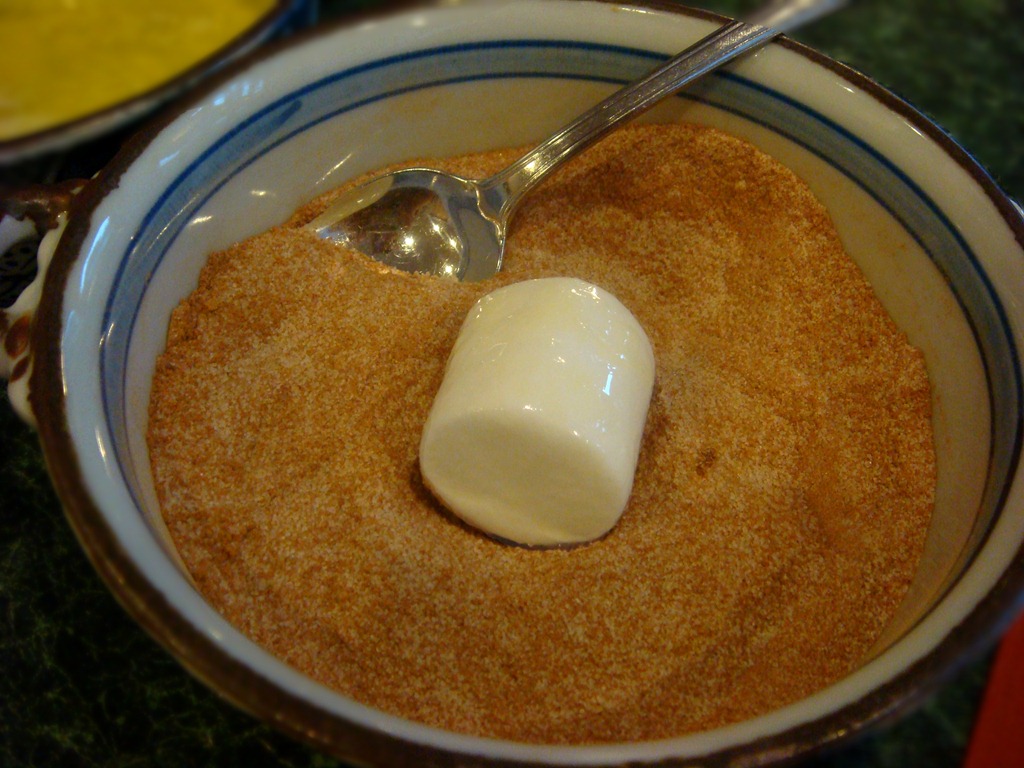
Dip a large marshmallow in melted butter, then roll in cinnamon & sugar mixture.

Resurrection Rolls  5

Place dipped marshmallow in the center of a crescent roll.

Resurrection Rolls  6

Pinch the dough around the marshmallow, completely covering marshmallow. Pinch seams to seal well. Be sure to seal the seams completely, or the marshmallow will melt all over the baking sheet.

Resurrection Rolls  4

Place on prepared baking sheet. Brush tops of rolls with some of the leftover butter and sprinkle with additional cinnamon/sugar mixture. Bake at 375°F for 12-14 minutes.

Resurrection Rolls 2

I admit that it feels just a little bit sacrilegious to have the kids talk about dipping Jesus in butter, but it is certainly an object lesson that they remember all year. And a delicious way to remember the reason we celebrate Easter- the gift that was the atonement and resurrection of the Savior, as evidenced by the empty tomb.

Resurrection Rolls 1

May each of you enjoy the joy and blessing that the Savior has given as you celebrate Easter with family and friends. Click below for a great video on the last week of Christ’s life and His resurrection and appearance to Mary that first Easter morning:

He Is Risen

RECIPE:

Resurrection Rolls

Resurrection Rolls 1

1 can refrigerated crescent rolls
8 large marshmallows
¼ cup butter, melted
¼ cup sugar
1 Tbs cinnamon

Line a baking sheet with a silicone liner, parchment paper, or non-stick foil.

Combine sugar and cinnamon in a small bowl and set aside.

Unroll and separate crescent rolls. Dip a marshmallow in the melted butter, then roll in cinnamon/sugar mixture. Place the covered marshmallow on a raw crescent roll. Pinch the dough around the marshmallow, completely covering marshmallow. Pinch seams to seal well. Be sure to seal the seams completely, or the marshmallow will melt all over the baking sheet.

Place on prepared baking sheet. Brush tops of rolls with some of the leftover butter and sprinkle with additional cinnamon/sugar mixture.

Bake at 375°F for 12-14 minutes. Let cool for 2-3 minutes before removing rolls from baking sheet. Serve warm.

NOTE: Some of the melted marshmallow may leak during baking, but the roll should still form a hollow tomb. Pinch seams tightly to reduce oozing.

Symbolism:
White marshmallow = body of Jesus (perfect)
Melted butter = oils used to anoint Jesus’ body
Cinnamon = spices used to anoint Jesus’ body
Crescent roll (well sealed) = sealed tomb
Hollow roll (after baking) = empty tomb after Christ’s resurrection

NoEmptyChairs.me

5 Comments

Filed under Breads, Desserts

Homemade Fortune Cookies and thoughts on Japanese Gaman

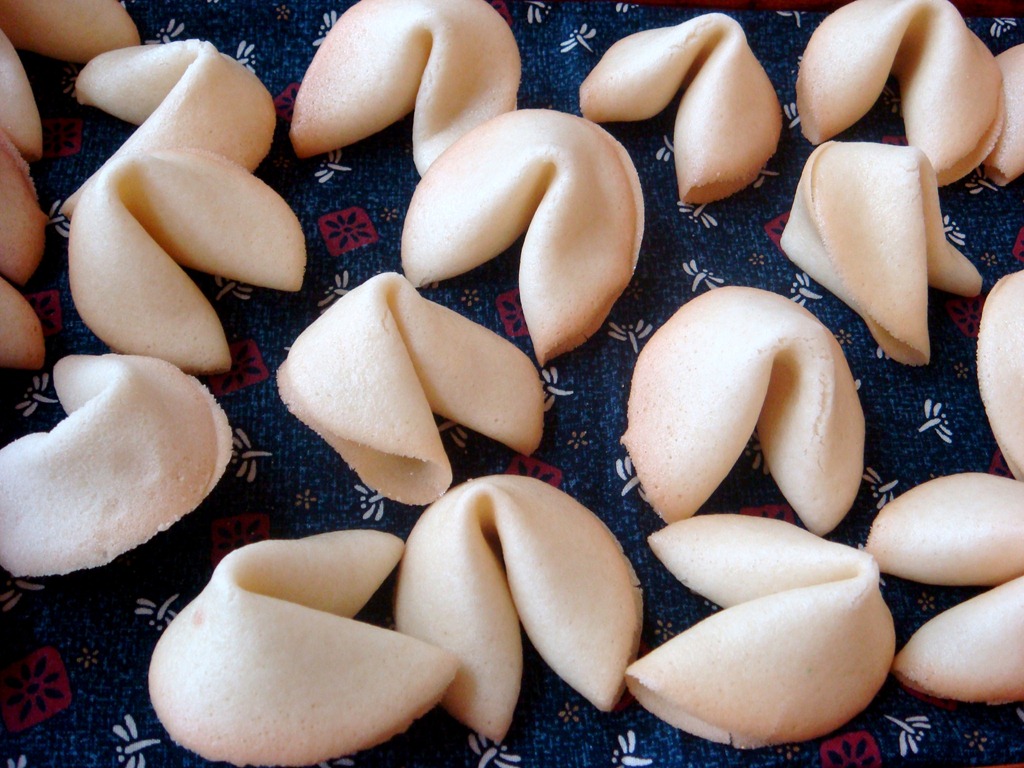
Fortune Cookies 1

As we approach Chinese New Year which begins on  February 10,  I want to share a recipe for homemade fortune cookies and also my favorite fortune (from a cookie) ever.

A few years ago  I was serving in a responsibility at church that most of the time filled me with love and gratitude, but also involved a heavy time commitment and occasionally left me feeling heart-sick about things that I could not fix.

After one such day, Brian and I went to dinner with some good friends. After the meal, the traditional fortune cookies were served. I received the most timely fortune. It is the only one that I have actually held onto and occasionally reread.

Fortune 2

I know this doesn’t sound like an especially cheery sentiment, but it described exactly how I was feeling at the time. It was also a wonderful nostalgic reminder of the time we spent living in Japan. My Japanese is extremely limited, but one of the concepts that fascinated me there was the concept of uncomplaining endurance or perseverance, regardless of circumstance. From a religious perspective, we might call this “enduring to the end.” The Japanese have not just one word for this, but a vocabulary that covers an entire spectrum of levels of endurance and different situations which might require endurance.

The word “ganbatte”, on the low end of the spectrum might be called out to someone who has just one lap to go in a race or is about to take a hard test. It implies both an encouragement to keep going or work hard and also an admonition to do your best. It implies as well an unspoken wish of good luck in your endeavor.

At the other end of the spectrum you have “gaman”, which implies a self-sacrificing patience, endurance, and perseverance through extremely difficult and often prolonged circumstances. It is a charge to endure with grace and dignity. “Work on in despair” is not meant to be a negative concept, but a positive character trait to develop that will bless both you and society at large.

So, as you make these cookies and the edges burn OR you wait too long to fold them and they harden, OR you make 600 of them for a Chinese New Year party and while you are changing your kids break open every single one to read the funny fortunes, all I can say is:

GANBATTE!

Fortune Cookies 2

Making Fortune Cookies:

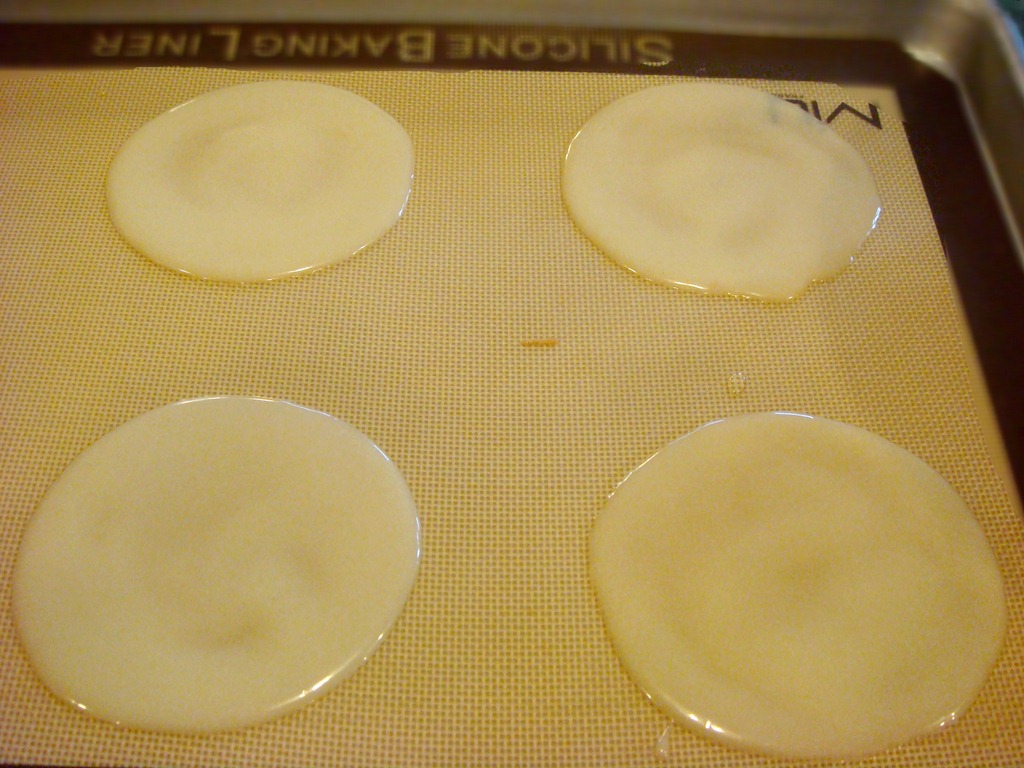
Fortune cookies are made from a thin egg white based batter. You will need to line your baking sheets with a silicone liner or parchment paper. Spread batter in 3-4” circles on your baking sheets. I can get 6 on my baking sheet. The cookies will harden quickly after removing them from the oven. Start with just a couple of cookies on your baking sheet until you get the hang of folding them quickly.

Fortune Cookies 5

The cookies are done when the dough is dry, but not brown. Don’t be discouraged if you ruin a cookie or two trying to get the exact time right (no two ovens are exactly the same).

Fortune Cookies 3

To fold: While the cookies are still hot from the oven, flip a cookie over and place a fortune in the center of the cookie. Gently fold cookie in half (do not flatten center crease; just make the edges meet). Using a mug or drinking glass, fold the cookie in half again over the edge of the mug. Transfer to a muffin tin to keep cookie from unfolding while it completely cools.

Fortune Cookies 4

Cookies should be eaten the same day, or stored in an airtight container. They will quickly become soft in a humid climate. Making them in the winter here in dry western PA, they will keep for several days without becoming soft.

You can write your own fortunes, or here are some links for pre-written fortunes:

Traditional Fortunes:
FortuneCookieMessage.com
Fortunecookies.co.nz
KCFortuneCookieFactory.com
BreakTheCookie.com
ChineseFortuneCookie.com

Funny Fortunes:
YourDictionary.com
MentalFloss.com
SayingsPlus.com

For Kids:
DAPatchy.com/Kidscook
Fortunecookies.co.nz

RECIPE:

Homemade Fortune Cookies

Fortune Cookies 1

1 cup flour
1 cup sugar
1 Tbs cornstarch
½ tsp salt
4 egg whites
1/3 cup oil
2 Tbs water
1 ½ tsp orange or almond extract
1 tsp vanilla extract
Fortunes cut into strips about 3 ½” long by ½” wide

Preheat oven to 300°F. Line baking sheets with silicone mats or parchment paper.

Use a whisk to mix flour, cornstarch, salt, and sugar in a small bowl.

In a separate bowl, use the whisk to lightly beat the egg whites, oil, water, vanilla, and orange or almond extract until frothy.

Stir the flour into the egg white mixture and mix until you have a smooth batter. The batter will be thin, with the consistency of a sticky pancake batter and not stiff like a normal cookie dough.

Place one tablespoon of batter onto the cookie sheet. Using the back of a spoon, spread batter in a circular motion to make a circle about 3-4 inches in diameter.  Place 4-6 cookies on a baking sheet (start with fewer cookies until you get the hang of folding quickly). The batter should be very thin on the baking sheet. If it’s too thick the cookies won’t fold without breaking.

Bake for 11-14 minutes, or until the outer edge of each cookie barely begins to brown.

TO FOLD: Immediately after  removing baking sheet from the oven, working very quickly, remove a cookie with a thin metal spatula and flip it over onto a clean plate or mat. Place a fortune in the middle of the cookie (let one end slightly extend beyond edge of cookie, if desired). Fold the cookie in half, but do not flatten center crease; just make the edges meet gently. Fold cookie in half again by gently pulling the edges downward over the rim of a mug or glass. Place the finished cookie in the cup of a muffin tin so that it keeps its shape while it cools. Continue with the rest of the cookies.

Let cookies sit, uncovered, for 1-2 hours (so that they harden completely). Cookies are best eaten the same day, especially if weather is humid. In drier climates, cookies will keep well for several days.

Yield: 36-40 cookies

NoEmptyChairs.me

3 Comments

Filed under Cookies, Desserts, Uncategorized

Stained Glass Valentine Cookies

Stained Glass Valentine Cookies 1

Here is a fun Valentine treat to make with kids and is easier than your traditional frosted sugar cookies. All you need is a good sugar cookie recipe, a package of Jolly Rancher hard candies and two different sized heart cookie cutters.

To begin, you will need to line your baking sheets with silicon mats or parchment paper. Non-stick foil might work as well, but I haven’t tried that yet.

Prepare your dough and cut out large hearts. I usually like to make nice thick sugar cookies, but these need to be about 1/8” thick, or the center “window” will be too thin compared to the cookie. Place cookies on baking sheet and then cut out the smaller heart in the center of each cookie. Cutting out the smaller heart after the cookie is on the baking sheet helps the cookie dough retain its shape. It is harder to move cookie dough with the center cut out. You can bake the little hearts along with the big ones, or reroll them with your dough scraps.

Place one Jolly Rancher candy (whole) in the center of each cookie. If your openings are smaller than the candies, you can crush the candies first, but I found that there are fewer bubbles in your windows if you leave the candies whole. And it is so much easier than crushing hard candy!

Stained Glass Valentine Cookies 3

While the cookies bake, the candies will melt and fill in the centers.

After baking, let the cookies completely cool and the candy window centers harden before removing from baking sheet.

Store covered between layers of waxed paper or parchment paper. The candy centers will stick together if they touch.

Stained Glass Valentine Cookies 2

You could also make these into cookie pops by inserting lollypop sticks into the bottoms of each heart before baking.

It would also be fun to make some for other holidays using different cookie cutters, or a linzer cookie cutter (crush candies first if using a small linzer cutter). Or a gingerbread man with a tiny cut-out heart.

RECIPE:

Stained Glass Valentine Cookies

Stained Glass Valentine Cookies 1

3 cups sugar
1 cup butter, softened
1 cup sour cream
2 tsp vanilla
3 eggs
1 tsp baking soda
1 tsp salt
About 7 – 7 ½ cups flour
1 package Jolly Rancher candies
2 heart cookie cutters (one large and one small)

In a large mixing bowl, beat sugar, butter, sour cream and vanilla until light and fluffy. Beat in eggs.  Mix in baking soda, salt and enough flour to make a moderately stiff dough (Start with 7 cups and add more if needed).

Chill for 20 minutes to 1 hour, if necessary, for easier handling. Roll out dough to about 1/8” and cut with large heart cookie cutter. Cut out a smaller heart inside of each cookie. You can bake these plain smaller hearts, or re-roll them with the dough scraps.

Place hearts on a baking sheet lined with a silicon baking mat or parchment paper. Place one whole Jolly Rancher candy in the center of each heart.

Bake at 375°F for 9 -10 minutes, or until candies have melted; cookies should not be browned on the edges.  They should look white when done. Cool completely on the baking sheet. When candy centers are completely cool and hardened, remove cookies to a sheet of parchment paper.

Store covered between layers of waxed paper or parchment paper. The candy centers will stick together if they touch.

Makes 5-6 dozen, depending on the size of the cookie cutter

NoEmptyChairs.me

16 Comments

Filed under Cookies, Desserts