Ginger Beef Stir-Fry

Ginger Beef 2

We eat a lot of stir-fries in our house. They are a fairly quick meal to get on the table, and they are one thing that I don’t hear complaints about from anyone. This Ginger Beef is not a saucy stir-fry, but is very flavorful. The beef marinates for about half an hour at room temperature and then is cooked in small batches over very high heat. Fresh ginger, cut into thin matchstick shapes, green onions and sliced serrano chiles (hot, but not overpowering) provide additional flavor. Because this dish is not as chock-full of vegetable as some other stir-fries, I often serve it with Szechuan green beans (recipe coming soon!).

RECIPE:

Ginger Beef Stir-Fry

Ginger Beef 2

Marinade
5 Tbs soy sauce
2 Tbs unseasoned rice vinegar
1 Tbs honey (or 5 drops liquid stevia)
1 tsp grated fresh ginger
½ tsp red chile pepper flakes
½ tsp ground cumin

Stir-Fry
1 ½ lb flank steak or top sirloin steak
2 Tbs oil, divided
2-3 hot chiles, preferably red serranos, sliced
2 cloves garlic, minced
1 ½” piece of fresh ginger, peeled and cut into thin matchstick shapes
1 bunch (about 5-6) green onions, cut diagonally into 1” pieces
1 Tbs sesame oil

Mix together all of the marinade ingredients.

Thinly slice the steak (partially freezing the steak will make this easier) and place slices in a Ziploc bag. Pour marinade over the sliced steak. Let sit at room temperature for 30 minutes. This can also be prepared ahead of time and stored in the refrigerator. Remove beef from fridge 30 minutes before cooking.

Place 1 Tbs oil in a wok or  large skillet and heat over high heat until very hot. Place a small amount of the beef (about ½ cup at a time) in the hot pan. Sauté beef slices over high heat until juices in pan almost completely evaporate. Transfer cooked beef to serving bowl. Repeat with remaining beef.

Add remaining 1 Tbs oil to the pan and sauté the sliced chiles, minced garlic and ginger matchsticks for 1 minute. Add the beef back to the pan with the sliced green onions. Stir in the sesame oil and cook for 1 minute. Serve immediately over steamed rice.

(recipe adapted from Simply Recipes)

NoEmptyChairs.me

1 Comment

Filed under Main Dishes

Homemade Taco Seasoning Mix

Taco Seasoning 4

Making your own taco seasoning mix is an easy way to cut chemicals and preservatives out of your food and save money at the same time. And it tastes so much better than any packaged mix. Make a large batch and then store in an airtight container. Use about 2 Tbs of the mix for a pound of ground beef to make regular tacos. You can adjust the amounts of spicier chilies to your family’s taste. Penzey’s (online or in person) is a great source for quality bulk spices.

Use this for more than just ground beef tacos. Try replacing spices in the following recipes with this taco seasoning mix:

Layered Chicken Taco Salad Bowls
Taco Cornbread Pie
Chicken and Cheese Enchiladas
Creamy Chicken Enchiladas Verdes
Baked Chicken Taquitos
Chicken and Black Bean Chili
Hearty Beef Chili
Fajitas
Marinades for grilled steak or chicken

RECIPE:

Homemade Taco Seasoning Mix

  • Servings: Makes about 2 ½ cups
  • Print

Taco Seasoning 4

1 ½ cups chili powder
4 Tbs paprika (Spanish smoked or regular)
2 Tbs kosher salt (coarse grain; use less for regular table salt)
2 Tbs black pepper
2 Tbs garlic powder
2 Tbs onion powder (not onion salt)
2 Tbs ground cumin
2 Tbs dried oregano
1 Tbs Ancho chili pepper
1 Tbs crushed red pepper flakes
1 Tbs ground cayenne pepper

Mix all ingredients and store at room temperature in an airtight container. Use about 2 Tbs of seasoning per pound of meat. Makes about 2 ½ cups.

Note: Adjust amount of crushed red pepper flakes and cayenne pepper to make milder or spicier

NoEmptyChairs.me

1 Comment

Filed under Condiments/Sauces, Main Dishes, Tips and Tutorials

Pumpkin Zucchini Bread

Pumpkin Zucchini Bread

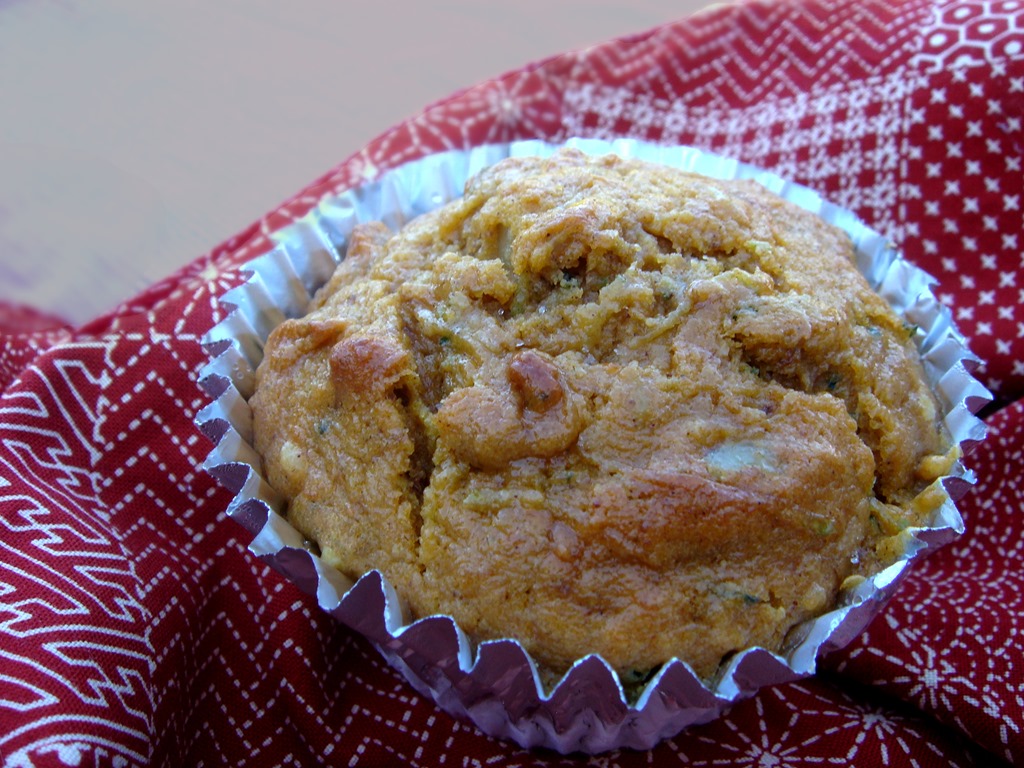
Pumpkin Zucchini Bread: where summer and autumn collide in a great tasting snack. This is a great way to use an over-abundance of zucchini from your garden (or local farmers’ market) and incorporate the great fall flavors of pumpkin and spices like cinnamon, nutmeg and cardamom.

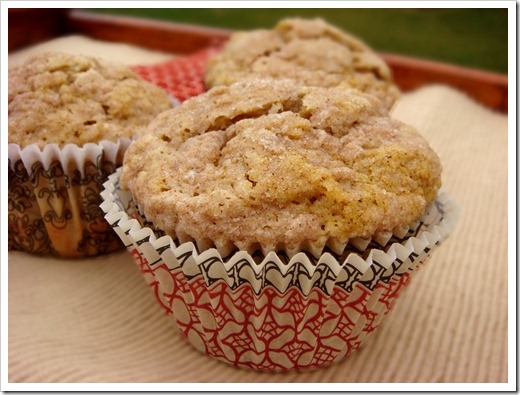
You can also make these in muffin form for a delicious on-the-go breakfast or lunch box treat. There is no easier way to get your kids to eat their veges. Chocolate chips are optional, but always appreciated (unless you are a certain son of mine).

Pumpkin Zucchini Muffin

RECIPE:

Pumpkin Zucchini Bread

  • Servings: Makes 2 loaves
  • Print

Pumpkin Zucchini Bread

3 eggs, lightly beaten
2 cups sugar
1 ½ cups canned pumpkin
2 cups shredded zucchini
½ cup butter, melted
1 Tbs vanilla
3 cups flour
1 tsp baking soda
½ tsp baking powder
1 tsp salt
1 tsp ground cinnamon
½ tsp ground cardamom
¼ tsp ground nutmeg (or cloves)
1 1/2 cups chocolate chips, optional
1 cup chopped walnuts or pecans

Preheat oven to 350°F. Grease and flour 2 medium loaf pans.

Combine eggs and sugar in a mixing bowl. Add pumpkin, zucchini, melted butter and vanilla and mix well. In a separate bowl, combine dry ingredients. Gradually add to pumpkin mixture and stir until just incorporated. Stir in chocolate chips and nuts. Pour into 2 loaf pans.

Bake at 350°F for 60 minutes, or until a toothpick comes out clean. Cool in pans for 10 minutes. Remove and cool on a wire rack.

FOR MUFFINS: Line muffin pans with paper liners (or grease pan). Bake at 375°F for 15-18 minutes.

NoEmptyChairs.me

Leave a comment

Filed under Breads, Breakfast/Brunch, Desserts

Softball (or Baseball) Cookies

Softball Cookies 1

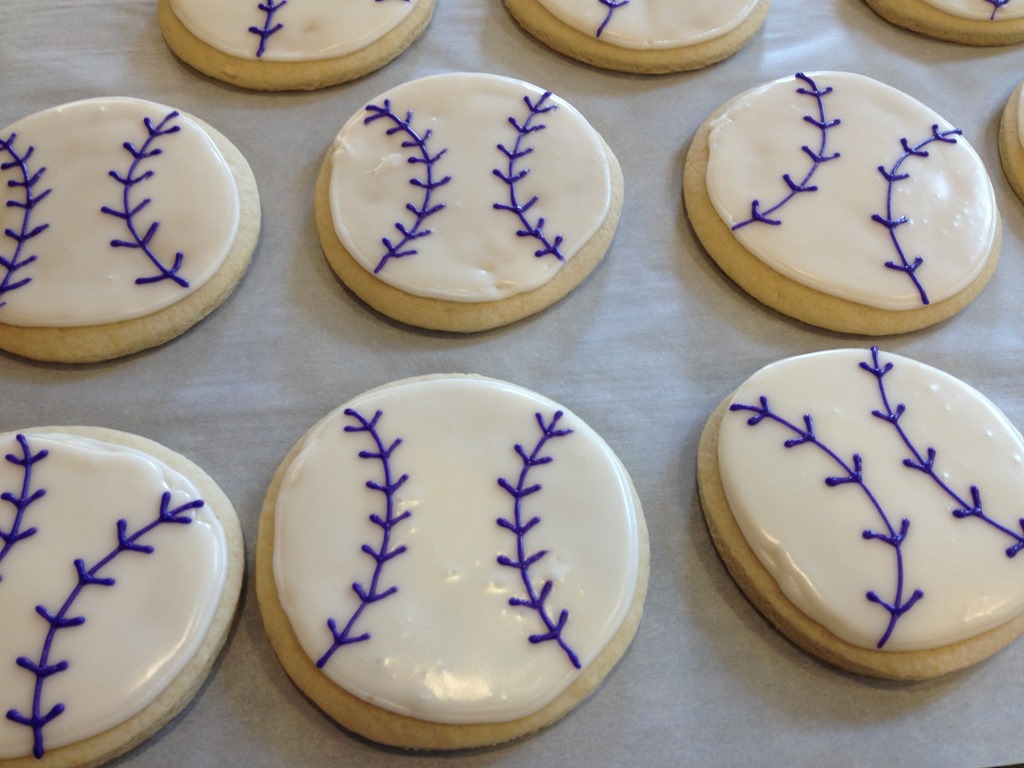
We made it to the end of another girls’ softball season! Last week was our end-of-season party and awards night. Since I had a couple-dozen plain round cookies left from the graduation party Fruit Pizza Cookies (stored in the freezer), I made these softball cookies in our team color (Go Purple Bandits!) for the girls to eat after their pizza.

Softball Cookies 6

I used a simple Glacé Icing to frost these (just powdered sugar, milk, corn syrup, vanilla or almond extract and gel food coloring) that you mix with a whisk. You could also use a Royal Icing. Click HERE to see soccer ball cookies made with Royal Icing. There are also some more detailed pictures there of piping and flooding sugar cookies.

To make the baseball/softball cookies:

Using  thick white piping-thickness icing, pipe a circle around the edge of each cookie. Using  thinner flooding-thickness white icing, fill the center of each cookie with white icing. Use a toothpick to move icing around to completely fill center. Use toothpick to pop any bubbles. Let cookies set for about 30 minutes before piping on colored lines (ball seams).

Using thick colored piping-thickness icing (I used purple, but you could use red for a traditional baseball), pipe two arcs at the edges of the cookies. Pipe “v’s” to complete seams. Let icing harden at least 24 hours before stacking cookies.

In humid weather it will take even longer for the icing to harden. After 36 hours, mine were still slightly soft. Royal icing dries harder and faster than glacé icing, but I didn’t have any meringue powder and I like the taste of the glacé icing better, especially with almond extract.

Softball Cookies 3

Little J in her Bandits uniform. She was voted Best Hitter by her teammates.

Softball Cookies 2

Little J had a great coach this year that really focused on fundamentals, and her game improved a lot. Her favorite thing to do was to slide. Whether the ball was anywhere near her or not. Here she is sliding into third:

Softball Cookies 4

She tried this in a game once wearing shorts (“It’s too hot to wear pants, Mom!”). After coming home with a softball-sized scrape on the edge of her bum, I haven’t had to nag anymore about the wisdom of pants.

RECIPE:

Sugar Cookies with Glacé Icing

  • Servings: About 5 dozen using a 3-inch round cookie cutter
  • Print

Softball Cookies 5

Sugar Cookies

3 cups sugar
1 cup butter, softened
1 cup sour cream
2 tsp vanilla
3 eggs
About 7 – 7 ½ cups flour
1 tsp baking soda
1 tsp salt

Beat sugar, butter, sour cream and vanilla until fluffy. Beat in eggs. Add soda, salt and enough flour to make a moderately stiff dough (start with 7 cups and add additional flour if needed). Chill dough for 20 minutes to 1 hour for easier handling. Roll out dough to desired thickness (I like these fairly thick) and cut with cookie cutter.

Bake at 375°F for 9-11 minutes; if they brown, it’s been too long.  They should still look white when done.

Glacé Icing
——–
(from Our Best Bites)
1lb powdered sugar (about 4 cups) + additional for thickening piping icing
¼ cup+ 2 Tbs  whole milk or cream
¼ cup + 2 Tbs light corn syrup
1 tsp almond or vanilla extract
Gel food coloring

With a whisk, combine sugar, milk or cream, corn syrup and almond or vanilla extract until smooth. NOTE: If you are using cream, you will need 1-2 Tbs more. Using cream does help the icing look whiter. Add food coloring for desired colors.

You will use this same recipe for both glazing and piping. The way it is right now is the consistency you want for glazing. It’s smooth and thin. It easily runs off of a whisk in a thin drizzle.

To prepare the icing for piping, add more powdered sugar until icing is thick enough to hold its shape.

To make the baseball/softball cookies:
Using  thick white piping-thickness icing, pipe a circle around the edge of each cookie. Using  thinner flooding-thickness white icing, fill the center of each cookie with white icing. Use a toothpick to move icing around to completely fill center. Use toothpick to pop any bubbles. Let cookies set for about 30 minutes before piping colored lines (ball seams).

Using thick colored piping-thickness icing (I used purple because our team was the Purple Bandits, but you could use red for a traditional baseball), pipe two arcs at the edges of the cookies. Pipe “v’s” to complete seams. Let icing harden at least 24 hours before stacking cookies. In humid weather it will take even longer for the icing to harden. After 36 hours, mine were still slightly soft.

NoEmptyChairs.me
5 Comments

Filed under Cookies, Desserts, Uncategorized

Graduation Party: Individual Fruit Pizza Cookies

Fruit Pizza Cookies 8

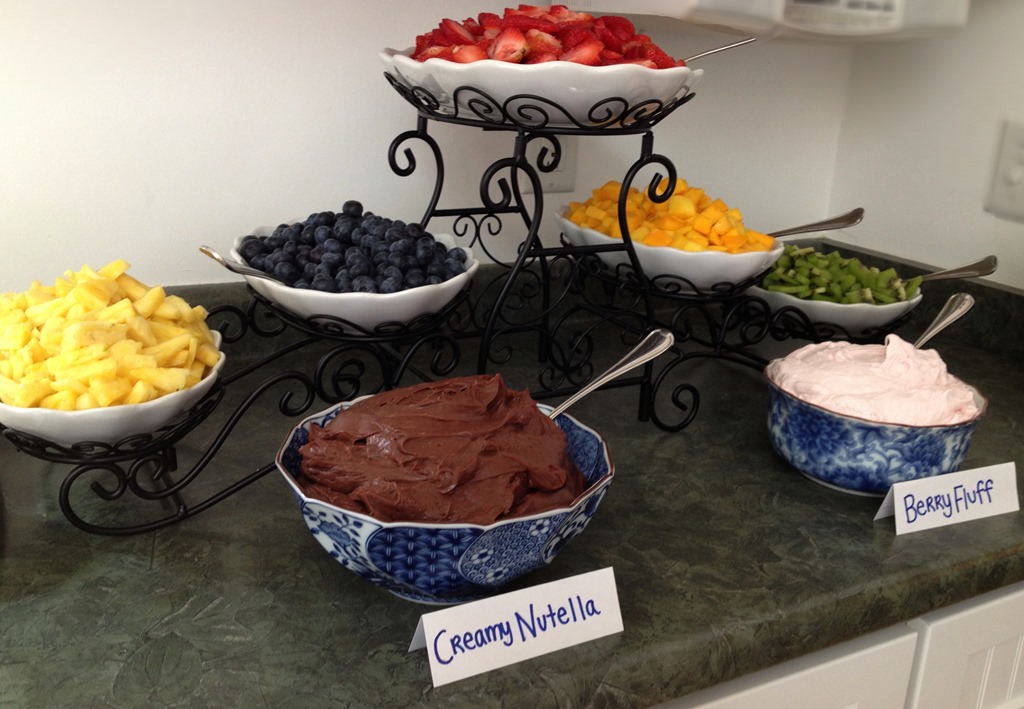
At a graduation party for Big A and her best friend M we had a dessert bar where guests could make their own mini fruit pizzas using sugar cookies, fruit dips and chopped fruit.

I made plain round sugar cookies (about 4” in diameter) to use as a base for the fruit pizzas.

Fruit Pizza Cookies 4

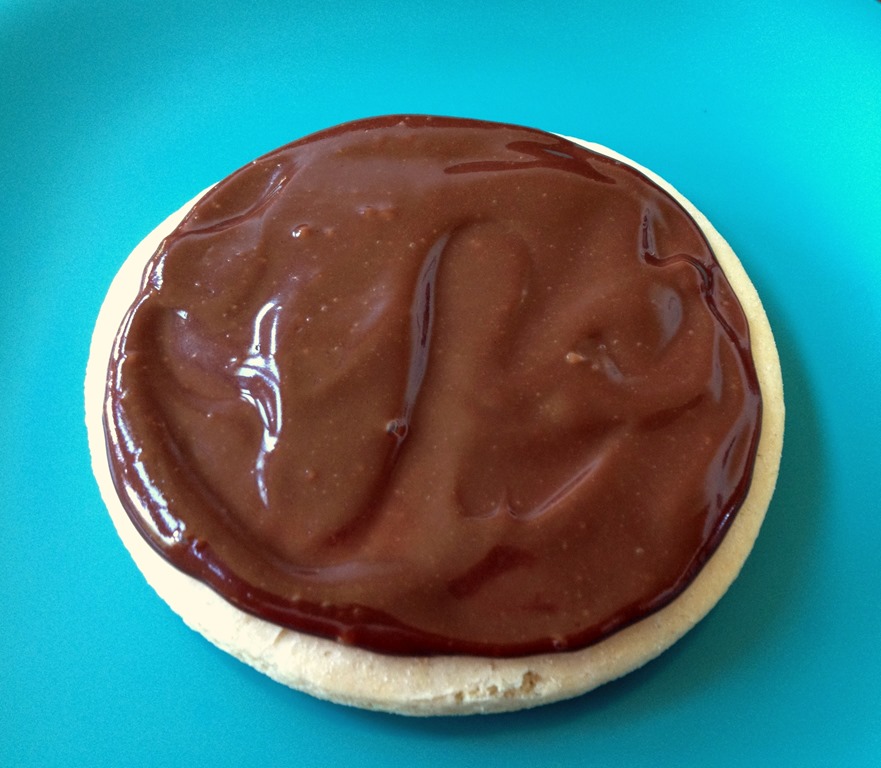
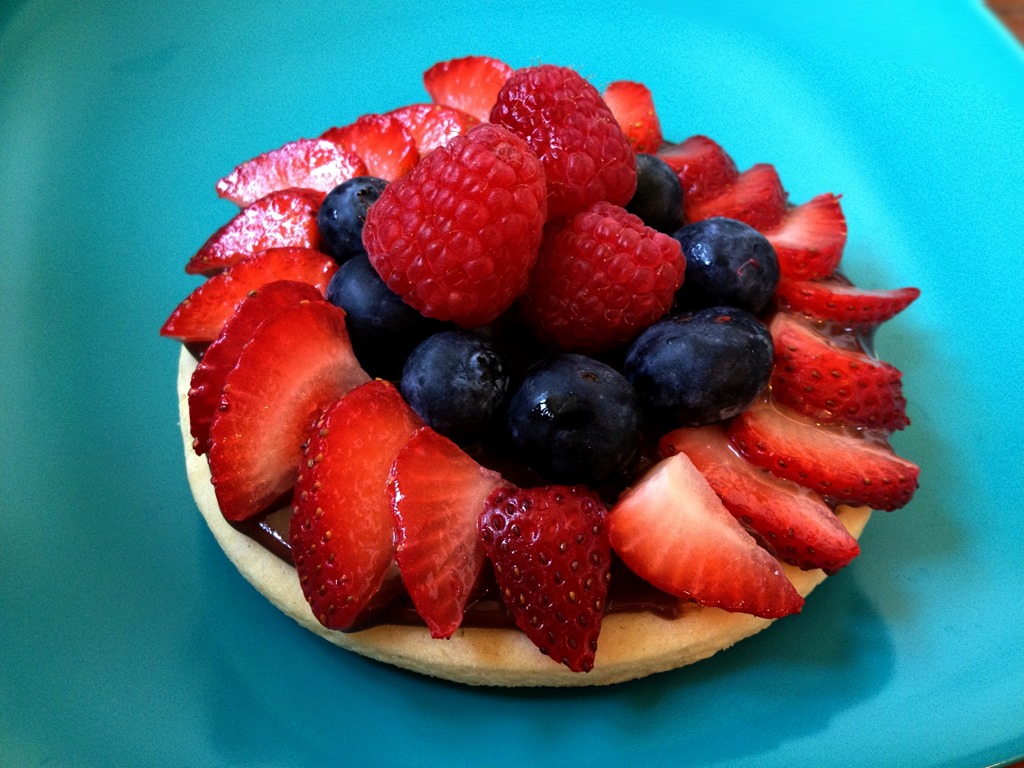
There were two fruit dips that we used as frosting for the cookies, a Berry Fluff Dip (which I didn’t get a good picture of) and a Creamy Nutella Dip. Using a fruit dip instead of a regular frosting makes for a less-sweet base for the fruit, which I prefer.

Fruit Pizza Cookies 1

The Nutella fruit dip needs to be stored in the refrigerator, but should be served at room temperature. The dip will get very thick in the fridge, almost fudge consistency. Fudge. Nutella fudge. That is something to ponder for next Christmas.

This “fruit dip” also makes a great frosting for sugar cookies or brownies:

Fruit Pizza Cookies 7

To top frosted cookies, there was an array of chopped fruit. We used fresh pineapple, blueberries, strawberries, mango and kiwi.

Fruit Pizza Cookies 3

The graduates and their friends loved it!

Fruit Pizza Cookies 5

Congratulations Class of 2013. We are so proud of you Big A!

Fruit Pizza Cookies 2

RECIPES:

Individual Fruit Pizza Cookies

  • Servings: About 5 dozen using a 3-inch round cookie cutter
  • Print

Fruit Pizza Cookies 8

Sugar Cookies
3 cups sugar
1 cup butter, softened
1 cup sour cream
2 tsp vanilla
3 eggs
About 7 – 7 ½ cups flour
1 tsp baking soda
1 tsp salt

Beat sugar, butter, sour cream and vanilla until fluffy. Beat in eggs. Add soda, salt and enough flour to make a moderately stiff dough (start with 7 cups and add additional flour if needed). Chill dough for 20 minutes to 1 hour for easier handling. Roll out dough to desired thickness (I like these fairly thick) and cut with cookie cutter.

Bake at 375°F for 9-11 minutes; if they brown, it’s been too long.  They should still look white when done.

Creamy Nutella Fruit Dip
8 oz. cream cheese
1 cup Nutella
½ cup heavy cream

Warm cream cheese and Nutella slightly (about 30 seconds in the microwave) and then stir together with the cream until well mixed. Serve at room temperature. Store in the refrigerator.

Berry Fluff Fruit Dip
1 container marshmallow fluff
1 container Cool Whip
1 container strawberry flavored cream cheese, softened
½ cup sweetened raspberry (or strawberry) puree or seedless jam

Mix all ingredients until well blended.

To make individual fruit pizzas:
Cut out sugar cookie dough with a 3-4” round cookie cutter and bake. Prepare dessert bar with sugar cookies, fruit dips and chopped fruit (choose from strawberries, raspberries, blueberries, pineapple, kiwi, mango, nectarines, peaches, grapes). Guests can assemble their own cookie fruit pizza.

Creamy Nutella Fruit Dip

  • Servings: Makes 2 ½ cups
  • Print

Fruit Pizza Cookies 7

8 oz. cream cheese
1 cup Nutella
½ cup heavy cream

Warm cream cheese and Nutella slightly (about 30 seconds in the microwave) and then stir together with the cream until well mixed. Serve at room temperature. Store in the refrigerator.

Serve as a fruit dip or as a frosting for cookies or brownies.

NoEmptyChairs.me

Berry Fluff Fruit Dip

  • Servings: Makes about 4 cups
  • Print

Berry Fluff Fruit Dip
1 container marshmallow fluff
1 container Cool Whip
1 container strawberry flavored cream cheese, softened
½ cup sweetened raspberry (or strawberry) puree or seedless jam

Mix all ingredients until well blended. Serve as a fruit dip or as a frosting for cookies.

NoEmptyChairs.me

1 Comment

Filed under Cookies, Desserts, Uncategorized

Croquembouche for a Sweet Sixteen

Croquembouche 2

The end of the school year and all of the activities that come with it have left me behind in writing about some of the treats we have been enjoying here. So today I am going back a few weeks to the Sweet Sixteen celebration we had for our Middle K. She didn’t want a party, but was excited to come home with a driver’s learning permit. Three drivers under the age of 21: don’t even ask about our insurance rates!

Croquembouche 1

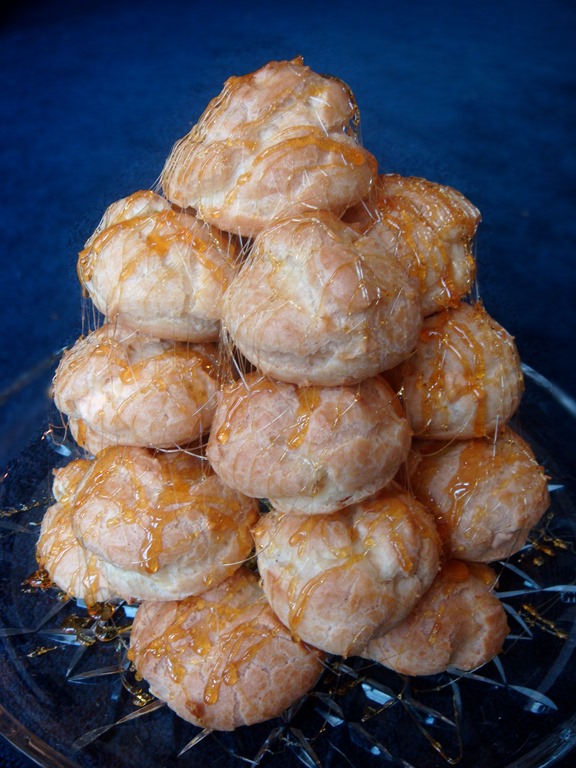
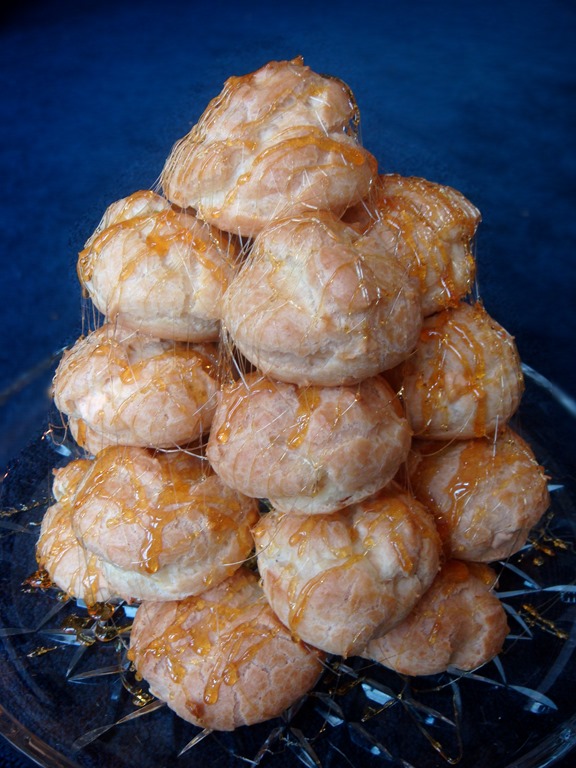
Instead of a traditional birthday cake, Middle K wanted a Croquembouche: a cream puff tower drizzled with burnt-sugar caramel that sticks the cream puffs together. We filled them with a simple butterscotch mousse made from packaged butterscotch pudding whipped with half milk/half cream.

Many croquembouche are very tall (2-3 feet tall) and are served as wedding cakes. We were not quite as ambitious with ours, but it certainly made for a fun birthday cake.

Croquembouche 3

Just-Baked Unfilled Cream Puffs

RECIPES:

Croquembouche

Croquembouche 2

Cream Puffs
½ cup butter
1 cup water
1/8 tsp salt
1 cup flour
4 eggs

Filling: Pudding, whipped cream, custard or mousse

In a medium saucepan, combine butter, water and salt. Bring to a boil. Add flour all at once, stirring vigorously. Cook and stir until mixture forms a ball that doesn’t separate. Remove from heat. Cool 10 minutes. Add eggs, one at a time, beating with a wooden spoon after each addition until smooth.

Preheat oven to 400°F. Drop batter by heaping tablespoons, 3 inches apart, onto a greased baking sheet. Bake for 30-35 minutes or until golden. Cool completely on a wire rack. Fill with desired filling (SEE ASSEMBLY TIP BELOW).

Burnt Caramel
2 cups sugar
½ cup water

Place sugar and water in a saucepan and stir to combine. Cook over medium heat until sugar turns light brown, about 15–20 minutes. Remove from heat. (If caramel begins to harden in the pan before you are done, place pan over low heat until re-melted)

To Assemble Croquembouche:

Prepare cream puffs and desired filling (whipped cream, pudding, custard, mousse). Place filling in a pastry bag with a long filling tip. Pierce the cream puffs (do not cut cream puffs in half) with the pastry tip until tip is about 1 cm into the cream puff. Squeeze pastry bag to fill cream puff.

Place one layer of cream puffs in a circle on a serving plate. Drizzle the tops of the cream puffs with a small amount of the burnt  caramel. Immediately place a smaller circle of cream puffs on top of the hot caramel (work quickly before the caramel hardens). Repeat with increasingly smaller layers of cream puffs topped with caramel. Once your tower is assembled, use a spoon or fork to drizzle hot caramel in strands around the outside of the tower. Serve same day as assembling.

NoEmptyChairs.me
Cream Puffs

Croquembouche 3

½ cup butter
1 cup water
1/8 tsp salt
1 cup flour
4 eggs
Filling: Pudding, whipped cream, custard, or mousse
Optional glaze: melted chocolate to drizzle over top

In a medium saucepan, combine butter, water and salt. Bring to a boil. Add flour all at once, stirring vigorously. Cook and stir until mixture forms a ball that doesn’t separate. Remove from heat. Cool 10 minutes. Add eggs, one at a time, beating with a wooden spoon after each addition until smooth.

Preheat oven to 400°F. Drop batter by heaping tablespoons, 3 inches apart, onto a greased baking sheet. Bake for 30-35 minutes or until golden. Cool completely on a wire rack.

Cut cream puffs in half. Scoop out and discard any soft dough inside. Spoon in desired filling and replace top. Optional: drizzle tops of cream puffs with melted chocolate. Serve immediately after filling.

To make Eclairs: Prepare batter as above. Spoon into a pastry tube fitted with a Number 10 or larger tip. Slowly pipe strips of batter onto a greased baking sheet, making each strip about 4” long. Bake as above. Fill and frost with chocolate glaze.

NoEmptyChairs.me
1 Comment

Filed under Desserts