Tag Archives: recipe

Banana Chocolate Chip Muffins

112511 012-1

Looking for a banana muffin that is moist and full of banana flavor? This recipe (slightly adapted from Cook’s Illustrated) is your answer. It packs FIVE bananas into a single loaf of bread (or batch of 15-18 muffins).

I like bananas, but only if they are on the slightly green side. Once they are completely yellow or start to brown, I won’t touch them. I can push them on the kids for a little longer, but none of us are squishy banana fans. So I regularly have one or two bananas from a bunch that go “bad” before we eat them. So I peel and throw these overripe bananas into my freezer in Ziploc bags. Eventually those bags get to the bursting point, and I know I need to do some banana baking.

This recipe is one of our favorites. The bananas are cooked (in the microwave) until they are liquidy, and then the liquid is reduced to concentrate the banana flavor. You can add chocolate chips and/or chopped nuts to your liking.
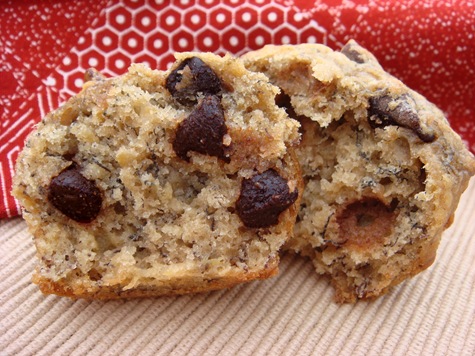
112511 022-1

The muffins also freeze nicely if you happen to have A LOT of bananas to use up and want to make multiple batches!

RECIPE:

Banana Chocolate Chip Muffins (or Bread)
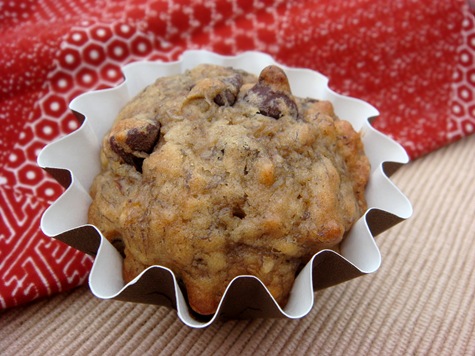
112511 012-1

1 ¾ cups flour
1 tsp baking soda
½ tsp salt
5 large very ripe bananas
½ cup (1 stick) unsalted butter, melted and cooled slightly
2 large eggs
¾ cup light brown sugar
1 tsp vanilla extract
1 cup chocolate chips
½ cup walnuts (optional)

Preheat oven to 350°F.  Line muffin tins with 15-18 paper liners, or grease muffin tins.

In a large bowl, whisk together flour, baking soda, and salt.

Place bananas in a microwave-safe bowl; cover with waxed paper. Microwave on high power until bananas are soft and have released liquid, about 5 minutes. Pour bananas into a strainer placed over a medium saucepan. Allow to drain, stirring occasionally, for 15 minutes. Set banana pulp aside.

Place the saucepan with the banana liquid over medium-high heat and cook until reduced to ¼ cup, about 5 minutes. Remove pan from heat and stir banana pulp into the reduced liquid. Mash with a potato masher or a fork until fairly smooth. Whisk in butter, eggs, brown sugar, and vanilla.

Pour banana mixture into flour mixture and stir until just combined. Gently fold in chocolate chips and walnuts, if using.

Pour batter into the prepared muffin tins. Bake for 15 minutes, or until toothpick comes out clean.

Makes 15-18 muffins

FOR BANANA BREAD: Spray a medium loaf pan with nonstick cooking spray. Pour batter into pan. Bake at 350°F for 55 to 70 minutes, or until toothpick comes out clean. Cool bread in pan on wire rack 15 minutes, then remove loaf from pan and continue to cool on a wire rack.

adapted from Cook’s Illustrated

NoEmptyChairs.me

Leave a comment

Filed under Breads, Breakfast/Brunch

Dinner in under 30 minutes: Southwest Chicken and Zucchini Sauté

071311 004-1

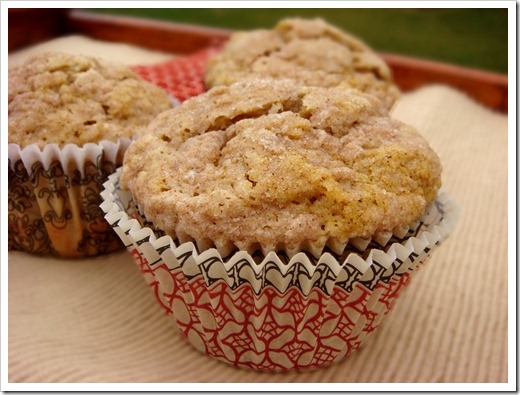
Sometimes we all need a quick fix dinner that can be on the table in under 30 minutes. But we still want something healthy and delicious. This sautéed chicken and zucchini meal satisfies our entire family: I love that it is quick and healthy, and everyone loves the taste.

Don’t have zucchini? Or have too many zucchini-haters? Use any other vegetable of choice: asparagus is very nice, or green beans. You can even throw in a bag of frozen vegetables if you are short on fresh ones.

071311 006-1

Serve on its own, or over cooked rice or pasta. With or without cheese.

Recipe:

Southwest Chicken and Zucchini Sauté

071311 004-1

2 Tbs olive oil
4 chicken breasts (about 1 lb), diced
1 onion, chopped
1 tsp chili powder
½ tsp ground cumin
½ tsp salt
2 cups sliced zucchini (about 2 medium zucchini)
1 can yellow corn (or 2 ears fresh corn)
1 can chili seasoned tomatoes
¼ cup chopped fresh cilantro
1 cup shredded sharp cheddar cheese, for garnish

Heat oil in a large skillet. Sauté chicken and onion until browned. Sprinkle with chili powder, cumin, and salt. Add zucchini to skillet and cook until chicken is cooked through and zucchini is crisp-tender. Stir in corn and tomatoes. Cook, uncovered, for 7-10 minutes. Stir in cilantro. Garnish with shredded cheese, if desired.

Serve alone, or over cooked rice or pasta.

NoEmptyChairs.me
4 Comments

Filed under Main Dishes

How To . . . Blanch Almonds

042611 093-1

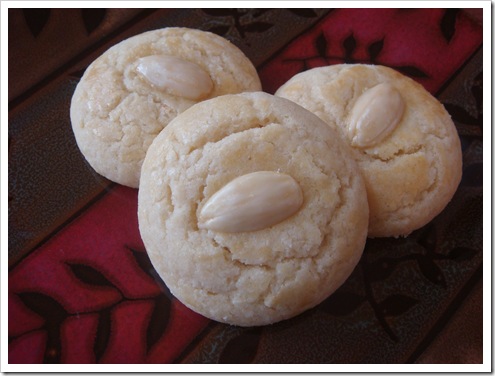
Blanched almonds are delicious in these Chinese Almond Cookies and are the basis for making almond flour. Blanched almonds sold in stores are extremely expensive, but you can easily make them at home. All you need is a bag of raw almonds.

Bring a saucepan of water to a boil. Remove from heat. Add raw almonds to the hot water. Let sit for 1 minute (not longer). Drain and pour into a bowl of ice cold water.

042611 002-1

Leave almonds in ice water only until they are cool, about one minute. Drain.

042611 007-1

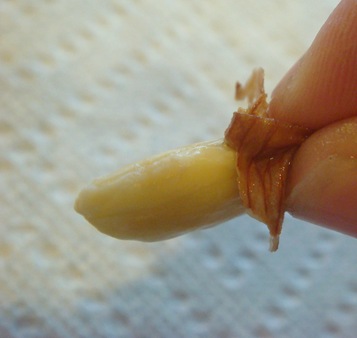
To remove the skins: pinch almonds between your thumb and index finger to slide the almond out of its skin.

042611 011-1

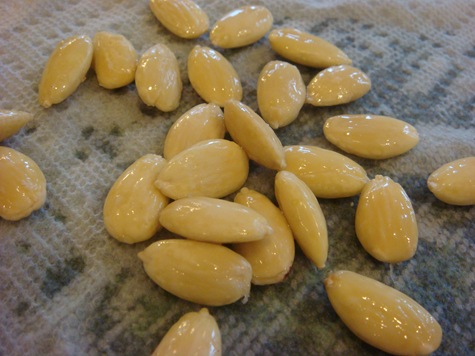
Pat dry. Allow to dry completely before using in recipes.

If you over-soak your almonds and they don’t dry properly: preheat oven to 200°F. Turn oven OFF. Place almonds on a baking sheet and put into the warm (but OFF) oven. Leave almonds in the oven for 15-20 minutes.

042611 028

To make almond flour from your blanched almonds: place completely dry blanched almonds in a blender or food processor and blend until almonds form fine meal.

042611 093-1

Blanched almonds are also great in cookies like these Chinese Almond Cookies.

Leave a comment

Filed under Cookies, Tips and Tutorials

Twelve Days of Christmas Cookies: Candy Cane Kisses Cookies

120511 002-2 DAY 12: Candy Cane Kisses Cookies

Fun little Christmas colored cookies topped with candy cane flavored Hershey’s Kisses. These are great for making with kids. They love rolling the dough balls in colored sugar and pressing the Kisses into the warm cookies. I did find that the white chocolate kisses tend to collapse into themselves (melt) faster than the regular chocolate kisses. If you like this, press the Kisses into the cookies immediately after removing the cookies from the oven. If you want the Kisses to hold their shape, wait about 3 minutes before pressing the Kisses into the cookies. Don’t wait until they are completely cool, however, or the Kisses won’t “stick”.

These cookies are best made very small; they should be just barely bigger than the Kisses (after baking).

—

RECIPE:

Candy Cane Kisses Cookies

  • Servings: 4 dozen small cookies
  • Print

120511 002-2

1 bag Hershey’s Candy Cane Kisses
½ cup butter, softened
1 cup granulated sugar
1 ½ teaspoons vanilla extract
1 egg
2 cups all purpose flour
¼ teaspoon salt
¼ teaspoon baking soda
2 tablespoons milk
Red and Green colored sugar (about 3 Tbs each)

Preheat over to 350°F. Remove wrappers from about 4 dozen Kisses.

Beat butter, sugar, vanilla, and egg in a large bowl until well blended. Stir together flour, baking soda, and salt; add alternatively with milk to butter mixture, beating until well blended.

Shape dough into small 1-inch balls. Roll in red and/or green colored sugar. Place on ungreased cookie sheet.

Bake 8 – 10 minutes or until cookies are barely set. Remove from oven; cool for 3 minutes on the baking sheet. Press candy piece into center of each cookie. Remove from cookie sheet to wire rack. Cool completely.

Yield: about 4 dozen very small cookies.

Recipe from Hershey’s

NoEmptyChairs.me

5 Comments

Filed under Cookies, Desserts

Twelve Days of Christmas Cookies: Chocolate Peppermint Cookies

120111 001-2 DAY 10: Chocolate Peppermint Cookies

These fun cookies are from Martha Stewart. If you dip them in dark chocolate, they taste a lot like Girl Scout Thin Mint Cookies.

Martha’s recipe is quite labor intensive, involving three refrigerator/freezer periods, dough rolling & cutting, dipping the cookies with a fork, and sifting the candy into similar sized pieces.

I simplified the process a lot when I made these. I shaped the dough into logs that I sliced into rounds, instead of rolling out the dough and then cutting them out with a round cookie cutter. I only chilled my dough once. I dipped the cookies with my fingers (coating just the top and sides, instead of the whole cookie), and I definitely did not sort my crushed candy canes into large and small pieces. Mine may not be as perfect as Martha’s, but that didn’t seem to make any difference to the kids eating them.

—

RECIPE:

Chocolate Peppermint Cookies

120111 001-2

2 cups flour
1 cup unsweetened Dutch-process cocoa powder
1 tsp baking soda
1 tsp baking powder
1 tsp salt
10 Tbs butter, softened
1 ½ cups sugar
2 large eggs
2 large egg yolks
1 ½ tsp pure peppermint extract
12 large candy canes or 30 peppermint candies, crushed
about 2 pounds chocolate, coarsely chopped (dark or white chocolate)

Preheat oven to 325°F. Line a baking sheet with parchment paper or a silicone mat.

Whisk flour, cocoa powder, baking soda, baking powder, and salt in a bowl. In another bowl, beat butter and sugar with a mixer on medium-high speed for 1 minute. Reduce speed to medium-low, and add eggs and peppermint extract. Slowly add flour mixture, and beat until just incorporated.

Divide dough in half and place on two large pieces of plastic wrap. Using plastic wrap, shape dough into 2 logs about 2″ in diameter. Wrap logs securely in the plastic wrap and refrigerate until firm, at least 1-2 hours, or several days.

When ready to bake, unroll plastic wrap from dough logs. Use a sharp knife to cut dough into 1/4” disks. Gently reshape edges into circles, if necessary. Place cookies on lined baking sheet, keeping unused dough in the refrigerator until ready to slice. Bake cookies for 10 minutes, or until dry to the touch. Cool 2 minutes on baking sheet before transferring cookies to wire racks to cool.

Melt chocolate in a heatproof bowl in the microwave or in a double boiler (melt chocolate slowly). Dunk cookies into melted chocolate. Use a fork to turn the cookie over in the chocolate. Pick up the cookie with the fork, let excess chocolate drip off, and gently scrape bottom against edge of bowl. Place on parchment (or waxed paper)-lined baking sheets, and while the chocolate is still wet, sprinkle tops of cookies with the crushed candy canes. Let chocolate harden before storing. (TIME SAVING NOTE: You can also just use your fingers to hold the cookie and only dunk the top and sides of the cookie, gently scraping the excess chocolate off of the top of the cookie before placing it on the parchment paper)

Makes 4-6 dozen, depending on the size of your cookies

Recipe adapted from Martha Stewart

NoEmptyChairs.me
3 Comments

Filed under Cookies, Desserts

Twelve Days of Christmas Cookies: Chocolate Walnut Puddle Cookies

113011 010-2

DAY 9: Chocolate Walnut Puddle Cookies

Gluten-free. Butter-free. Sugar? OK, not exactly sugar-free. But with only 6 easy-to-find ingredients that can be mixed in one bowl without a mixer, cookies don’t get much easier than this!

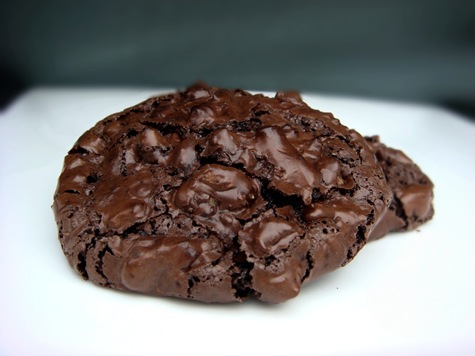
Made with chopped toasted nuts, egg whites, powdered sugar, cocoa, salt, and vanilla, these cookies turn out soft and chewy on the inside with a crackly top, like the top of a great batch of brownies. In fact, every bite is like the best part of a pan of brownies (those chewy edge pieces).

113011 019-1

I made these with walnuts and we really enjoyed them. They were rich, chewy and chock full of nuts. Next time I want to try them with chopped roasted almonds.

RECIPE:

Chocolate Walnut Puddle Cookies

113011 010-2

3 cups walnuts, pecans, almonds or hazelnuts
1 lb (about 4 cups) powdered sugar
2/3 cup cocoa
½ tsp salt (fine ground sea salt, if you have it)
4 large egg whites
1 Tbs vanilla extract

Preheat oven to 350°F.

Spread nuts in a single layer on a baking sheet. Toast nuts in the oven for 5-10 minutes. Remove from oven and let nuts cool completely. Chop into coarse pieces (don’t chop too fine).

In a large bowl, use a whisk to stir together the powdered sugar, cocoa and salt. With a large spoon, stir in the cooled nuts. Stir in the egg whites and vanilla until well combined.

Line a baking sheet with parchment paper or a silicone mat. Drop the batter in small mounds on the baking sheet, leaving about 1” of space between cookies (no more than 12 cookies on a normal sized baking sheet). Bake for 11-13 minutes. The cookies will spread, puff slightly, crack on top, get glossy and then turn matte. Slide the entire sheet of parchment paper or mat off of the baking sheet onto a cooling rack and let the cookies cool completely. Use a metal spatula to remove cookies from parchment paper or mat.

Makes about 3 dozen cookies

Recipe adapted from Dinner with Julie

NoEmptyChairs.me

2 Comments

Filed under Cookies, Desserts