Ratatouille

Ratatouille 1

The transition from summer to fall is my very favorite time of the year. I love the cool mornings and sunny (but not humid) days. It is the perfect time for making my favorite comfort food: Ratatouille. Like all good comfort foods, it is warm and filling and permeates your house with delicious smells as it cooks low and slow on the stove. And during this change of seasons, I love that I can still get great fresh garden vegetables and herbs to use in this recipe.

Ratatouille is not always the most visually appealing dish, but is bursting with flavor. It is full of hearty vegetables: eggplant, zucchini, yellow squash, red peppers, onions, garlic, tomatoes, and lots of fresh herbs Then cooked down on the stove until the flavors blend and meld into the most delicious vegetable stew. Eating healthy has never tasted better!

Ratatouille 2

This is Little A’s very favorite side dish. His face just lights up when he smells it as he comes into the house. All of the kids love it except for Little J (but she hardly counts as she turns her nose up to EVERY vegetable in this dish).

Ratatouille makes a perfect side dish to grilled or roasted meats. I love to serve it this time of year, when we still like to grill chicken, pork, or other things outside. Grilled meat is wonderful, but also begs for something juicy to eat with it. Ratatouille fits that bill perfectly. It is also great later in the winter with a roasted pork tenderloin, roast chicken, or beef roast.

This recipe makes a good-sized pot of ratatouille. You could always scale it back if you don’t want to make that much, but I love to have leftovers of this dish. It makes a perfect lunch all on its own the next day. Or as a sauce for pasta for an easy meal later in the week.

I never measure things when I make this recipe. It is very flexible based on your personal tastes. Below is a good approximation of the amounts that I use.

RECIPE:

Ratatouille

Ratatouille 2

½ cup olive oil
1 large eggplant, skin on, diced
2 onions, chopped
1 red/orange/yellow pepper, chopped
5 cloves garlic, minced
3-4 zucchini and/or yellow squash, sliced and quartered
1 tsp salt
½ tsp fresh ground black pepper
1 tsp dried Italian seasoning
3 cups chopped tomatoes
½ tsp Tabasco sauce (adjust to taste)
3 Tbs chopped fresh basil*
2 Tbs chopped fresh parsley*
1 Tbs chopped fresh thyme*
1 Tbs chopped fresh oregano*

Heat olive oil in a large saucepot. Add eggplant to the hot oil and cook until eggplant begins to soften. Add onions, red pepper and garlic and cook until soft, about 3 minutes. Add zucchini, salt, pepper, and dried herbs; cook for 5 minutes over medium-high heat. Add chopped tomatoes and Tabasco sauce and cook over medium-low heat, uncovered, until mixture is cooked down and thickened (30-40 minutes). Stir in fresh herbs during the last 10 minutes of cooking. Taste and add additional salt, if necessary.

*Or substitute an additional 2-3 tsp dried Italian seasoning for the fresh herbs.

NoEmptyChairs.me

Leave a comment

Filed under Main Dishes, Side Dishes, Soups/Stews/Curries

Chocolate Butterfly Cupcakes

(and a gender reveal–NO, not mine)

Chocolate Butterfly Cupcakes 13

I first made these chocolate butterfly cupcakes for my sweet Little J’s 6th birthday. I was feeling very nostalgic about having my last baby in kindergarten and we had a super fun cooking party with a few of her friends. It is (by far) my favorite kids’ birthday party that I’ve hosted. I still get a little bit weepy just thinking about it. If you like a good sentimental cry, you can read about it HERE.

Then last month, a friend asked if I could make some gender reveal cupcakes to announce the sex of their upcoming new baby to their other four children. While I am perfectly content with the 5 children I already have and have no desire to start again with another one (5 years and counting until we are empty nesters!), celebrating with other new moms always makes me reflect on my own babies that are not babies any more.

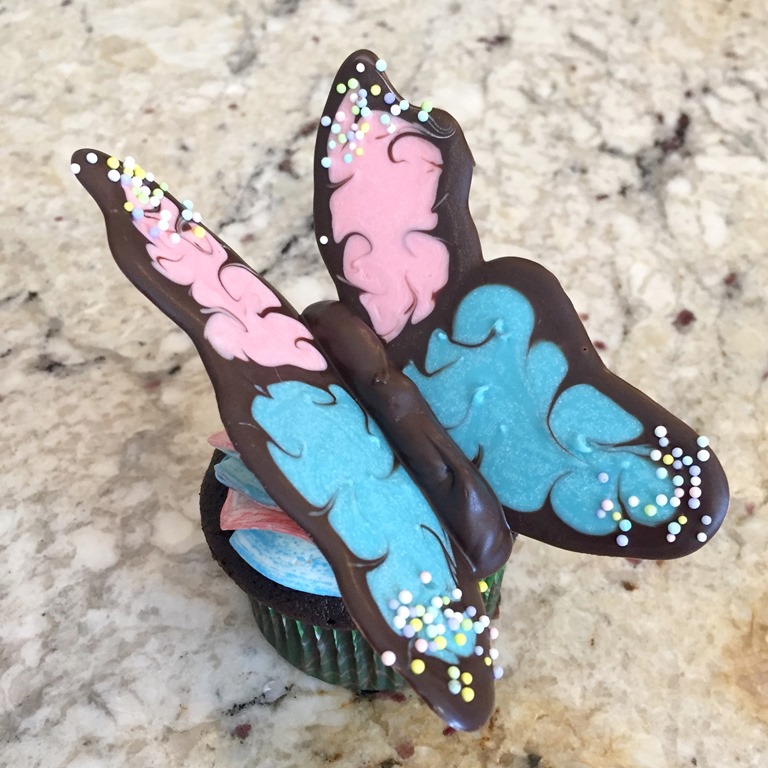
So I happily agreed, and immediately knew that I wanted to make these butterflies again, for my friend and her family who are welcoming a new life into their family, and for me to reminisce about my own little ones and the joy it has been parenting them. And having my Little J (who isn’t so little anymore) help me make the butterflies and cupcakes was a really great experience.

And because writing this is making me feel nostalgic all over again (and this is my blog so I get to indulge my wistful feelings as much as I want), here is my Little J, then and now:

Little J 2010 2017-09-13 15.54.09

Enough about me and my maudlin ramblings; you really just want to hear about the cupcakes. For my friend, I made my favorite dark chocolate cupcakes. They are tender and moist and absolutely delicious. It also doesn’t hurt that they are easy to make. They start with a cake mix, but the addition of pudding and sour cream takes them well beyond your average chocolate cupcake.

For the “gender reveal”, I cut out a section of the top of each cupcake and filled it with a blue filling (It’s a Boy!!). For the filling, I mixed the white frosting with some of the leftover blue candy melts from the butterflies and piped it into the cut-out centers.

Chocolate Butterfly Cupcakes 9

The frosting I used is a cooked vanilla frosting. It is not as sweet as a traditional buttercream, but is light and fluffy and delicious. I tinted the frosting with pink and blue food coloring to make a striped frosting.

Chocolate Butterfly Cupcakes 10

To create the two-toned look, use a paintbrush and food coloring to paint stripes onto the inside of a pastry bag. (Credit to my hand model Little J!) Carefully spoon white frosting into the bag. Before frosting the cupcakes, squeeze out a small amount of frosting until the color begins to show in the frosting. I used a 1M tip to pipe the frosting onto the cupcakes.

Chocolate Butterfly Cupcakes 11

Now on to the butterflies. Full disclosure: these are time consuming. But they are not particularly difficult. Just be prepared to spend several hours making them if you plan to make a lot.

Items needed:
chocolate and colored candy melts, stencil printed on paper, waxed paper, toothpicks, foil, pastry bags (one for each color), one writing piping tip, small round sprinkles. Optional: heating pad

Draw your desired butterfly wing shape onto a sheet of white paper using a permanent marker. Cut pieces of waxed paper (one for each set of wings you are making) large enough to cover the stencil. You can also draw a set of antennae if desired (see example HERE).

Chocolate Butterfly Cupcakes 1

Place a small amount of colored and chocolate melting disks into separate pastry bags or Ziploc bags. Melt in microwave—Start with 30 seconds, squish bags, then add an additional 10 seconds if not completely melted.

To keep the chocolate melted while making dozens of wings, I placed a piece of plastic wrap over a heating pad and set the bags on the heating pad while they weren’t being used.

Chocolate Butterfly Cupcakes 4

I used a writing tip to pipe the chocolate, but I just cut off a small end of the bag to squeeze out the melted colored candy.

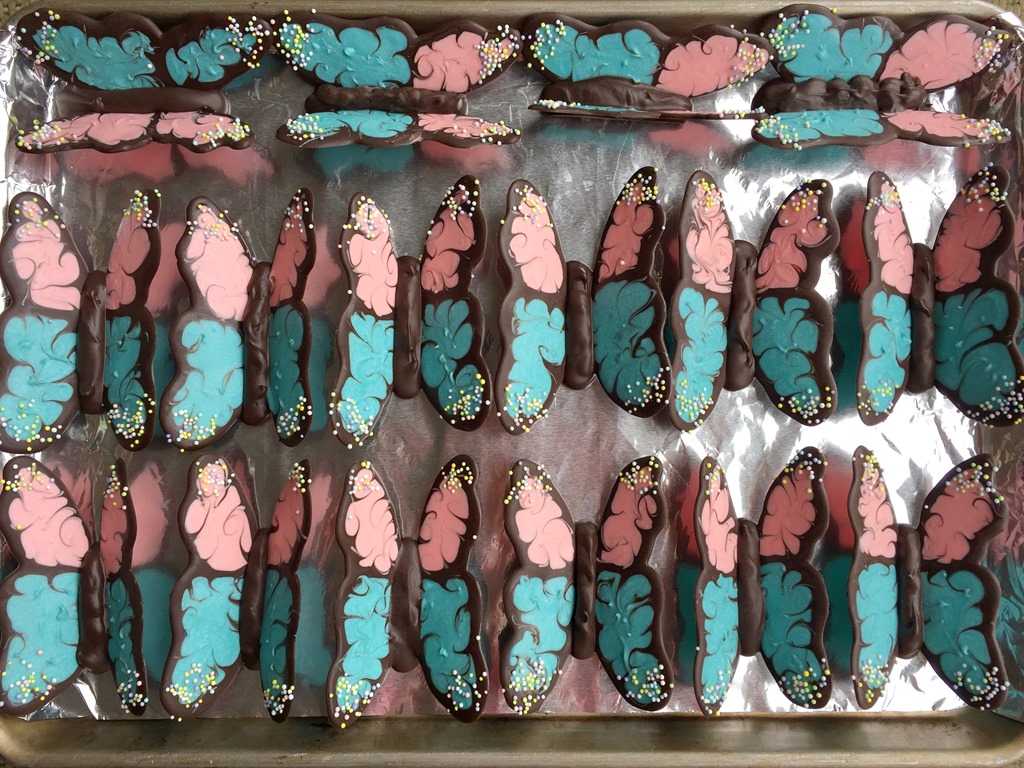
Place a small square of waxed paper over your stencil paper. Use the melted chocolate to trace around the edge of one wing at a time.

Chocolate Butterfly Cupcakes 2

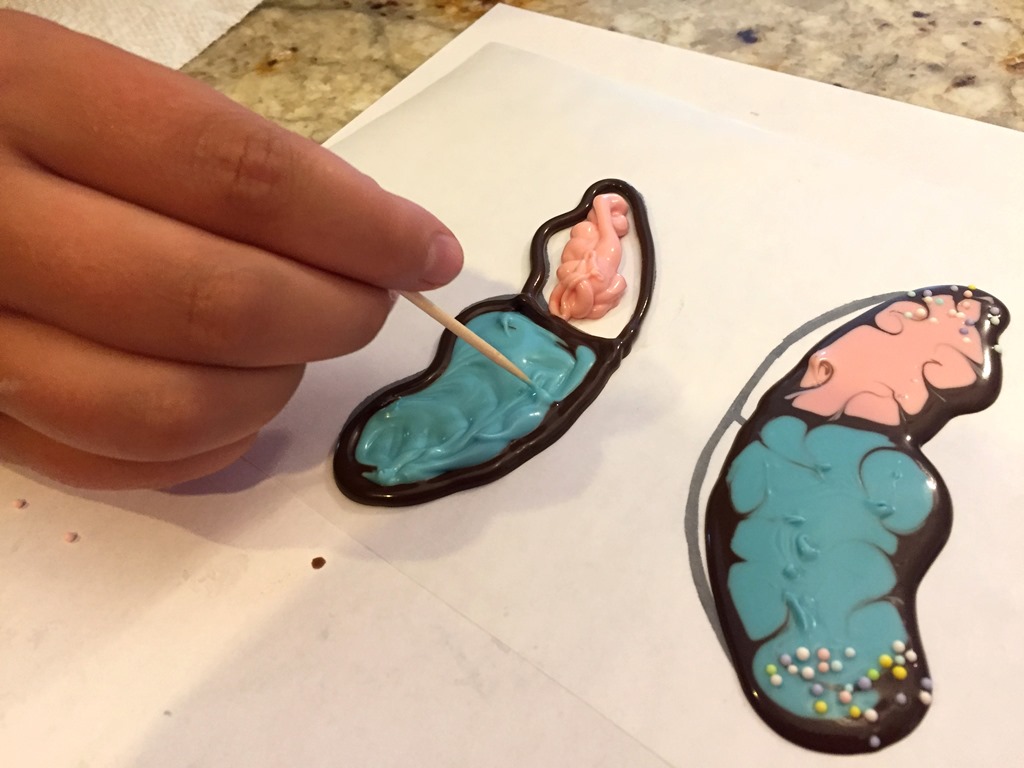
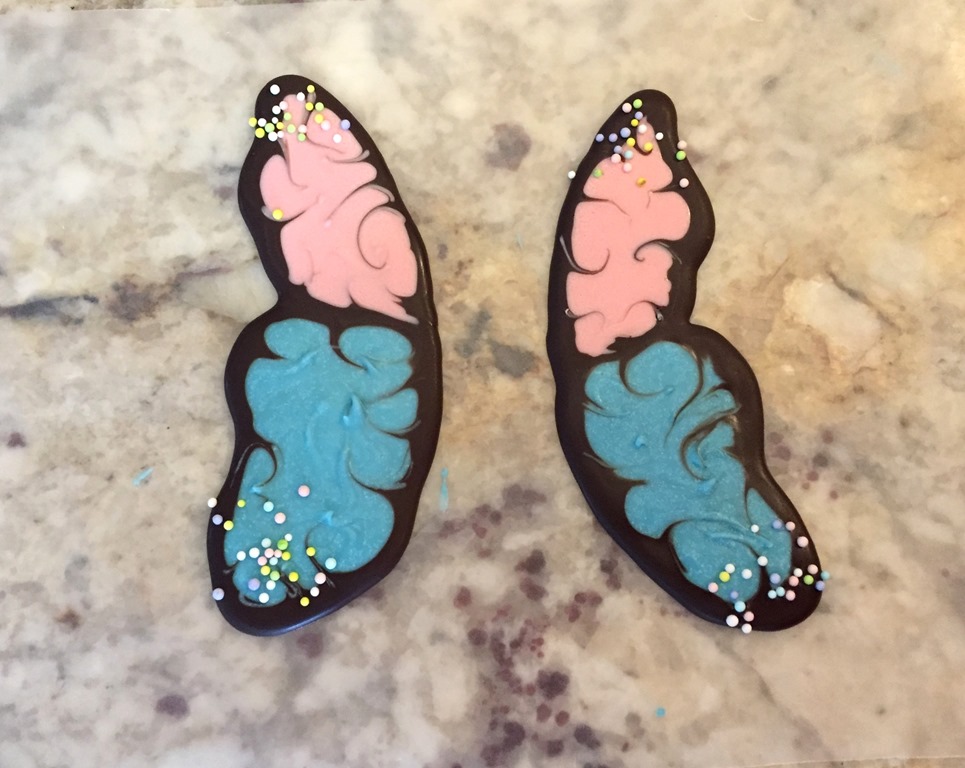
While the chocolate outline is still wet, squeeze a small amount of colored chocolate into the center of each wing section. I used pink in the top section and blue in the bottom section. Use a toothpick to spread colored chocolate to fill the wing. Use a toothpick to gently swirl chocolate edges and colored chocolate. Sprinkle edges of wings with round sprinkles, if desired.

Work with just one wing at a time. The chocolate hardens quickly!

Chocolate Butterfly Cupcakes 3

Let the wings harden completely before assembling butterflies.

Chocolate Butterfly Cupcakes 6

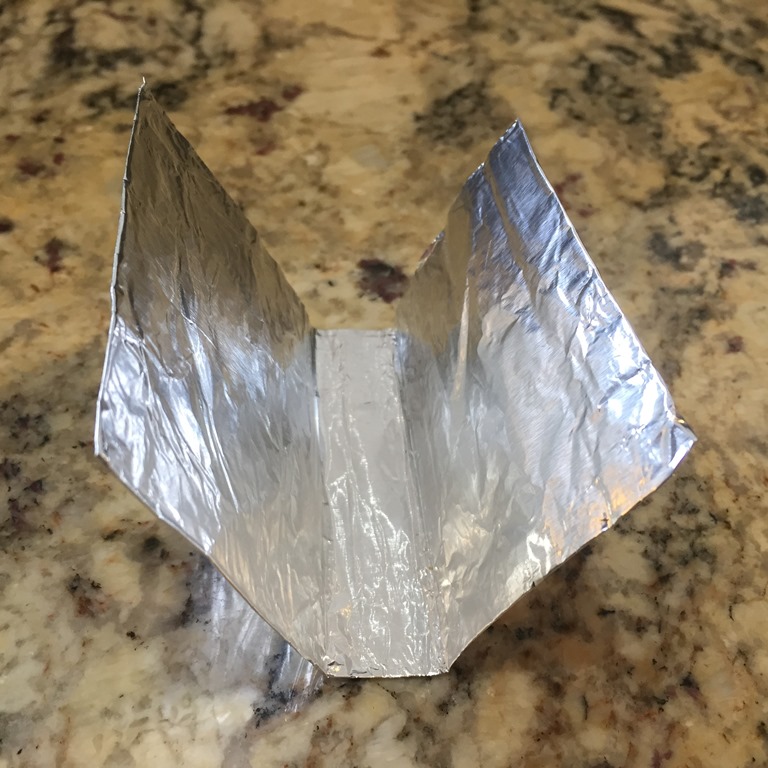
To make the body and assemble the butterflies, fold a piece of heavy-duty aluminum foil in half and then into a v-shape with a flat bottom (about 1/2” wide).

Chocolate Butterfly Cupcakes 16

Using the melted chocolate (remove the writing tip), pipe a body onto a separate piece of waxed paper (or directly onto the bottom section of the folded foil). Make little dollops of chocolate, being sure that they touch.

Chocolate Butterfly Cupcakes 15

Place segmented body (before it hardens) into the folded foil and place the wings at an angle into the still soft chocolate body. Prop them up underneath if the foil doesn’t hold them. (Sorry, I didn’t get a photo of this step)

Don’t use your fingers to support the wings while the body dries: the chocolate will melt in your fingers and ruin the wings.

Chocolate Butterfly Cupcakes 7

Chocolate Butterfly Cupcakes 8

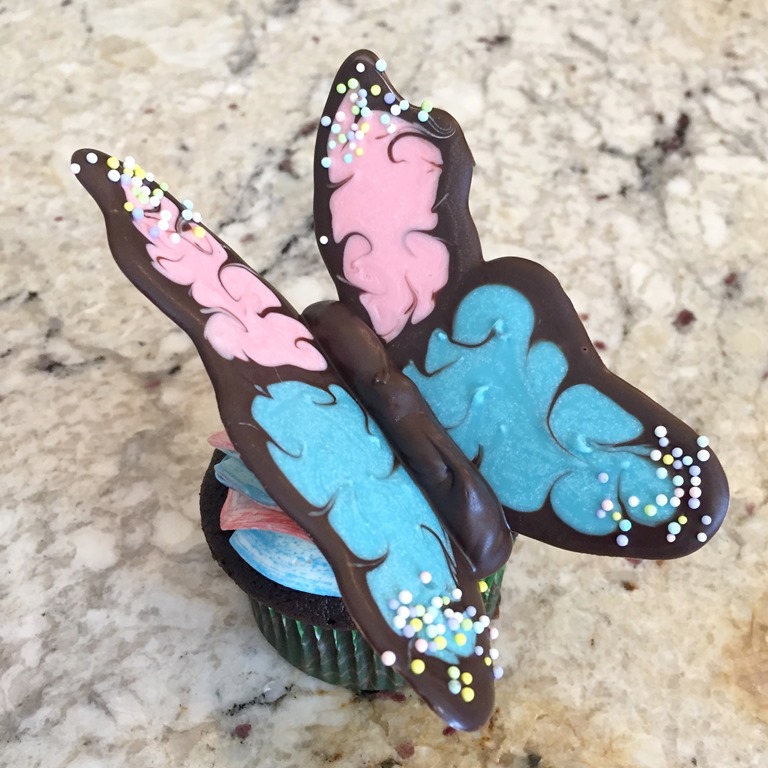
Gently press a butterfly onto the top of each frosted cupcake.

Chocolate Butterfly Cupcakes 13

Did you know that a group of butterflies is called a “Kaleidoscope.” What a perfect description of these butterflies! Whatever they are officially called, your family will call them beautiful and delicious!

Chocolate Butterfly Cupcakes 14

RECIPES:

Dark Chocolate Cupcakes

  • Servings: 30-36 cupcakes
  • Print

Chocolate Butterfly Cupcakes 11

1 box dark chocolate fudge cake mix
1 small box (3.9 oz) instant chocolate pudding mix
1 cup sour cream
1 cup vegetable oil
4 eggs
½ cup warm water

Preheat oven to 350°F . Place cupcake liners in muffin tins.

In a large bowl, mix together all of the ingredients and beat with a mixer for 2 minutes.

Fill cupcake liners just over halfway. Bake for 18-20 minutes, or until a toothpick inserted in the center comes out clean. Cool completely before frosting.

NoEmptyChairs.me

Cooked Vanilla Frosting

  • Servings: frosting for 24-36 cupcakes
  • Print

Chocolate Butterfly Cupcakes 11

2 cups whole milk
10 Tbs flour
2 tsp vanilla
2 cups butter
2 cups granulated sugar (do not use powdered sugar)
Optional: gel food coloring

In a small saucepan, mix the flour and milk until no lumps remain. Heat over medium heat, stirring constantly with a whisk, until mixture thickens (and is just about to boil). Remove from heat and let it cool completely to room temperature.  Stir in vanilla.

In a large mixing bowl (a stand mixer works best for this) cream the butter and sugar until light and fluffy. Beat in the cooled milk mixture and beat for 5-7 minutes, until frosting is light, fluffy and completely uniform throughout. Beat in food coloring, if desired.

This frosting looks best when piped with a large decorating tip, but can also be spread with a spatula.

NoEmptyChairs.me

Chocolate Butterflies (Cupcake Toppers)

Butterfly Cupcakes 001  Chocolate Butterfly Cupcakes 13

Ingredients and Equipment:

Melting chocolate (both chocolate and colored)
Sprinkles (small round)
Waxed paper
Toothpicks
Ziploc bags or pastry bags
Writing tip
Butterfly stencil
Aluminum foil

Assembly Instructions:

  • Trace wing and antennae pattern onto a piece of white paper.
  • Place a small amount of colored and chocolate melting disks into separate pastry bags or Ziploc bags. Melt in microwave—Start with 30 seconds, knead bags, then add an additional 10 seconds if not completely melted. Place a round writing tip on the bag with the chocolate, and cut off one corner of each colored candy bag.
  • To keep the chocolate melted while making dozens of wings, place a piece of plastic wrap over a heating pad and set the bags on a heating pad while not using.
  • Place a small square of waxed paper over your stencil paper. Use the melted chocolate to trace around the edge of one wing at a time.Chocolate Butterfly Cupcakes 2  Chocolate Butterfly Cupcakes 3
  • While the chocolate outline is still wet, squeeze a small amount of colored chocolate into the center of each wing section. I used pink in the top section and blue in the bottom section. Use a toothpick to spread colored chocolate to fill the wing. Use a toothpick to gently swirl chocolate edges and colored chocolate. Sprinkle edges of wings with round sprinkles, if desired.
  • Work with just one wing at a time. The chocolate hardens quickly! Let the wings harden completely before assembling butterflies.
  • Fold a piece of heavy-duty aluminum foil in half and then into a v-shape with a flat bottom (about 1/2” wide).Chocolate Butterfly Cupcakes 16  Chocolate Butterfly Cupcakes 15
  • Using the melted chocolate (remove the writing tip), pipe a body onto the bottom section of the folded foil. Make little dollops of chocolate, being sure that they touch.
  • Place the wings at an angle into the still soft chocolate body. Prop them up underneath if the foil doesn’t hold them. Let butterflies harden completely before gently peeling off of foil and placing on cupcakes.Chocolate Butterfly Cupcakes 7

NoEmptyChairs.me

2 Comments

Filed under Desserts

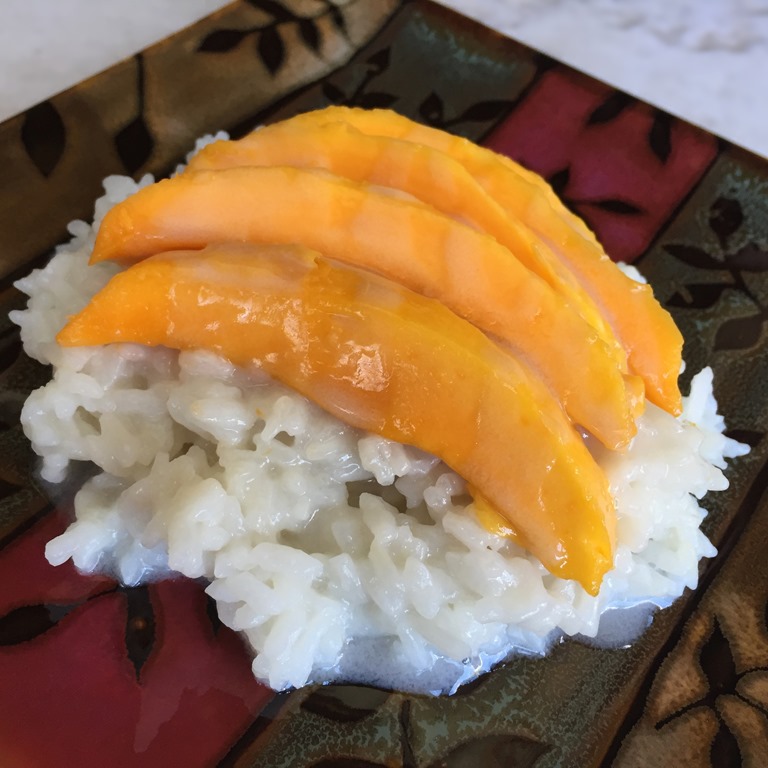
Mango Sticky Rice

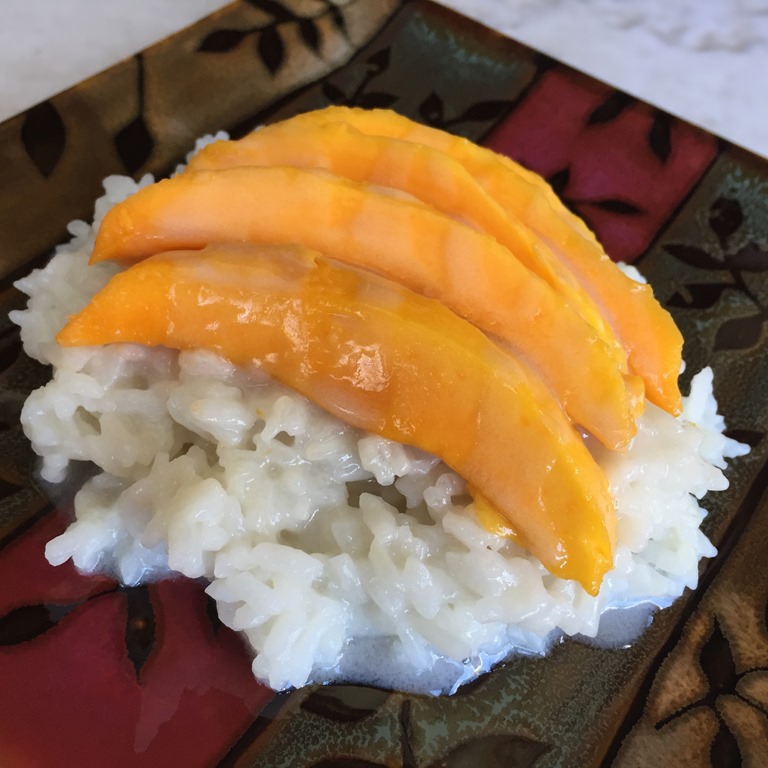
Mango Sticky Rice 1

Mango Sticky Rice may be the primary reason my kids love eating at Thai restaurants. They also love the curries, stir-fries and satays, but this simple dessert definitely tops the list.

Making this at home may not be as much fun as a night out for dinner, but it sure saves the pocketbook! And with this recipe, there is always lots to go around, so there is no fighting for the last bite.

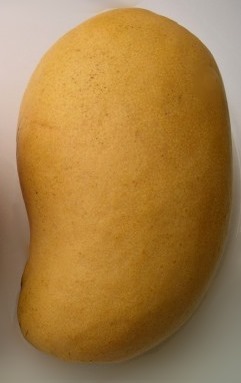
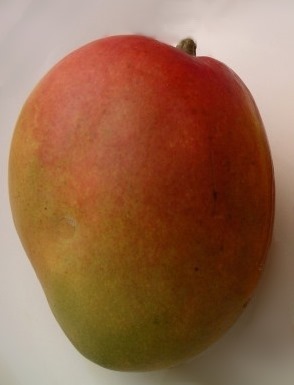
The two main types of mangoes you find here in the US are Haden and Ataulfo. The orange/red/green Haden mangoes are the most common, but the smaller yellow Ataulfo mangoes are my favorite. They are very sweet and have fewer strings than the larger Hadens.

Haden Mango     Ataulfo Mango

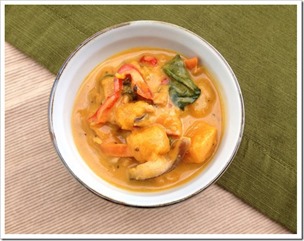
For a complete Thai dinner experience, try one of these curries as an entrée before your Mango Sticky Rice:

Thai Green CurryThai Green Curry

Thai Pumpkin Curry
Thai Pumpkin Curry

Thai Red Curry
Thai Red Curry

Mango Sticky Rice 2

RECIPE:

Mango Sticky Rice

Mango Sticky Rice 1

1 cup short grain white rice
1 ½ cups unsweetened refrigerated coconut milk (or use water)
1 can coconut milk (do not use lite; do not shake can)
6 Tbs sugar, divided
1 tsp salt, divided
3 ripe mangoes, chilled

Combine rice and 1 ½ cups refrigerated coconut milk or water in a medium saucepan. Bring to a low boil, then reduce heat to low and cover. Cook for 20 minutes, or until rice is cooked.  Alternately, cook rice with coconut milk in a rice cooker.

Carefully open the can of coconut milk and scoop out the thick coconut cream from the top of the can. Set cream aside in a small bowl. Pour the thinner coconut milk from the bottom of the can into a small saucepan. Stir in 4 Tbs sugar and ¾ tsp salt. Heat over medium-low heat until sugar dissolves, but do not boil. Remove from heat and slowly stir the hot sweetened coconut sauce into the rice in the pan. Cover and let sit for an additional 15 minutes, stirring occasionally.

Place the thick coconut cream in a small saucepan. Stir in 2 Tbs sugar and ¼ tsp salt. Cook over low heat until cream melts and sugar dissolves. Do not boil.

Slice chilled mangoes.

Place ½ cup of the warm cooked, sweetened rice onto each serving plate. Top with about ½ of a chilled, sliced mango. Drizzle with sweetened coconut cream. Serve immediately.

NoEmptyChairs.me

1 Comment

Filed under Desserts

Homemade Marshmallow Fluff

Strawberries and Toasted Marshmallow Fluff

When you have a  kid that hates chocolate, you have to get creative with your campfire treats.

Dipping fresh strawberries in homemade marshmallow fluff and toasting them over the fire on a roasting stick sure makes up for not liking the s’mores that everyone else is eating.

In fact, you may have to guard your fruit ‘n fluff from the s’mores eaters who think they are the ones getting the short end of the roasting stick!

Marshmallow Fluff

Marshmallow fluff is easy to make yourself, but does require a candy thermometer. It is so much better than the stuff you buy in a jar! And toasting it makes it even more delicious. You can coat most fruits with the fluff for toasting. Try things like strawberries, fresh pineapple, mangos, bananas, mandarin orange segments, kiwi fruit. Or even chunks of pound cake.

Another benefit: you can swap out the vanilla extract with something more exotic, like lemon, coconut, orange, or almond extract to give your fluff a fun new flavor. Mango chunks dipped in coconut flavored fluff = YUM!

We may have even been known to make this in the winter, toasting our fluff-coated-fruit over sterno cans.

RECIPE:

Homemade Marshmallow Fluff

Strawberries and Toasted Marshmallow Fluff

3/4 cup sugar
3/4 cup (9 oz) light corn syrup
1/3 cup water
Pinch of salt
3 egg whites
1/2 tsp cream of tartar
2 Tbs sugar
1 tsp vanilla extract (or other flavored extract: lemon, orange, almond, coconut)

Mix 3/4 cup sugar, corn syrup, water, and salt in a small saucepan. Bring to a boil over medium heat. Use a spatula to scrape edges of pan as it cooks. Attach a candy thermometer to the side of the pan and continue to cook until mixture registers 240°F on the thermometer. Remove from heat.

While sugar mixture is cooking, place egg whites and cream of tartar in a large mixing bowl (a stand mixer works best). Beat until egg whites are foamy. Slowly add 2 Tbs sugar and continue to beat until soft peaks form.

Turn mixer onto low speed and slowly pour the hot syrup into the mixing bowl. Once all of the syrup has been mixed in, increase mixer speed and beat for 3-5 minutes, or until mixture forms stiff peaks. Add vanilla (or other flavored extract) and beat for an additional minute.

Store marshmallow fluff in the refrigerator.

FOR TOASTED FLUFF-COVERED FRUIT:

Dip fruit (strawberries, fresh pineapple, mangos, bananas, mandarin orange segments, kiwi fruit, etc) in the marshmallow fluff. Place on a roasting stick and cook over an open flame until lightly toasted.

NoEmptyChairs.me

Leave a comment

Filed under Candy, Desserts

Blackened Cod with Creamy Cilantro Dressing

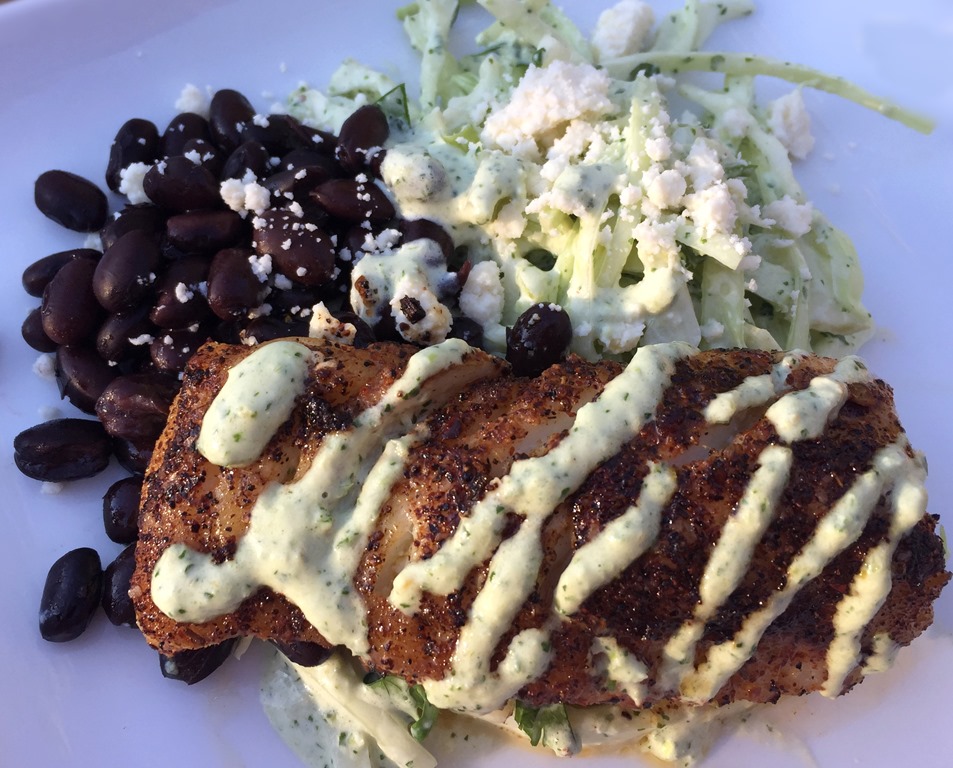
Blackened Cod 2

Looking for something to serve with your Creamy Cilantro Coleslaw? This blackened cod is perfect. And quick and easy on a warm summer night when you don’t want to heat up your kitchen.

If you are making the coleslaw as well, there will probably be enough extra dressing from that recipe to use for drizzling onto the cooked fish. Recipe for Creamy Cilantro Coleslaw:

Creamy Cilantro Coleslaw 1

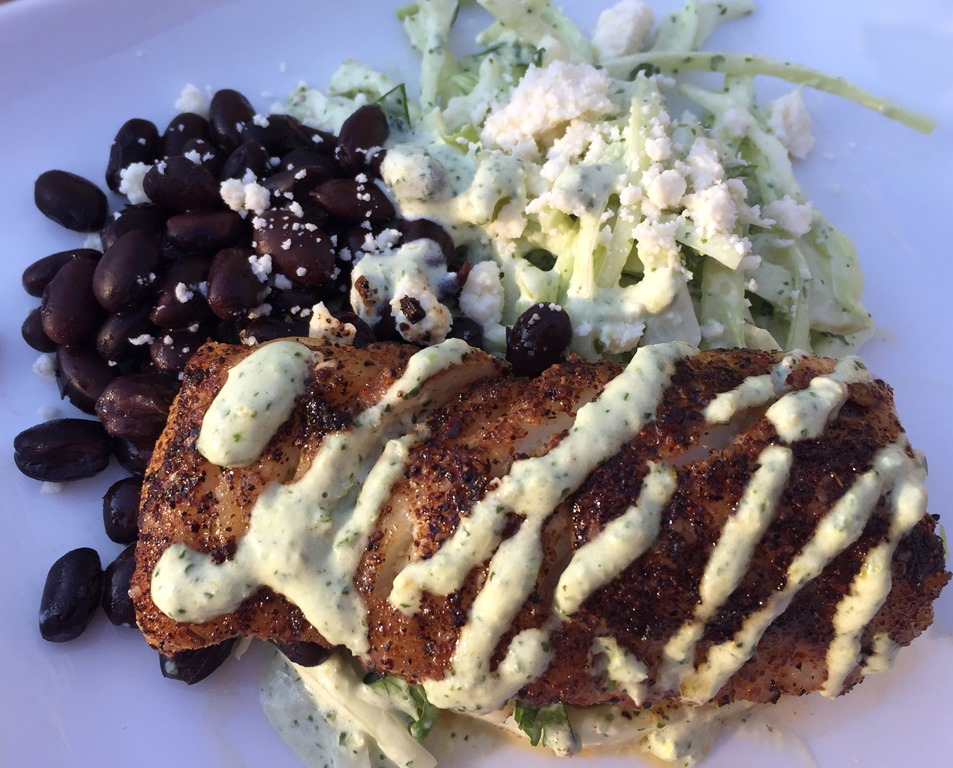
I like to serve this meal with Cotija cheese. Cotija is a firm mild cheese with a texture similar to feta, but without the saltiness. It crumbles easily with your fingers.

Blackened Cod 1

This recipe also makes great Fish Tacos.

RECIPE: 

Blackened Cod with Creamy Cilantro Dressing

Blackened Cod 2

4 cod fish fillets (you could also use halibut or snapper)
1 tsp chili powder
1/2 tsp kosher salt
1/4 tsp garlic powder
1/4 tsp cumin
1/4 tsp Ancho chili powder
1/8 tsp chipotle chili powder
2 Tbs oil

Creamy Cilantro Dressing (recipe below)
Cotija cheese, crumbled
1 can black beans, drained and mixed with 1 Tbs lime juice
Creamy Cilantro Coleslaw

Prepare Creamy Cilantro Dressing and refrigerate for one hour before serving.

Remove fish from refrigerator about 30 minutes before cooking. Mix dry spices in a small bowl. Pat fish fillets dry and rub spices onto both sides of fish fillets.

Heat oil in a cast iron skillet over medium-high heat. Place fish fillets in the hot skillet and sear until cooked through (do not crowd pan; cook in 2 batches if necessary). Depending on the thickness and variety of fish, it should take about 3 minutes per side. Check for doneness with a fork: fish should flake easily, but not fall apart. Remove from pan and let fish rest for 2-3 minutes.

Drizzle fish with some of the Creamy Cilantro Dressing and top with crumbled cotija cheese. Serve fish with coleslaw, black beans, and additional cilantro dressing.

Creamy Cilantro Dressing

½ cup Greek yogurt or sour cream
¼ cup mayonnaise
3 green onions
1 fresh jalapeno
¼ cup fresh cilantro
2 Tbs diced mild green chilies (about ½ of a 4 oz can)
2 Tbs fresh squeezed lime juice
½ – 1 tsp Sriracha chili sauce (adjust to taste)
½ tsp kosher salt

Place all dressing ingredients in a blender or food processor and blend until smooth. Refrigerate for one hour before serving.

NoEmptyChairs.me
Leave a comment

Filed under Main Dishes, Salads, Side Dishes

Creamy Cilantro Coleslaw

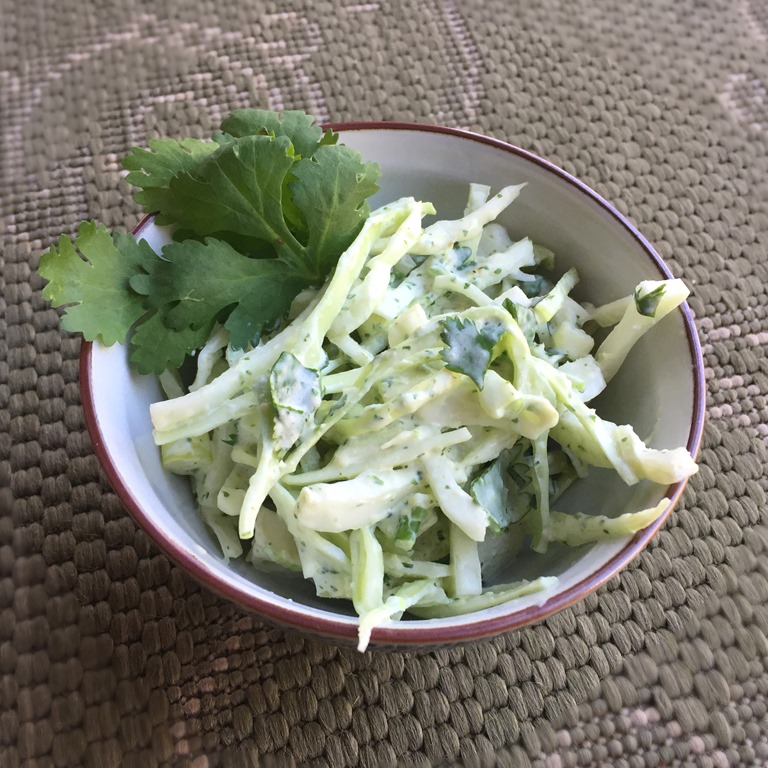
Creamy Cilantro Coleslaw 1

A light and creamy summer salad perfect for serving with grilled or barbecued meats. Flavored with lime juice and fresh jalapenos, the dressing on this coleslaw is tangy and slightly spicy, not sweet like a traditional coleslaw.

And if you have some dressing left over, it is great as a sauce for grilled meat, or refrigerated and used later as a salad dressing.

RECIPE:

Creamy Cilantro Coleslaw

Creamy Cilantro Coleslaw 1

3-4 cups shredded cabbage
4 green onions, sliced
½ cup coarsely chopped fresh cilantro

Dressing:
½ cup Greek yogurt or sour cream
¼ cup mayonnaise
3 green onions
1 fresh jalapeno
¼ cup fresh cilantro
2 Tbs diced mild green chilies (about ½ of a 4 oz can)
2 Tbs fresh squeezed lime juice
½ – 1 tsp Sriracha chili sauce (adjust to taste)
½ tsp kosher salt

Prepare dressing: Place all dressing ingredients in a blender or food processor and blend until smooth.

Place cabbage, green onions, and chopped cilantro in a large bowl. Add the dressing a little at a time, stirring until cabbage is coated, but not drowning in dressing.** Refrigerate coleslaw for about one hour before serving.

**Any extra dressing can be served as a sauce for grilled meat, or refrigerated and used later as a salad dressing.

NoEmptyChairs.me
4 Comments

Filed under Salads, Side Dishes