Tag Archives: recipe

August Adventures and a Summer Peach Dessert

I have been thinking bad thoughts about computers, technology and blogging lately. I know just enough (and no more) that when things go wrong, I can usually make things even worse before calling for reinforcements (ie  my teenagers). Even they were not able to fix everything, so I am still thinking some of those bad thoughts, but finally, I am at least able to do some posting (in a much more labor-intensive way that I usually do).

The last few weeks we have had a lot of fun family adventures, but I have not done much food picture taking. Today is just a quick look at what we have been up to and a delicious recipe to celebrate the end of summer!

Piano Recital for Big and Little A:


Little A’s Baptism!

Big J performed the baptism and Brian did the confirmation.

Big A’s 15th Birthday

What a lovely and amazing young woman she has grown into!

Whitewater Rafting Trip

Little J wishing she was big enough to go rafting!

Tubing, Skiing and Wakeboarding on Deep Creek Lake

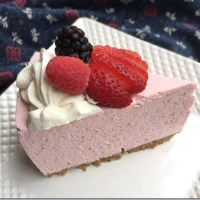
These Peach Cobbler bars were a great way to end a fabulous summer. You can eat them warm topped with ice cream (although they will not cut very nicely warm), or let them cool and cut into squares.

RECIPE:

Peach Cobbler Bars

Dough:
3 cups flour
2/3 cup sugar
1 tsp baking powder
½ tsp salt
1 cup (2 sticks) unsalted butter, cold
1 egg, lightly beaten
1 tsp vanilla

Filling:
6 cups diced peaches (about 8 peaches)
2 Tbs lemon juice
½ cup flour
2/3 cup sugar
¼ teaspoon salt
½ teaspoon ground cinnamon
¼ teaspoon ground nutmeg

Preheat the oven to 375°F. Grease a 9×13-inch baking pan.

Dough: In a medium bowl whisk together the flour, sugar, baking powder and salt. Use a pastry blender to cut in the butter. Mix the egg and vanilla and then cut into the dough. The dough will be crumbly. Pat about 2/3 of the dough into the prepared pan. Place the pan and the remainder of the dough in the refrigerator while you prepare the filling.

Filling: Place the diced peaches in a large bowl and sprinkle with lemon juice. Mix gently. In a separate bowl whisk together the flour, sugar, salt, cinnamon and nutmeg. Pour over the peaches and mix gently.

Spread the peach mixture evenly over the crust. Crumble the remaining dough over the peach layer.

Bake for 45 minutes, or until the top is slightly brown.

Serve warm with ice cream (bars will not cut neatly while warm), or cool completely and cut into squares.

Adapted from Brown Eyed Baker

NoEmptyChairs.me

3 Comments

Filed under Desserts, Uncategorized

Fruit Pizza

080610 078-1 Summer is birthday season at our house. With one child’s birthday at the beginning of summer and then three more within four weeks of each other later in the  summer , we have a lot of cake and sugar floating around our house. So I am grateful for Big J for going with a lighter dessert for his birthday yesterday. He usually goes for the more non-traditional birthday desserts. And with all of the fresh fruit available, I was really happy to make a Fruit Pizza.

080610 071-1

Eighteen Years! Eighteen years, in a land far, far away, my life changed forever. I can’t decide whether those 18 years have flown by, or that I’ve been a mom forever. Either way, it has been a wonderful journey. I love you J! It’s these coming years, as my babies slowly start leaving the nest that are making me nervous.

080610 051-1 This Fruit Pizza has a shortbread crust, a thin layer of slightly sweetened cream cheese, luscious summer fruit, and a light glaze on top. The fruit I used, from the inside out: blueberries, mango, raspberries, kiwi and strawberries.

The glaze is made from any light-colored fruit juice (I used a peach-mango, which turned out great!), some sugar, cornstarch and lemon juice (to keep cut fruit from browning, especially if you are using bananas or peaches).

Pre-Glazed Fruit Pizza:

080610 040-1 —-

RECIPE:

Fruit Pizza

080610 051-1

Crust:

½ cup powdered sugar
1 ½ cups flour
¼ tsp salt
¾ cup butter, softened
½ tsp vanilla extract

Filling:
8 oz cream cheese, softened
2 Tbs powdered sugar
1 tsp vanilla extract

Fruit (strawberries, blueberries, bananas, kiwi, mangos, peaches, grapes, pineapple, raspberries, etc.)

Glaze:
½ cup sugar
2 Tbs cornstarch or Clear Jel
2 tsp lemon juice
1 ½ cups clear fruit juice (apple, white grape, peach-mango,lemonade, etc)

Preheat oven to 325°F.

Crust: Using a pastry blender, mix ½ cup powdered sugar, flour, salt, butter, and ½ tsp vanilla. Press onto a pizza pan. Bake for 10-15 minutes. Cool completely.

Filling: Combine cream cheese, 2 Tbs powdered sugar, and 1 tsp vanilla. Spread over cooled crust. Arrange fruit on cream cheese layer.

Glaze: Combine sugar, cornstarch, lemon juice, and fruit juice in a small saucepan. Cook over medium heat until sugar is dissolved and mixture is thickened. Cool and spoon over fruit (all of the glaze may not be used). Chill. Slice into wedges to serve.

NoEmptyChairs.me

4 Comments

Filed under Desserts, Uncategorized

Cherry Blackberry Cobbler

072710 037-1 I love sour cherries in the summer, especially when they are paired with a sweeter berry. We had some blackberries that were getting a little over-ripe, so adding them to this dessert made a perfect Family Night treat. And topped with cinnamon ice cream that we were given in trade for a used girl’s bike? Best trade we ever made!

072710 001-1 This is a double batch of the recipe printed below. Small scoops of dough are dropped onto the hot fruit filling, and then sprinkled with a mixture of cinnamon and sugar. Twenty minutes in the oven and the topping is perfectly cooked and ready to eat!

072710 004-1

072710 023-1 The cobbler topping is not made of hard dry biscuits, or loose crumble. It is soft, tender, not-too-sweet, cinnamon-topped mini cakes that soak up that fruit goodness and just scream for a scoop of real vanilla (or cinnamon-thanks Jenny!) ice cream.

072710 011-1 This is bowl-licking good stuff!

072710 017-1

RECIPE:

Cherry Blackberry (or Raspberry) Cobbler

072710 037-1

Filling:
1 quart (4 cups) pitted sour cherries
———(or 2 cans sour/tart cherries + juice)
2 cups blackberries, raspberries or mixed berries
1 cup sugar
2 Tbs Clear Jel (or cornstarch)
½ Tbs lemon juice
1 tsp vanilla extract
½ tsp almond extract
¼ tsp salt

Cobbler:
¾ cup flour (or half wheat & white flour)
2 Tbs sugar
1 tsp baking powder
¼ tsp salt
2 Tbs cold butter
½ cup buttermilk, kefir, or milk (use less if using regular milk)
1 egg
1/2 Tbs sugar + 1/8 tsp cinnamon

Preheat oven to 400°F.

Combine filling ingredients in a saucepan. Cook and stir over medium heat until bubbly and slightly thickened. Pour into an 8×8” pan, or 2-qt casserole dish.

Mix flour, sugar, baking powder and salt. Cut in butter. Combine milk and egg. Make a well in center of dry ingredients. Add milk/egg mixture. Stir just until dough clings, adding more milk if necessary. Spoon into 6 mounds over hot filling.

Mix sugar and cinnamon. Lightly sprinkle over topping, discarding any extra.

Bake, uncovered, for 20-25 minutes. Check topping with a toothpick.

NoEmptyChairs.me

Leave a comment

Filed under Desserts

Sour Cherry Vanilla Jam

072810 009-1 —–

The final two jams that we made last week were Peach Butter (recipe found HERE) and this Sour Cherry Vanilla Jam. The vanilla flavor was not as pronounced as in the Peach Vanilla Jam, but the jam was still really good. Slightly tart from the sour cherries and nice and thick. To get more of the vanilla flavor next time, I am going to soak the chopped cherries with the sugar and vanilla bean overnight before cooking the jam.

071810 010-1 ———

RECIPE:

Sour Cherry Vanilla Jam

  • Servings: Makes 6 Half-Pint Jars
  • Print

072810 009-1

5 cups chopped pitted sour cherries (about 3 lb)
1 cup cherry juice or water**
1 ½ cups sugar, divided
½ tsp powdered stevia
1 vanilla bean
1 box low-sugar pectin

Mix cherries, juice or water, 1 ¼ cups sugar, and stevia in a large bowl or saucepan. Split vanilla bean in half lengthwise and using the tip of a knife, scrape the seeds into the cherry mixture. Stir vanilla bean pod into the cherries. Let sit for 2-3 hours to overnight (strengthens the vanilla flavor in the jam).

Mix pectin with ¼ cup sugar. Stir into cherry mixture. Bring to a hard boil (boiling doesn’t stop when stirred) over medium-high heat. Cook, stirring constantly, for 5 minutes. Remove from heat. Remove vanilla bean.

Ladle into jars, leaving 1/8” headspace. Wipe rims of jars. Place lids on jars.

Place jars in a boiling bath canner or steam canner. Return water to a gentle boil. Process 10 minutes. Cool on a towel on kitchen counter for 24 hours. Check seal.

Yield: 6 half-pint jars

**NOTE: The cherries I used were from a 10 lb bucket of pre-pitted sour cherries. I added 1 cup of the juice from the bottom of the bucket to the jam. If you are pitting your own cherries, you may not need to add this much additional liquid.

NoEmptyChairs.me

Leave a comment

Filed under Canning/Freezing, Condiments/Sauces

Low Sugar Peach Vanilla Jam

072610 026-1 Of the five jams that we made last week (maybe of all the jams I have ever made), this is my very favorite. Fresh ripe peaches and flecks of vanilla bean. And low in sugar. What could be better.

Try it mixed into some homemade yogurt, or on top of ice cream.

072210 040-1

It is still too early in the season here for freestone peaches, but there are some good deals at the farmers market on some luscious, ripe non-freestone varieties. And for jam, these are perfect!

072210 035-1 To quickly and easily remove the peach skin, blanch the peaches in simmering water for 15-30 seconds, then transfer to an ice water bath.

072210 041-1 When making jam, the easiest way to crush your peaches, especially non-freestone varieties, is to take the whole peeled peach in your hand (over a large bowl) and squeeze. If your peaches are ripe, which they should be for a good jam, the peach flesh will be crushed through your fingers, leaving you with just the pit in your hand. Kids love this job!

To get as much vanilla flavor in this jam as I could without overcooking the peaches, I combined the crushed peaches with some lemon juice, 1 cup sugar and 1/2 tsp stevia in a large bowl. Then I added the vanilla bean (cut the bean in half lengthwise, then use the tip of a knife to scrape all of the seeds into the bowl with the fruit); stir in both the seeds and the vanilla bean halves. Let peach mixture sit for 2-3 hours, or overnight (in the refrigerator).

Leave the vanilla bean in while cooking the jam, removing it just before filling your jars.

072610 047-1

I love vanilla bean flecks!

072610 026-1

————

RECIPE:

Low Sugar Peach Vanilla Jam

  • Servings: Makes 5-6 Half Pint Jars
  • Print

072610 026-1

5 cups crushed peaches (about 4 1b)
1 ¼ cups sugar, divided
½ tsp powdered stevia or 1 tsp liquid stevia
2 Tbs lemon juice
1 vanilla bean
1 box low-sugar pectin

Combine peaches, 1 cup sugar, stevia, and lemon juice in a large saucepan or bowl. Split vanilla bean in half lengthwise. Scrape seeds into bowl with peaches. Stir in the vanilla bean pod. Let sit for 2-3 hours or overnight (cover and refrigerate if leaving overnight).

Mix pectin with ¼ cup sugar. Stir into peach mixture. Bring to a hard boil (boiling doesn’t stop when stirred) over medium-high heat. Cook, stirring constantly, for 5 minutes. Remove from heat. Remove vanilla bean pod.

Ladle into jars, leaving 1/8” headspace. Wipe rims of jars. Place lids on jars.

Place jars in a boiling bath canner or steam canner. Return water to a gentle boil. Process 10 minutes. Cool on a towel on kitchen counter for 24 hours. Check seal.

Yield: 5-6 half-pint jars

Note: Peaches, stevia brands, and personal taste vary. Taste jam after cooking; if needed, add small amounts of additional sugar or stevia until desired sweetness. Return jam to a full rolling boil after adding any additional ingredients.

NoEmptyChairs.me

12 Comments

Filed under Canning/Freezing, Condiments/Sauces

Dulce de Leche

DSC02455.jpg

**Below are six different ways to make Dulce de Leche. Click on the “METHOD” titles to go to the individual blog posts for more detailed instructions and pictures**

Dulce de Leche

DSC02455.jpg

STOVETOP METHOD:

Ingredients:

  • unopened cans of sweetened condensed milk

Preparation:

  1. Start with a large stockpot. Place a rack in the bottom of the pot (mine has a steamer insert that I used).
  2. Remove the labels from your sweetened condensed milk. Place unopened, label-free cans  into the bottom of your stockpot. You can use as many as will fit in one layer in your pot.
  3. Fill pot with room temperature tap water. Cover cans completely with water. The water level should be at least 2 inches above the cans.
  4. Cover the pot and bring to a boil. Reduce heat to a simmer. Cook, covered, for 3 hours.
    ***The water level must remain above the top of the cans. If not—this is when you end up cleaning caramel from exploding cans off of the top of your ceiling and every surface beneath it*** To ensure that you don’t forget that you are cooking when you go off and start another project, set a timer for 30 minutes. Check water level (add more boiling water, if necessary), then set the timer again for another 30 minutes. Continue setting the timer in 30 minute increments until the 3 hours are up.
  5. Remove pan from heat, remove lid, and let water cool for 30-60 minutes before removing cans.
  6. Unopened cans can be stored on a pantry shelf (use a marker to label cans). Opened cans need to be refrigerated.

CROCKPOT METHOD:

Ingredients:

  • Unopened cans of sweetened condensed milk

Preparation:

  1. Remove labels from sweetened condensed milk cans. Do not open cans.
  2. Place cans in the bottom of a crock pot.
  3. Cover cans completely with room temperature water. **Be sure that water completely covers cans**
  4. Place the lid on the crock pot and cook on low heat for 8 hours. (The water level in my crock pot stayed the same for the entire cooking time, so there was no need to add additional water.)
  5. Turn off crock pot, remove lid and let water cool 30-60 minutes before removing cans.
  6. Unopened cans can be stored on a pantry shelf (use a marker to label cans). Opened cans need to be refrigerated.

OVEN METHOD:

Ingredients:

  • One can of sweetened condensed milk

Preparation:

  1. Preheat oven to 425°F.
  2. Pour one can of sweetened condensed milk into a glass pie plate. Cover the pie plate securely with foil.
  3. Place foil-covered pie plate in a larger baking pan. (I used the bottom half of a broiler pan.)
  4. Place the pans on an oven rack and add hot water until it reaches the halfway mark of the pie plate.
  5. Bake for 60-90 minutes, adding more water if necessary

DOUBLE BOILER METHOD:

Ingredients:

  • One can of sweetened condensed milk

Preparation:

  1. Pour one can of sweetened condensed milk into the top of a double boiler.
  2. Fill the bottom of the double boiler with water and bring to a boil.
  3. Cover pan and cook over low heat for 50-60 minutes (or longer to get desired consistency).
  4. Stir mixture occasionally, until thick and caramel-colored.

PRESSURE CANNER METHOD:

Ingredients:

  • Cans of sweetened condensed milk

Preparation:

  1. Wash canning jars (a quick run through the dishwasher is a good way to sanitize them). Place new canning lids in a small pan of very hot water (bring water to a boil, then remove from heat and add lids).
  2. Open sweetened condensed milk cans and pour into canning jars, leaving 1/2” headspace. (Try not to lick the remaining sweet milk off of the can lids now-you don’t want to incorporate any germs into the jars. There will be plenty of time for licking when the jars are processing.)
  3. Wipe rims and edges of jars with a damp cloth to remove any milk that dribbled.
  4. Place lids and rings on jars.
  5. Place filled jars on a rack in a pressure canner (YOU MUST USE A PRESSURE CANNER, NOT A BOILING BATH CANNER). Add 3 quarts of room temperature water. DO NOT BRING WATER TO A BOIL BEFORE ADDING JARS. Since you are not doing a “hot pack” (hot jars; hot filling; hot water), the jars WILL break if you place them directly into boiling water. Then you end up with a very large pot full of sticky, sugar milk/water. Leaving you to clean all of the other jars and the pot and start over. Not fun.
  6. Place the lid on the pressure canner and bring the water to a boil over high heat.
  7. After you have a steady steam flow through the vent pipe for 10 minutes, place the pressure regulator on the vent pipe.
  8. Continue to cook on high until pressure reaches 15 lb.
  9. Lower heat to maintain a constant 15 lb pressure. Keep an eye on the pressure gauge and adjust heat to maintain 15 lb of pressure. Cook for 20 minutes at 15 lb pressure. I used both pint and half-pint jars, and they both came out the same after 20 minutes.
  10. Turn off stove and remove pressure canner from heat. DO NOT OPEN. Let the pressure drop until the air vent/cover lock has completely dropped and no steam escapes when the pressure regulator is tilted (this took about 30 minutes for mine).
  11. When pressure is completely reduced, remove pressure regulator and open canner. Remove jars and set on the countertop on a clean towel.
  12. Let sit for 24 hours. Check seal. Refrigerate for added food safety.

HOMEMADE METHOD
(Adapted from Alton Brown):

Ingredients:

  • 4 cups (1 quart) whole milk
  • 1 ½ cups granulated sugar
  • ½ tsp baking soda
  • 1 vanilla bean, split

Preparation:

  1. Combine the milk and sugar in a heavy saucepan.
  2. Bring to a boil over medium heat. Do not stir.
  3. Remove from heat and use a skimmer to remove foam (a spoon or small ladle will work if you don’t have a skimmer).
  4. Add baking soda and split (but not scraped) vanilla bean to the pan.
  5. Cook, uncovered, over low heat for one hour, stirring often and skimming foam as necessary.
  6. Remove vanilla bean and continue to cook, stirring constantly, until mixture reaches desired thickness.  This will take about 60 minutes, depending on how thick you want your caramel. It will burn easily at this point, so be attentive!
  7. The dulce de leche is close to done when a spoon dragged through the mixture leaves a trail. It will thicken a lot as it cools. Test for consistency by dropping a small spoonful into a cup of ice water, or by placing a few drops on a plate that has been placed in the freezer.
  8. The original recipe calls for straining through a fine mesh strainer, but I skipped this step and it was still nice and smooth.

NoEmptyChairs.me

Leave a comment

Filed under Candy, Desserts, Tips and Tutorials