Tag Archives: recipe

Low Sugar Peach Vanilla Jam

072610 026-1 Of the five jams that we made last week (maybe of all the jams I have ever made), this is my very favorite. Fresh ripe peaches and flecks of vanilla bean. And low in sugar. What could be better.

Try it mixed into some homemade yogurt, or on top of ice cream.
072210 040-1

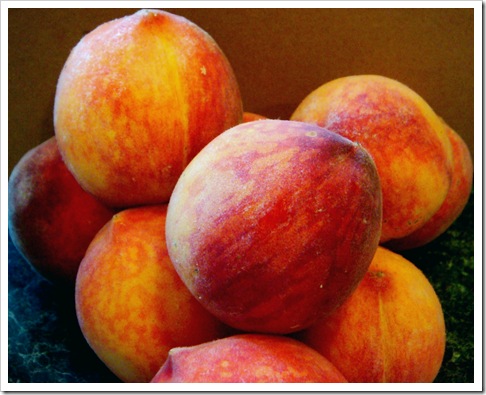
It is still too early in the season here for freestone peaches, but there are some good deals at the farmers market on some luscious, ripe non-freestone varieties. And for jam, these are perfect!

072210 035-1 To quickly and easily remove the peach skin, blanch the peaches in simmering water for 15-30 seconds, then transfer to an ice water bath.

072210 041-1 When making jam, the easiest way to crush your peaches, especially non-freestone varieties, is to take the whole peeled peach in your hand (over a large bowl) and squeeze. If your peaches are ripe, which they should be for a good jam, the peach flesh will be crushed through your fingers, leaving you with just the pit in your hand. Kids love this job!

To get as much vanilla flavor in this jam as I could without overcooking the peaches, I combined the crushed peaches with some lemon juice, 1 cup sugar and 1/2 tsp stevia in a large bowl. Then I added the vanilla bean (cut the bean in half lengthwise, then use the tip of a knife to scrape all of the seeds into the bowl with the fruit); stir in both the seeds and the vanilla bean halves. Let peach mixture sit for 2-3 hours, or overnight (in the refrigerator).

Leave the vanilla bean in while cooking the jam, removing it just before filling your jars.
072610 047-1

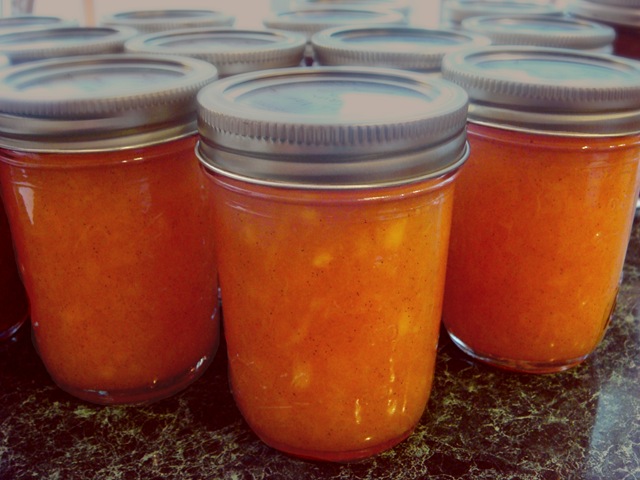
I love vanilla bean flecks!

072610 026-1

————

RECIPE:

Low Sugar Peach Vanilla Jam

  • Servings: Makes 5-6 Half Pint Jars
  • Print

072610 026-1

5 cups crushed peaches (about 4 1b)
1 ¼ cups sugar, divided
½ tsp powdered stevia or 1 tsp liquid stevia
2 Tbs lemon juice
1 vanilla bean
1 box low-sugar pectin

Combine peaches, 1 cup sugar, stevia, and lemon juice in a large saucepan or bowl. Split vanilla bean in half lengthwise. Scrape seeds into bowl with peaches. Stir in the vanilla bean pod. Let sit for 2-3 hours or overnight (cover and refrigerate if leaving overnight).

Mix pectin with ¼ cup sugar. Stir into peach mixture. Bring to a hard boil (boiling doesn’t stop when stirred) over medium-high heat. Cook, stirring constantly, for 5 minutes. Remove from heat. Remove vanilla bean pod.

Ladle into jars, leaving 1/8” headspace. Wipe rims of jars. Place lids on jars.

Place jars in a boiling bath canner or steam canner. Return water to a gentle boil. Process 10 minutes. Cool on a towel on kitchen counter for 24 hours. Check seal.

Yield: 5-6 half-pint jars

Note: Peaches, stevia brands, and personal taste vary. Taste jam after cooking; if needed, add small amounts of additional sugar or stevia until desired sweetness. Return jam to a full rolling boil after adding any additional ingredients.

NoEmptyChairs.me

12 Comments

Filed under Canning/Freezing, Condiments/Sauces

Dulce de Leche

DSC02455.jpg

**Below are six different ways to make Dulce de Leche. Click on the “METHOD” titles to go to the individual blog posts for more detailed instructions and pictures**

Dulce de Leche

DSC02455.jpg

STOVETOP METHOD:

Ingredients:

  • unopened cans of sweetened condensed milk

Preparation:

  1. Start with a large stockpot. Place a rack in the bottom of the pot (mine has a steamer insert that I used).
  2. Remove the labels from your sweetened condensed milk. Place unopened, label-free cans  into the bottom of your stockpot. You can use as many as will fit in one layer in your pot.
  3. Fill pot with room temperature tap water. Cover cans completely with water. The water level should be at least 2 inches above the cans.
  4. Cover the pot and bring to a boil. Reduce heat to a simmer. Cook, covered, for 3 hours.
    ***The water level must remain above the top of the cans. If not—this is when you end up cleaning caramel from exploding cans off of the top of your ceiling and every surface beneath it*** To ensure that you don’t forget that you are cooking when you go off and start another project, set a timer for 30 minutes. Check water level (add more boiling water, if necessary), then set the timer again for another 30 minutes. Continue setting the timer in 30 minute increments until the 3 hours are up.
  5. Remove pan from heat, remove lid, and let water cool for 30-60 minutes before removing cans.
  6. Unopened cans can be stored on a pantry shelf (use a marker to label cans). Opened cans need to be refrigerated.

CROCKPOT METHOD:

Ingredients:

  • Unopened cans of sweetened condensed milk

Preparation:

  1. Remove labels from sweetened condensed milk cans. Do not open cans.
  2. Place cans in the bottom of a crock pot.
  3. Cover cans completely with room temperature water. **Be sure that water completely covers cans**
  4. Place the lid on the crock pot and cook on low heat for 8 hours. (The water level in my crock pot stayed the same for the entire cooking time, so there was no need to add additional water.)
  5. Turn off crock pot, remove lid and let water cool 30-60 minutes before removing cans.
  6. Unopened cans can be stored on a pantry shelf (use a marker to label cans). Opened cans need to be refrigerated.

OVEN METHOD:

Ingredients:

  • One can of sweetened condensed milk

Preparation:

  1. Preheat oven to 425°F.
  2. Pour one can of sweetened condensed milk into a glass pie plate. Cover the pie plate securely with foil.
  3. Place foil-covered pie plate in a larger baking pan. (I used the bottom half of a broiler pan.)
  4. Place the pans on an oven rack and add hot water until it reaches the halfway mark of the pie plate.
  5. Bake for 60-90 minutes, adding more water if necessary

DOUBLE BOILER METHOD:

Ingredients:

  • One can of sweetened condensed milk

Preparation:

  1. Pour one can of sweetened condensed milk into the top of a double boiler.
  2. Fill the bottom of the double boiler with water and bring to a boil.
  3. Cover pan and cook over low heat for 50-60 minutes (or longer to get desired consistency).
  4. Stir mixture occasionally, until thick and caramel-colored.

PRESSURE CANNER METHOD:

Ingredients:

  • Cans of sweetened condensed milk

Preparation:

  1. Wash canning jars (a quick run through the dishwasher is a good way to sanitize them). Place new canning lids in a small pan of very hot water (bring water to a boil, then remove from heat and add lids).
  2. Open sweetened condensed milk cans and pour into canning jars, leaving 1/2” headspace. (Try not to lick the remaining sweet milk off of the can lids now-you don’t want to incorporate any germs into the jars. There will be plenty of time for licking when the jars are processing.)
  3. Wipe rims and edges of jars with a damp cloth to remove any milk that dribbled.
  4. Place lids and rings on jars.
  5. Place filled jars on a rack in a pressure canner (YOU MUST USE A PRESSURE CANNER, NOT A BOILING BATH CANNER). Add 3 quarts of room temperature water. DO NOT BRING WATER TO A BOIL BEFORE ADDING JARS. Since you are not doing a “hot pack” (hot jars; hot filling; hot water), the jars WILL break if you place them directly into boiling water. Then you end up with a very large pot full of sticky, sugar milk/water. Leaving you to clean all of the other jars and the pot and start over. Not fun.
  6. Place the lid on the pressure canner and bring the water to a boil over high heat.
  7. After you have a steady steam flow through the vent pipe for 10 minutes, place the pressure regulator on the vent pipe.
  8. Continue to cook on high until pressure reaches 15 lb.
  9. Lower heat to maintain a constant 15 lb pressure. Keep an eye on the pressure gauge and adjust heat to maintain 15 lb of pressure. Cook for 20 minutes at 15 lb pressure. I used both pint and half-pint jars, and they both came out the same after 20 minutes.
  10. Turn off stove and remove pressure canner from heat. DO NOT OPEN. Let the pressure drop until the air vent/cover lock has completely dropped and no steam escapes when the pressure regulator is tilted (this took about 30 minutes for mine).
  11. When pressure is completely reduced, remove pressure regulator and open canner. Remove jars and set on the countertop on a clean towel.
  12. Let sit for 24 hours. Check seal. Refrigerate for added food safety.

HOMEMADE METHOD
(Adapted from Alton Brown):

Ingredients:

  • 4 cups (1 quart) whole milk
  • 1 ½ cups granulated sugar
  • ½ tsp baking soda
  • 1 vanilla bean, split

Preparation:

  1. Combine the milk and sugar in a heavy saucepan.
  2. Bring to a boil over medium heat. Do not stir.
  3. Remove from heat and use a skimmer to remove foam (a spoon or small ladle will work if you don’t have a skimmer).
  4. Add baking soda and split (but not scraped) vanilla bean to the pan.
  5. Cook, uncovered, over low heat for one hour, stirring often and skimming foam as necessary.
  6. Remove vanilla bean and continue to cook, stirring constantly, until mixture reaches desired thickness.  This will take about 60 minutes, depending on how thick you want your caramel. It will burn easily at this point, so be attentive!
  7. The dulce de leche is close to done when a spoon dragged through the mixture leaves a trail. It will thicken a lot as it cools. Test for consistency by dropping a small spoonful into a cup of ice water, or by placing a few drops on a plate that has been placed in the freezer.
  8. The original recipe calls for straining through a fine mesh strainer, but I skipped this step and it was still nice and smooth.

NoEmptyChairs.me

Leave a comment

Filed under Candy, Desserts, Tips and Tutorials

Yummy Mummy Cookies

Yummy Mummy Cookies

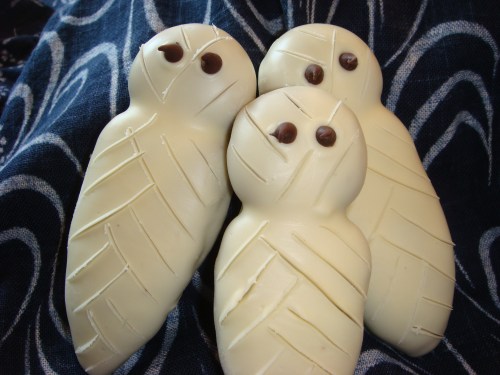
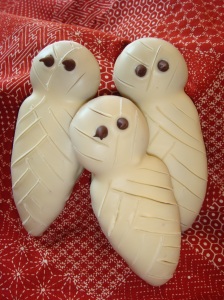
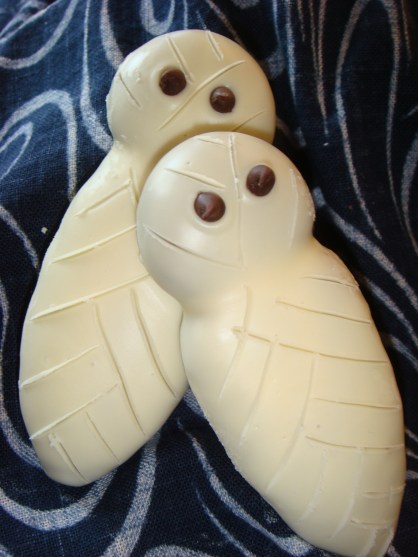
As Halloween approaches, the one thing my kids start asking for is “Mummy Cookies”. These are definitely the Halloween favorite at our house. I first found this recipe in a newspaper in northern Kentucky about 12 years ago. They were developed by Hershey’s Cocoa, and they still have a link to them on the Hershey’s website. I follow their recipe pretty closely, except that I do not add chocolate chips to the dough (I don’t think they were in the recipe 12 years ago). I like a smoother cookie, especially as these are coated in white chocolate.

DSC02958

The one problem that we have with these cookies in our house is, of course, that they are chocolate, and Little A will not let anything of that variety pass his lips. So I usually make two batches: one with the regular recipe, and one using a sugar cookie recipe as the mummy base. Little A’s okay with picking off those two little chocolate eyes. So we have both chocolate and vanilla mummies at our house. For a vanilla mummy, you can use any sugar cookie recipe that does not have a big spread. Here is my all time favorite Sugar Cookie Recipe.

I do have to admit that I prefer my mummies naked. Shh-don’t tell! I’m not a real fan of white chocolate coating. Maybe if they were dipped in a good dark chocolate, but that would kind of ruin the mummy concept. Maybe if I shaped some like Bats?

DSC02720

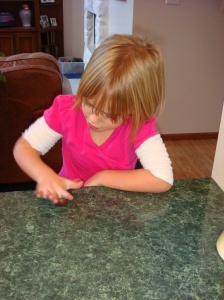
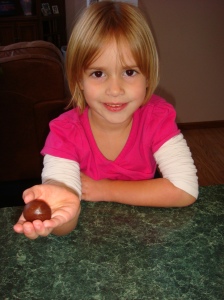
As far as the cookie recipe goes, it is pretty standard: mix the wet ingredients, then add the dry ones. These cookies are always much better with little hands helping! Before making the cookies, you can refrigerate the dough a little, if you want, but I don’t usually find this necessary. The dough will store well in the fridge or freezer, however, so it is easy to make up a really big batch and then freeze some for another day.

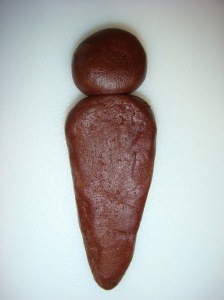
To get your cookies to look like mummies, start with about a tablespoon of dough and make a wedged carrot-shaped body (about 3 inches long).

DSC02905___DSC02908

Place the body on a cookie sheet. Roll a small teaspoon-sized  ball of dough for the head (about the size of a grape). Again-this is a great job for little hands. Place the head on top of the body, pressing the two pieces together just a little. Bake and cool completely.

DSC02876

Melt your white chocolate chips with 1-2 Tbs of shortening (per bag) in a double boiler or in the microwave.

When the white chocolate is warm enough that it pours evenly from a spoon, you are ready to encase your mummies.

DSC02939

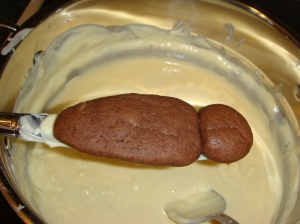
Place one cookie on the flat edge of a butter knife.

Be sure that the mummy’s head is supported, or it will soon be decapitated.

_

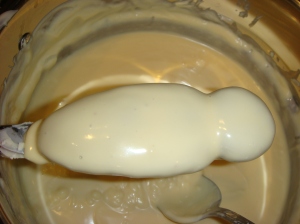
Hold the knife over the bowl of chocolate, and spoon the coating over the cookie. It should be quite runny (add additional shortening if necessary).

DSC02944

.

.

Gently tap the knife on the edge of the bowl to remove excess coating. Keep the knife straight, or you will end up with a mummy swimming in your chocolate.

.

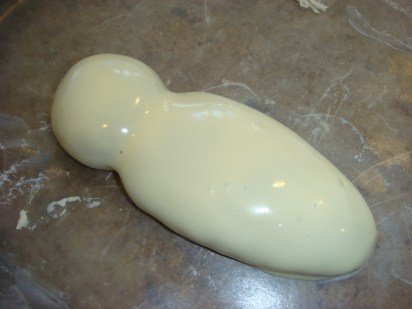
Place the coated cookie on a waxed paper lined cookie sheet (use a toothpick to gently nudge the cookie off of the knife).

DSC02946

While the coating is still wet, add two mini chocolate chips for eyes. Let the white chocolate begin to harden (but not completely).

DSC02970

Use a toothpick to draw mummy “wrappings”. Let coating completely harden. If the room is warm, you may need to place the cookie sheet in the fridge for a few minutes.

Happy Haunting!

RECIPE:

Yummy Mummy Cookies

  • Servings: about 2 dozen
  • Print

DSC02963

2/3 cup butter
1 cup sugar
2 tsp vanilla
2 eggs
2 ½ cups flour
½ cup cocoa
¼ tsp baking soda
½ tsp salt
1-2 pkg white chocolate chips
1-2 Tbs shortening per package of chips (not butter)
Mini chocolate chips

Preheat oven to 350°F.

Beat butter, sugar, and vanilla until creamy. Beat in eggs. Stir together dry ingredients; gradually add to butter mixture. Beat until blended. Refrigerate 20 minutes for easier handling, if desired.

To form mummy bodies: Roll dough into 2-3” long carrot shape. Roll a small ball for a head. Press together on ungreased cookie sheet.

Bake 8-9 minutes. Cool completely.

Microwave white chocolate chips and shortening until smooth. Coat tops of mummy cookies by placing one cookie at a time on a table knife. Hold knife over the bowl of melted white chocolate and spoon mixture over cookie. Gently tap knife to remove excess chocolate. Place on waxed paper. Place 2 mini chocolate chips on for eyes. As coating begins to set on cookies, use a toothpick to score lines into the coating to resemble mummy wrappings.  Let harden completely before storing.

Adapted from Hershey’s

Makes about 2 dozen cookies

NoEmptyChairs.me

139 Comments

Filed under Cookies