Homemade Yogurt & Granola

040910 061-1 Within about the last year and a half, I have become quite the fermented milk fan! From kefir to yogurt to lacto-fermented mayonnaise, there is always some kind of milk product sitting out on my counter, working it’s probiotic, yeast-culturing magic; turning plain old milk into something so much more healthy and delicious.

Some of my children find this disgusting, and refuse to touch anything in the fridge that is kept in a Mason Jar. Others have jumped right in and love to drink our daily kefir smoothies, or eat “stirring yogurt” (Little J’s name for homemade yogurt-because you get to “stir-in” whatever flavor or additives you want-like the granola recipe at the bottom of the page). Kefir is my sour-milk of choice, but a nice thick yogurt is always great to have around as well. I will show you some of my kefir-growing soon, but if you are new to kefir check out this great website.

Another great thing about homemade yogurt, besides the superior taste and nutritional value, is how cheap it is to make. For just about the cost of milk (especially after your first batch when you now have your own yogurt starter to use for the next batch), you can also have yogurt. We have been getting our milk from a local dairy, so I also love being able to turn good, fresh milk into creamy, delicious, no-preservative-or-other-additives yogurt.

Making Yogurt

In a saucepot, stir together milk and dry milk powder. Powdered milk is an optional ingredient, but it does help make for a thicker yogurt. If you are using a thermometer, attach it to the side of the pan and bring milk to 185°F-200°F, stirring often. If you are not using a thermometer, bring milk just barely to a boil and then remove from heat immediately. If the milk has developed a foam on top, skim this off.

Fill a clean sink with about 2-3 inches of ice water (just make sure that the water level is low enough that when you add the pan of milk, it comes about halfway up pan). Set pan of hot milk into the ice water bath. Let milk cool to about 110°F (without a thermometer: baby-bottle warm), stirring often. This should take about 10 mins. If you leave your milk too long, and it gets too cool, just reheat slightly on the stove until it reaches 110°F.
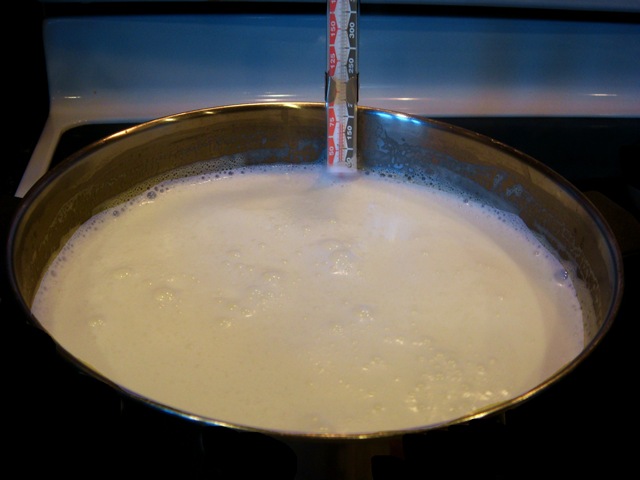
040910 0431-1 Gently stir yogurt starter (just plain, unsweetened yogurt, preferably not non-fat) into milk. The first time you make your own yogurt, you will need to buy this. Try to get a high quality, plain yogurt with no pectin added (or other additives). For future batches of yogurt, save a small amount of your own yogurt to use as a starter the next time.

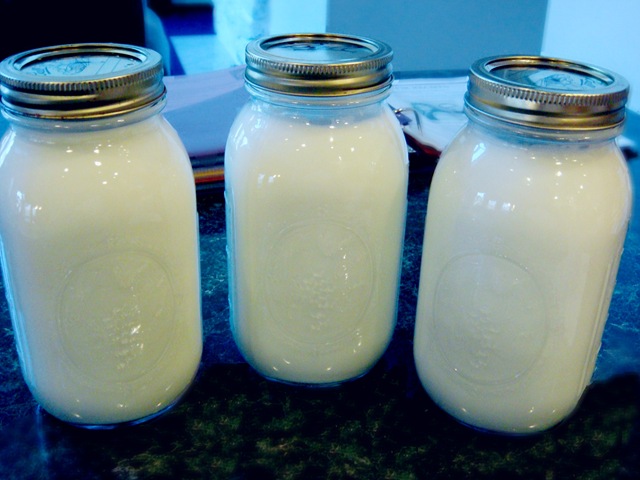
Yogurt needs to incubate between 98°F and 113°F. If the temperature is too low, the yogurt will not reproduce and you will have a runny final product. Temperatures over 118°F will kill the yogurt culture. An easy place to maintain this temperature range is in a cooler. I usually make 3 quarts of yogurt at a time (plus a little extra to use as starter the next time). This cooler fits my 3 quart-sized yogurt jars, one half-pint jar, plus 2 hot water jars for maintaining a nice warm good-bacteria growing temperature.

While the milk is cooling, I fill two quart-sized jars with boiling water and place them in a towel-lined cooler. Once I have mixed the milk with the yogurt starter, I put my yogurt-filled jars in the cooler with the hot water-filled jars.

040910 065-1 Not shown in the above photo is the small half-pint jar that I also fill and add to the cooler. It serves as the starter for the next batch of yogurt I make. You can also just save the last part of one of your quart jars, but this way, I don’t forget and eat the whole jar, and it stays sealed until I am ready to make more yogurt.

060610 018-1

Wrap the towel around the jars.

040910 066-1 Close the cooler and let the yogurt incubate for 8-12 hours. I like yogurt on the tart side, so I usually let it stay for a full 12 hours.

040910 068-1 Transfer jars to the refrigerator. Do not open or shake the jars until they have completely chilled in the refrigerator.

040910 061-1

Delicious, thick creamy yogurt!

060610 006-1

For an even better treat, top your homemade yogurt with some homemade granola!

060610 016-1

RECIPES:

Homemade Yogurt

040910 061-1

Equipment:
Canning jars and lids** (see note at bottom)
Small cooler
Bath towel
Candy/frying thermometer (optional)

Per quart jar of yogurt:
4 cups milk (whole milk is best)**
3 Tbs dry milk powder (optional, but it makes for a thicker yogurt)
2 Tbs plain yogurt

For 3 quarts of yogurt + one 1/2 pint jar (for starter)**:
3 quarts whole milk
1/2 cup (slightly heaping) dry milk powder
1/3 cup, heaping, (or 6 Tbs) plain yogurt

In a saucepot, stir together milk and dry milk powder. If you are using a thermometer, attach it to the side of the pan and bring milk to 185°F-200°F, stirring often. If you are not using a thermometer, bring milk just barely to a boil and then remove from heat immediately. If the milk has developed a foam on top, skim this off.

Fill a clean sink with about 2-3 inches of ice water (just make sure that the water level is low enough that when you add the pan of milk, it comes about halfway up pan). Set pan of hot milk into the ice water bath. Let milk cool to about 110°F (without a thermometer: baby-bottle warm), stirring often. This should take about 10 mins. If you leave your milk too long, and it gets too cool, just reheat slightly on the stove until it reaches 110°F.

While milk is cooling, boil some water (about 2 quarts if you are making 3 quarts of yogurt) and pour it into clean jars. Top with lids. Place in a towel-lined cooler. If you are making a lot of yogurt and using a large cooler, you can also just put a pan of just boiled water in the bottom of the towel-lined cooler.

Remove milk from cold water bath, and gently stir in yogurt. Pour into sterile glass jars.** Top with lids and screw top rings. Place jars of milk in the cooler with the hot water jars. Wrap towel around tops of jars and close cooler.

Let incubate for 8-12 hours. Do not open cooler during this time. You need to maintain a temperature between 98°F and 113°F. If the temperature is too low, the yogurt will not reproduce and you will have a runny final product. Temperatures over 118°F will kill the yogurt culture.

Remove yogurt jars from the cooler and place in the refrigerator to chill. Do not open jars or shake or stir yogurt until well chilled.

**NOTE: When I make yogurt, I like to make an additional jar (a small half-pint jar) to save as starter for the next batch. Using the full amount of milk given above will give you enough extra for this small jar. If you are not going to make an additional small jar, then reduce the milk by a few tablespoons per quart.

NoEmptyChairs.me

Homemade Granola

  • Servings: 20 1-cup servings
  • Print

060610 016-1

10 cups rolled oats
2 cups coarsely chopped raw almonds
2 cups coarsely chopped raw pecans
1 cup wheat germ
1 cup sunflower seeds
¼ cup flax seeds
¼ cup sesame seeds
2 tsp cinnamon (use more for a stronger flavor)
1 cup coconut oil
1 ½ cups honey (or half honey/half pure maple syrup)
1 Tbs vanilla extract
2-3 cups dried fruit: raisins, cranberries, blueberries, cherries (optional)
1 cup shredded/flaked coconut (unsweetened, if possible)(optional)

Preheat oven to 325°F.

In a large bowl, mix together oats, nuts, wheat germ, sunflower, flax and sesame seeds, and cinnamon.

Heat coconut oil until melted. Stir in honey and/or maple syrup and vanilla. Stir into oat mixture.

Pour onto a large baking dish. Bake at 325°F for 90 minutes, stirring every 15 minutes. Cook until granola is golden brown.

Cool.

Optional: stir in dried fruit. I like to store the granola without the fruit mixed in, and then add different kinds of dried fruit when I am serving the granola (saves on different kids picking out different kinds of fruit!).

Yield: This makes A LOT (more than 20 cups)! It can easily be halved, but it also stores really well in the freezer (in Ziploc bags). Freeze before adding dried fruit.

NoEmptyChairs.me

4 Comments

Filed under Breakfast/Brunch, Condiments/Sauces, Tips and Tutorials

Strawberry Cream Pie

021910 069-1

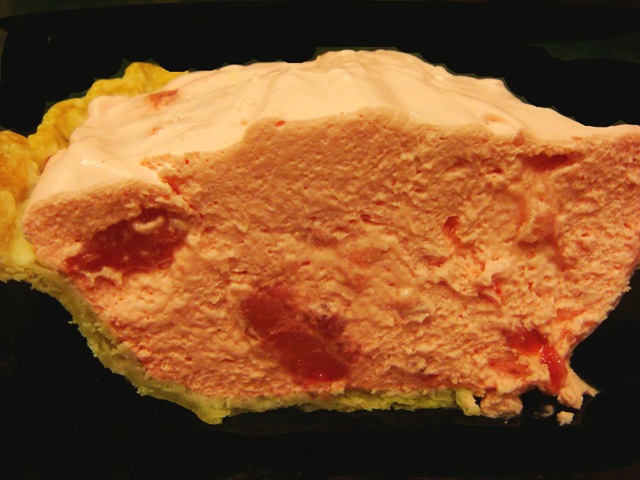
With strawberries in full swing here on the eastern half of the country, this pie is wonderfully refreshing, full of fresh strawberries and flavored whipped cream. Chilled, fresh-fruit pie: perfect for the end of a hot, humid summer day.

021910 036-1

RECIPE:

Strawberry Cream Pie

021910 069-1

1 baked pie crust
1 small package (4 servings) strawberry gelatin
2 cups (1 pt) heavy cream
8 oz cream cheese, softened
¼ cup powdered sugar or Splenda (or Stevia equivalent)
1 quart strawberries, sliced
Whole strawberries for garnish, if desired

Dissolve gelatin with ¾ cup boiling water in a small bowl. Stir in 1/3 cup cold water. Place in freezer for approximately 15-20 minutes (until it just begins to gel).

In a large bowl, use a mixer to whip the cream until stiff. Beat in cream cheese and sugar on low speed, just until combined. Fold in gelatin. Fold in strawberries. Pour into cooled baked pie crust, mounding the filling in the center. Garnish with additional strawberries, if desired.

Chill until firm, about 2 hours.

NoEmptyChairs.me
Leave a comment

Filed under Desserts

Chicken in a Mustard Cream Sauce and a Quinoa Pilaf

0401010 116-1

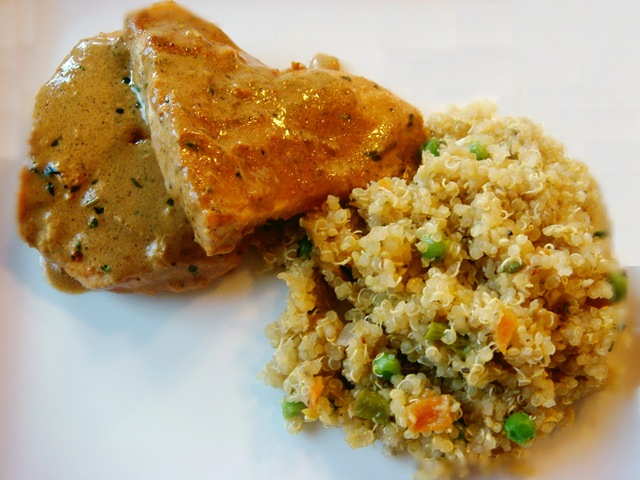
This meal makes a quick but flavorful last-minute dinner.

Sauté a few chicken breasts (I like them pounded thin for faster, more even cooking), mix 4 ingredients for a tangy herb-infused cream sauce and serve with some fresh vegetables and/or this quick pilaf.

This pilaf uses the grain quinoa (pronounced keen-wah) which has a wonderful chewy, nutty flavor. It can often be substituted in rice dishes. It cooks quickly, about 15 minutes, and is full of nutritious fiber, protein and amino acids. As it is technically not a grain, but a seed, it is also gluten-free. We spent a few weeks eating gluten free as we were doing some food elimination allergy testing, and quinoa was one of my favorite new ingredients. We are back to eating wheat/gluten, but quinoa is here to stay!

RECIPES:

Chicken with Mustard Cream Sauce

0401010 116-1

4-6 boneless, skinless chicken breasts
2 tablespoons olive oil
salt, pepper and garlic powder
¼ cup white wine, or chicken broth
1 cup heavy cream
2-3 Tbs Dijon mustard
1 Tbs chopped fresh thyme or oregano (or 1 tsp dried)

Place chicken breasts between two pieces of plastic wrap. Pound chicken breasts until thin. (If the chicken breasts are especially large, cut breasts in half crosswise-through entire breast-before pounding)  In a large skillet, heat oil over medium-high heat. Add chicken. Sprinkle chicken breasts with salt, pepper, and garlic powder. Sauté until cooked through and nicely browned, 10 to 12 minutes, turning once. Sprinkle with salt, pepper, and garlic powder again after turning. Transfer to a plate; keep warm.

Pour wine into hot skillet; cook, stirring, until almost completely reduced, about 2-3 minutes. Whisk in cream, mustard, and thyme. Cook, whisking, until slightly thickened, about 2 minutes.

Return chicken (and any accumulated chicken juices) to skillet. Heat through. Right before serving, pour a little cream sauce on plate. Place chicken on top, and drizzle remaining sauce over chicken.

Adapted from Framed

NoEmptyChairs.me

Quinoa Pilaf

0401010 116-1

2 Tbs butter
1 onion, finely chopped
2 cloves garlic
1 cup quinoa, rinsed in a fine mesh strainer
2 cups chicken broth
1 tsp Italian seasoning ( 1 Tbs chopped fresh herbs)
1 tsp salt
¼ tsp pepper
1 cup chopped vegetables (asparagus, peas, carrots
——–mushrooms, broccoli, peppers, green onions, etc)

Heat butter in a saucepan. Add onion and garlic (and mushrooms or peppers, if using). Sauté until tender, about 5 minutes. Add rinsed quinoa, broth, and seasonings.  Bring to a boil. Add longer-cooking vegetables, like carrots or broccoli. Reduce heat, cover, and cook for 15 minutes, adding shorter-cooking vegetables, like asparagus, peas, or green onions, 3-4 minutes before end of cooking time. Let stand 5 minutes before serving.

NoEmptyChairs.me

Leave a comment

Filed under Main Dishes, Side Dishes

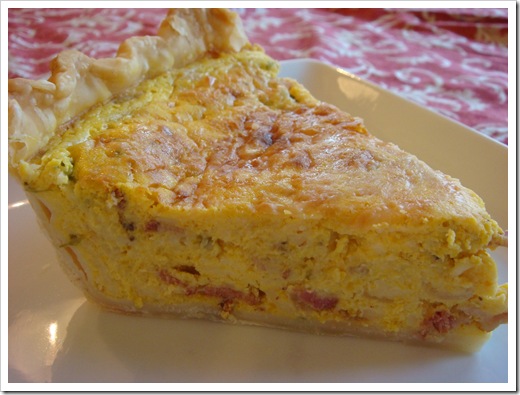
Create-Your-Own-Quiche

View Quiche

At our house, quiche is a year round food. In the winter, I pair it with soup for a hearty meal, and in the summer it stands more on its own, usually accompanied by a fresh, crisp salad.

As a family of seven, we are a two-quiche dinner family. Which works out well for everyone, because I will make one “good” quiche, chock full of vegetables, and another “plain” quiche, a standard Quiche Lorraine, with just bacon and cheese. So whichever kids don’t like my vegetables of choice that day are made happy with the plain, boring variety.

DSC05393-1 Quiche is a great way to use fresh, seasonal vegetables, especially prolific summer garden veges. It is also a good way to use small amounts of leftovers (both veges and meat like chicken or ham).

DSC05360-1 The following quiche recipe is completely adaptable to whatever meat and vegetable you have on hand. The only real recipe alteration you need to watch for is the amount of cream you use. For low-moisture add-ins (like bacon, sausage, chicken, onions,  asparagus, broccoli), 2 cups works well. For high-moisture items (ham that has not been sautéed, spinach, zucchini, tomatoes). reduce the amount of cream to 1 ½ cups or your quiche will not set correctly.

DSC05358-1

DSC05383-1

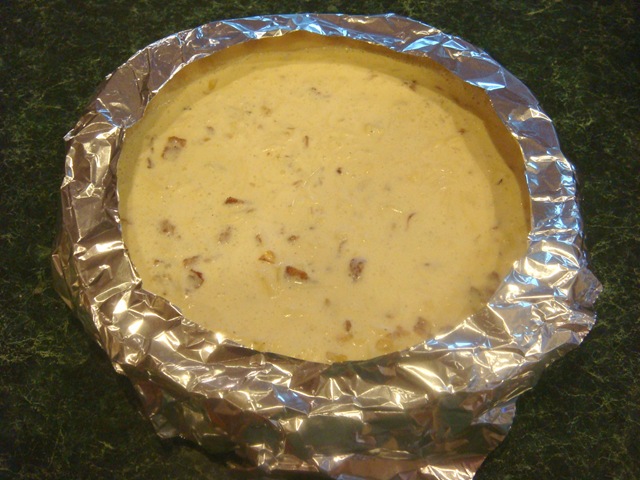
To keep the crust on my quiches (and pies!) from browning too quickly, I like to use pie crust shields over the edges. I have one commercial pie crust shield, but as I am always making two quiches at a time, for the second quiche, I make my own shield out of foil. I used to try using foil strips, but they always shifted when I tried to add additional strips, or move the pie in/out of the oven, causing me great frustration. So ….

How To . . . Make Your Own Pie Crust Shield Out of Foil

DSC05352-1

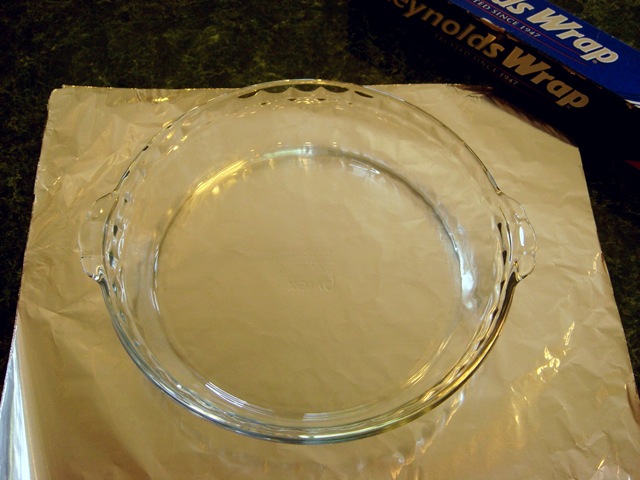
Set your pie plate, right side up, on a square of foil that is 2-3” larger than your pie plate.

060610 002-1

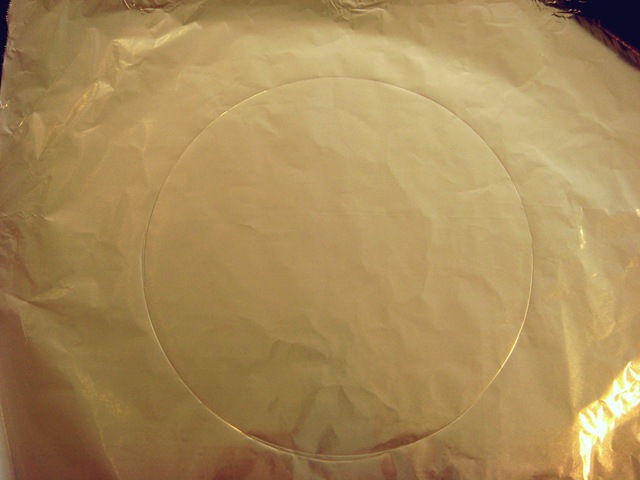
Trace the bottom of your pie plate (the smaller side).

060610 003-1

Set pie plate aside and cut out the inner circle.

060610 005-1

You can trim the corners on the outside edge, but I usually just leave them. Fill your pie crust, then set foil ring over the edge of the pie. Gently fold down outer edges, being careful not to squish all of that edge-crimping you worked so hard on!

DSC05362-1 Bake pie, or quiche, with the pie shield on. Five minutes before the end of the cooking time, carefully remove shield. If the edges are not brown enough, leave shield off and bake until edges are golden brown. If the edges are browned, replace shield and continue cooking until quiche/pie is cooked through.

DSC05393-1

DSC05383-1

—–

RECIPE:

Create Your Own Quiche

View Quiche2

Pastry crust for 9” pie plate
2 cups cream**
4 eggs
½ tsp salt
1/8 tsp pepper
Pinch of ground cayenne or Ancho chile pepper (optional)
1-2 cups chopped cooked meat (ham, bacon, chicken, sausage)
—–and/or vegetables (onions, green onions, peppers, spinach,
—–zucchini, broccoli, mushrooms, asparagus, tomatoes, etc)
½ cup fresh grated Parmesan (plus optional 2-3 Tbs for garnish)
1-1 ½ cups additional shredded cheese (Swiss, cheddar, Gruyere,
—–pepper-jack, feta, cream cheese-cubed, etc)

**NOTE: Use less cream (about 1 ½ cups) if meat/vegetables are very moist

Preheat oven to 425°F.

Prepare pastry crust and place in 9” pie plate (deep dish, if possible).

In a medium bowl, mix cream, eggs, salt, pepper, and cayenne pepper (if using).

Prepare meat and vegetable filling: chop and sauté meat and vegetables like onions, peppers, zucchini, mushrooms; lightly steam broccoli; green onions, asparagus, tomatoes, and spinach can be used raw, but frozen spinach should be thawed and drained to remove as much liquid as possible. Cool cooked vegetables slightly.

Combine meat, vegetables, Parmesan and additional cheeses in a mixing bowl. Spread evenly in pie crust. Pour cream/egg mixture over filling. Use a spatula or fork to remove any large air pockets.

If desired, cover the crust of the quiche with a pie shield. Bake at 425°F for 15 minutes. Reduce heat to 350°F and bake an additional 30 minutes, or until knife inserted in center comes out clean. Allow to set at room temperature 5-10 minutes before serving.

OPTIONAL: Sprinkle hot cooked quiche with 2-3 Tbs grated Parmesan as soon as it comes out of the oven.

—–

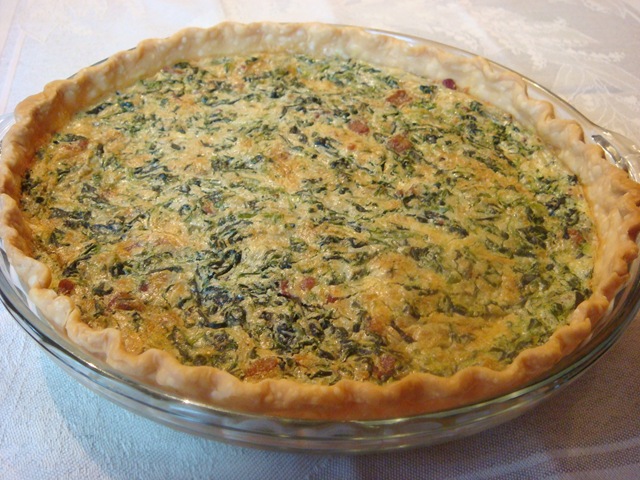
SPINACH QUICHE: I used about 1 cup cooked, crumbled bacon, 1 onion, sautéed, and 1 box of frozen spinach, drained and then squeezed to remove excess moisture. I used only 1 ½ cups cream and ½ cup each Swiss and sharp cheddar cheeses.

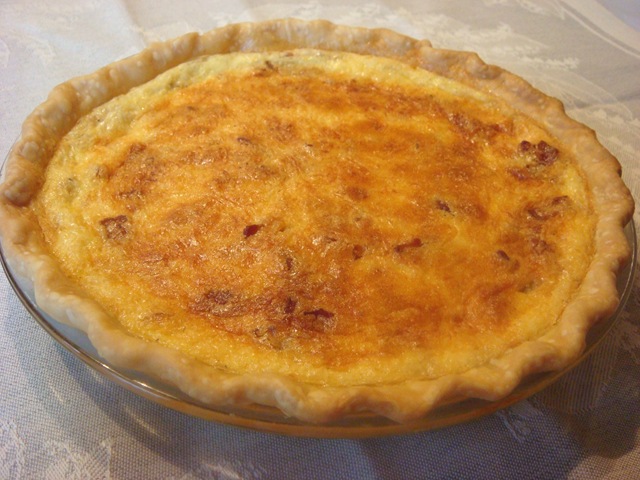
QUICHE LORRAINE: I used 1 ½ cups cooked, crumbled bacon and 1 onion, sautéed. I used 2 cups of cream and 1 ½ cups Swiss cheese.

PUMPKIN QUICHE: See recipe here

NoEmptyChairs.me
Leave a comment

Filed under Breakfast/Brunch, Main Dishes

Best Ever Cheddar and Herb Drop Biscuits

040910 018-2Looking for a great bread to serve with dinner? But no time for yeast and rising bread? Hate to roll out biscuit dough?

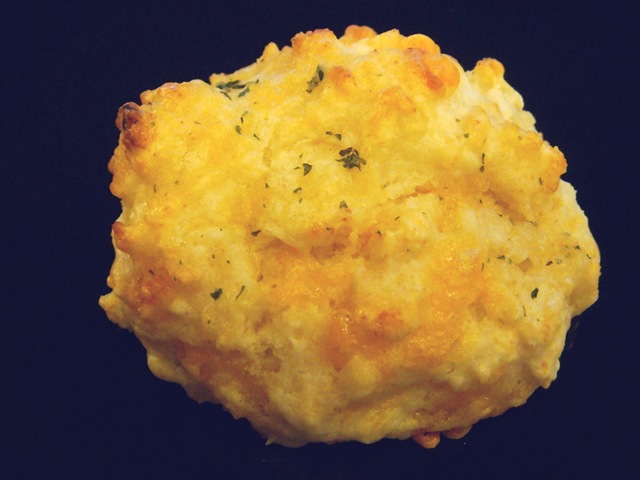
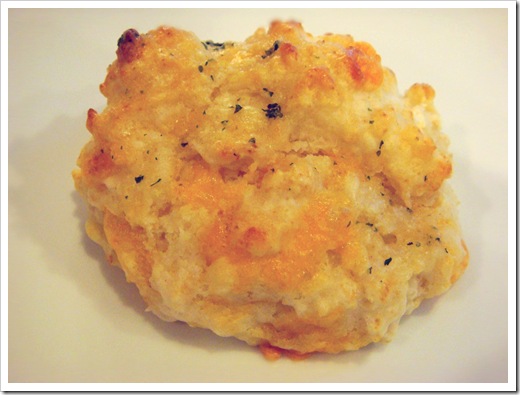
These biscuits are super fast, easy, and taste better than any biscuits I have ever tried. They can be on the table in just about 20 minutes, from start to finish.

I am not usually a fan of biscuits. They tend to be dry and flavorless. And rolling out biscuit dough never seems worth the effort. Not so with these flavorful drop biscuits! Full of cheese and garlic flavor, with a slight tanginess from the buttermilk or kefir (I am definitely a kefir fan!) Brushed with additional melted butter/garlic/herbs at the end, they are not your average hockey-puck biscuits.

Great served with pasta (in place of garlic bread) or with a nice Sunday roast. In fact, I would have a hard time coming up with meals they would not be great with.

040910 014-2

RECIPE:

Cheddar and Herb Drop Biscuits

040910 018-2

2 cups all-purpose flour
1 tablespoon baking powder
¼ teaspoon garlic powder
½ teaspoon salt
5 tablespoons cold butter, cut into pieces
1 heaping cup shredded sharp cheddar cheese
1 cup** buttermilk or kefir (I used 1 cup + 2 Tbs kefir)

3 Tbs melted butter
1 tsp dried parsley flakes
¼ tsp garlic powder

Preheat oven to 425°F. Grease or line a large baking sheet.

In a medium bowl, combine flour, baking powder, ¼ tsp garlic powder, and salt. Use a pastry blender, or two forks, to cut in butter until dough forms small pea-sized crumbs. Stir in shredded cheese. Mix in buttermilk or kefir just until moist. **Add an additional 1-2 Tbs buttermilk or kefir if biscuit dough is overly dry (dry spots here and there are fine, but the dough should hold together, and not still be crumbly).

Use two spoons or a cookie dough scoop to drop the biscuits onto a greased or lined baking sheet. Bake for 12-14 minutes, until browned and golden.

While the biscuits are baking, in a small bowl combine melted butter, parsley flakes, and garlic powder. As soon as the biscuits come out of the oven, brush the hot biscuits with the melted butter mixture. Serve immediately.

Yield: 12-18 biscuits

NOTE: If you don’t have buttermilk or kefir, you can substitute sour milk: Place 1 Tbs lemon juice or vinegar in a measuring cup. Add milk to 1 Cup line. Stir. Let sit for about 5 minutes before using.

Adapted from Mel’s Kitchen Cafe

NoEmptyChairs.me

Leave a comment

Filed under Breads

Cheese Stuffed Peppers and Pasta Shells

DSC02346-1

I love stuffed vegetables—squash, peppers, tomatoes—but my kids usually turn up their noses at such things. This recipe is easily adaptable for all of our tastes, pasta shells for the kids and vegetable shells for those of us who actually enjoy food with a little color.

DSC02305-1

One of my peppers was wobbly, so I cut a thin slice out of the bottom (being careful not to create a hole in the bottom of the pepper) to help keep the pepper level in the baking dish.

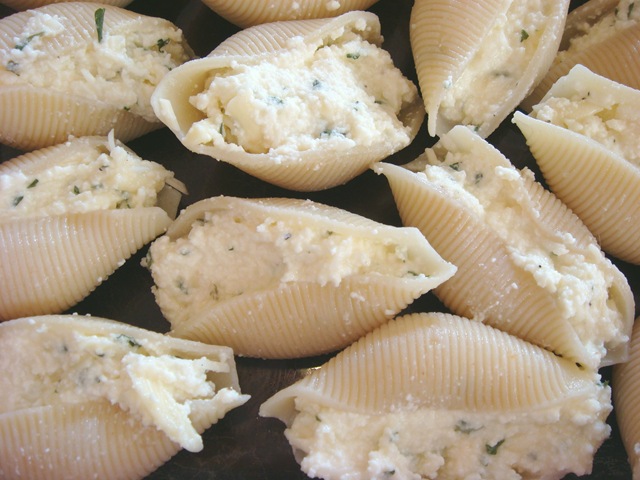
DSC02311-1 This filling is a standard ricotta manicotti filling, thick and cheesy, but I also love it mixed with spinach or other sautéed vegetables.

DSC02317-1 Stuff your peppers or pasta shells with the cheese mixture and place in a baking dish.

DSC02321-1

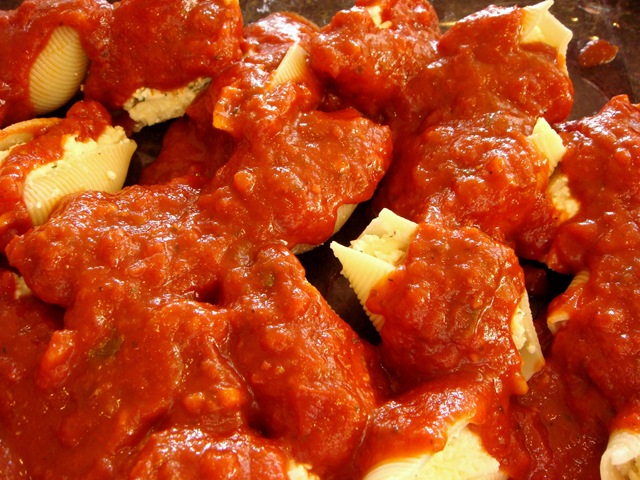
DSC02325-1 Top with sauce– a jarred marinara sauce or homemade spaghetti sauce works great—and bake, covered, for about 45 minutes at 350°F.

DSC02328-1 After it is cooked through, I like to top it with a little extra cheese and pop it back in the oven for about 5 minutes.

DSC02346-1

Serve with a tossed salad and crusty garlic bread!

RECIPE:

Cheese Stuffed Peppers or Pasta Shells (or Manicotti)

DSC02346-1

3 whole red or green peppers   OR
——½ box jumbo shells or manicotti noodles, cooked
1 lb ricotta cheese
1 ½ cups shredded mozzarella
½ cup fresh grated Parmesan
2 eggs
1 tsp dried parsley
¼ tsp salt
¼ tsp pepper
1 jar marinara sauce (or about 2-3 cups homemade sauce)
Additional grated Parmesan cheese (optional)

Preheat oven to 350°F

If using peppers, cut peppers in half and remove seeds.

Combine cheeses, eggs, and seasonings. Stuff peppers (or cooked pasta shells/manicotti noodles) with cheese mixture. Place a small amount of sauce in the bottom of the baking dish. Place stuffed peppers/shells/manicotti in pan. Pour remaining sauce over the top of the filled peppers or shells.

Bake, covered, at 350°F for 45 minutes. Uncover, sprinkle with additional Parmesan cheese, if desired, and bake 5-10 minutes longer.

—

ALTERNATE PREPARATION: Add well-drained chopped spinach and/or other sautéed vegetables (mushrooms, onions, zucchini/squash, eggplant) to cheese mixture; stuff and bake as directed.

NoEmptyChairs.me
2 Comments

Filed under Main Dishes