Category Archives: Desserts

Nutella (or Cinnamon) Swirled Buttermilk Coffee Cake

091711 023-1Nutella Swirled Coffee Cake

Last week we were swimming in coffee cake around here. Unfortunately, it was not the kind of swimming that helps trim inches off of my waistline. Good thing there were lots of hungry skinny children lurking around!

I was bringing breakfast to our seminary class on Friday, and wanted to try a new recipe, so I had to give it a test run at home earlier in the week. I ended up making quite a few changes to the original recipe, including swapping out the traditional cinnamon topping on one batch with one made from ooey, gooey chocolaty Nutella.

The first batches I made for home (shown in the pictures) used pecans, but I used walnuts the second time around for our class. I preferred the walnuts, but I almost always prefer walnuts over pecans, so choose whichever nut you prefer. Both the cinnamon and Nutella topped varieties were really good. The cake part was moist and light, and just slightly tangy from using buttermilk.

091711 021-1Cinnamon Streusel Coffee Cake

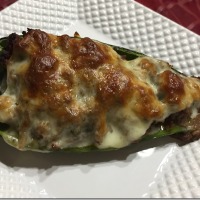
To distribute the chocolaty/cinnamony goodness throughout the cake, I layered half of the batter in the pan, added half of the topping, then repeated the layers.  The Nutella topping was very sticky; it was easiest to just use my fingers to drop small amounts onto the batter. It melts nicely into the cake while cooking.091711 002-1For an extra dose of chocolate, sprinkle some chocolate chips (not shown in this picture) on top of the Nutella layers.

091711 003-1The cinnamon topping is crumbly and can be sprinkled easily.

I split the batter and made one of each variety in two 8×8” square pans, instead of one large 9×13” pan. Just an FYI: the full batch that I made later in a standard 9×13” pan rose right to the top edge of the pan when baked, so be sure to use a pan that doesn’t have low sides!

The only down-side of this recipe is that it uses a lot of mixing bowls (four!), but the end result is definitely worth an extra run of the dishwasher.

Recipe:

Buttermilk Coffee Cake

091711 023-1091711 021-1

3 cups flour
4 tsp baking powder
1 tsp salt

3 egg whites, beaten until stiff

1 ½ cups buttermilk
1 tsp vanilla extract

¾ cup butter (1-½ sticks), softened
1 ½ cups sugar

Nutella Swirl or Cinnamon Streusel Topping

Preheat oven to 350°F. Prepare topping in a small bowl; set aside.(Choose your topping below for a 9×13” cake, or make one of each in two 8×8” pans, halving topping amounts)

Sift together flour, baking powder, and salt; set aside. Beat egg whites until stiff; set aside. Stir vanilla into buttermilk. In a separate bowl, cream butter and sugar with a mixer. Add flour mixture and buttermilk alternately until barely combined. Beat just until flour is incorporated; do not overmix. Using a rubber spatula, fold in beaten egg whites.

Spread half of the batter in a well-greased 9 x 13” baking pan (I used baking spray with flour). Sprinkle with half of the topping. Spread remaining batter into pan; sprinkle with remaining topping.

Bake for 40-45 minutes, or until center is set.
_____

NUTELLA SWIRL TOPPING:

¾ cup butter (1-½ sticks), softened
¾ cup Nutella
½ cup flour
½ cup brown sugar
1 scant tsp cinnamon
1 cup chopped walnuts or pecans
½ cup chocolate chips

Mix together all ingredients, except chocolate chips. Mixture will be sticky. Using your fingers, drop small amounts of Nutella filling onto first layer of batter. Sprinkle with half of the chocolate chips. Repeat layers.

CINNAMON STREUSEL TOPPING:

½ cup cold butter (1 stick)
½ cup flour
1 cup brown sugar
1 ½ Tbs cinnamon
1 cup chopped walnuts or pecans

Mix together all ingredients, except nuts, using a pastry cutter or two knifes until crumbly. Stir in nuts. Sprinkle half of topping onto first layer of batter. Repeat layers.

Recipe adapted from Pioneer Woman

NoEmptyChairs.me

7 Comments

Filed under Breakfast/Brunch, Desserts

Raspberry Cheesecake

RaspberryCheesecake (8)-3

One of the treats that we made to go with our berry-picking haul was this raspberry topped cheesecake. A simple creamy vanilla cheesecake topped with fresh raspberries and a raspberry sauce. For me, dessert doesn’t get much better than this.

For a more in-depth look at cooking a cheesecake in a water bath, click HERE.

The leftover raspberry sauce (I made a double batch)  has been great on ice cream and homemade waffles.

RECIPES:

Creamy Vanilla Cheesecake

RaspberryCheesecake (8)-3

Almond Shortbread Crust (or try this recipe for a graham cracker crust):
1 cup crushed shortbread cookies or Vanilla Wafer cookies
1 cup whole raw almonds
1/8 tsp salt
¼ cup melted unsalted butter (omit salt if using salted butter)

Filling:
3 (8 oz each) packages cream cheese, softened
1 cup sour cream
1 cup sugar or Stevia equivalent (about ¼ tsp powdered or ¾ tsp liquid)
2 Tbs flour
2 tsp vanilla extract
½ tsp almond extract (optional)
¼ tsp salt
3 eggs

Topping (optional):
1 cup sour cream
2 Tbs sugar or pinch Stevia
½ Tbs lemon juice (optional)
1 tsp vanilla extract

For crust:
Combine cookies and almonds in a food processor. Pulse until coarsely ground. Add melted butter and pulse just until mixed. Press onto  the bottom of a 9″ springform pan. Bake at 350°F for 10 minutes. Cool. Wrap springform pan in a double layer of foil, or one layer of foil and then place in an oven bag (like the kind used for turkeys) or a crock-pot liner. Place springform pan in a larger roasting pan.

For filling:
In a large mixing bowl, combine all filling ingredients except the eggs; beat with a mixer until smooth. Add eggs and beat again, just until smooth (do not overbeat). Pour filling over crust.  Fill roasting pan (not springform pan!) with very hot (almost boiling) water to about 2-inches deep.

Bake cheesecake in the water bath for about 60 minutes at 350°F. The cheesecake will have puffed significantly, and the middle will still be slightly jiggly. Remove pan from water bath and run a sharp knife around the sides, but do not remove ring.

For topping (sour cream topping is optional):
While cheesecake is baking, combine sour cream, sugar, lemon juice and vanilla in a small bowl. Pour over hot (cooked) cheesecake and let stand at room temperature for 45 minutes. Cover cheesecake pan (do not remove sides) with plastic wrap, taking care not to touch the surface of the cheesecake. Chill for at least four hours or overnight.

To serve:
Remove plastic wrap and remove the outer edge of the spring form pan. If desired, slide a sharp knife under the crust and slide the cheesecake off the spring form base and onto a cake stand or serving platter. Serve cheesecake alone, or topped with fresh berries or Raspberry Sauce.

NoEmptyChairs.me

Raspberry Sauce

12 oz raspberries, fresh or frozen (about 2 ½ cups of not crushed fresh berries)
½ cup water
½ cup sugar
½ Tbs lemon juice
1 Tbs ClearJel or cornstarch
2 Tbs cold water

In a heavy saucepan, combine raspberries, ½ cup water, sugar, and lemon juice. Bring to a boil. Reduce heat and simmer for 5 minutes, crushing berries slightly with the back of a spoon. For a seedless sauce: strain the berries through a fine sieve, pushing the pulp through the sieve with the back of a spoon. Return seedless puree to the saucepan (rinse saucepan first if there are seeds clinging to the sides). Mix the cornstarch and water in a small bowl; stir into puree in the saucepan. Return mixture to a boil; lower heat and simmer for 1-2 minutes, or until slightly thickened and no longer cloudy. Serve warm or cold. The sauce will thicken more as it cools.

Yield: 2 cups sauce (with seeds) or 1 ¾ cup sauce (without seeds)

To make a Raspberry Filling (for filling cakes/cupcakes/pastries): use 2-3 Tbs cornstarch and ¼ cup cold water to thicken puree. Chill filling until cold before using.

NoEmptyChairs.me

13 Comments

Filed under Condiments/Sauces, Desserts

Soccer Cake with Swiss Meringue Buttercream Icing

Bday cake 006-2

We had a slightly different cake planned for Little A’s birthday party, but with the unexpected hospital stay, we went with something much simpler: a rectangular cake make into a soccer field. The frosting is a Swiss Meringue Buttercream. It has a few steps, and does require a double boiler (or metal bowl over a pot of water) and a stand mixer. But the result is a wonderfully light, not too sweet frosting. You start with a cooked meringue (one whole cup of egg whites for a regular sized round cake; two cups for the cake we made). This is a fairly large cake (two layer 11×15” rectangle).

I had about a cup of egg whites left from making the Vanilla Custard for the Trifle, so I used that plus some reconstituted dried egg whites (Just Whites brand-available in the baking aisle of most grocery stores). Once the meringue has cooked, it is beaten until cool and glossy, then butter is beaten in to make a stable, spreadable frosting. I think this is my new favorite frosting. It was very easy to work with once it was beaten, and it is not too sweet. Now, almost a week later, the frosting is still soft (no crust) and delicious.

I love that this frosting gets most of it’s bulk from egg whites, and not sugar (that makes it almost healthy, right?). Just ignore the 4 sticks of butter when you answer that question.

Bday cake 004-2

I made a raspberry filling for the cake by beating ½ cup Raspberry Jam into about 3 or 4 cups of the meringue frosting. It held up great, and did not ooze out at all when the top layer was added. This would make a great all-around frosting as well, if you are looking for a pink cake. I would just use either a seedless raspberry jam, or a lightly sweetened raspberry puree if I was going to put it on the outside of the cake. The little bits of pulp and seeds were fine for a filling, but I would prefer a uniform color for an outside-of-the-cake frosting.

Bday cake 013-2

RECIPES:

Swiss Meringue Buttercream Icing

Bday cake 006-2

1 cup egg whites (about 8 large egg whites, or use “Just Whites” egg white powder, reconstituted, or refrigerated egg whites)
1 ½ cups sugar
pinch of salt
2 cups unsalted butter (4 sticks), at room temperature**
2 tsp vanilla extract (or use small amounts of other flavored extracts)
Gel food coloring (for colored frosting)

In the top of a double boiler, stir together  egg whites, sugar and salt. Bring water in bottom of double boiler to a low simmer; cook until the temperature of the egg whites reaches 160°F and sugar is completely dissolved (rub mixture between fingertips-it should not feel gritty). Mixture will be foamy and not a uniform consistency.

Transfer the egg white mixture to the bowl of a stand mixer. With the whisk attachment, whip until meringue is completely cooled and glossy peaks form, about 10 minutes. DO NOT ADD BUTTER UNTIL BOTH THE BOWL AND FROSTING ARE COMPLETELY COOL. Switch mixer attachment from the whisk to paddles. Add butter 1-2 Tablespoons at a time until incorporated. Mixture may appear curdled at times.  Continue beating until butter is fully incorporated and frosting is fluffy and smooth.  This will take about 10 minutes.  Add vanilla and beat smooth. Add gel food coloring and beat until color is uniform.

**BUTTER NOTE: butter should be room temperature soft, but not at the point of melting. If the butter is too cold, it will not incorporate well into the meringue, and you will have butter chunks. If the butter is over-soft, it will cause the frosting to curdle while beating-this is okay, it isn’t ruined: it will just take longer (more beating) for the frosting to become smooth.

Storage:  Store frosted cake at room temperature.  To store leftover icing: store in a covered container in the refrigerator.  When ready to use, bring to room temperature and beat until light and fluffy.

Yield: frosting for a two-layer round cake. For the cake above which is a double layer 11×15” rectangle, double the recipe.

NoEmptyChairs.me

Raspberry Swiss Meringue Buttercream Filling

Bday cake 013-2

2 cups prepared Swiss Meringue Buttercream Icing
¼ cup raspberry jam or lightly sweetened raspberry puree

Beat with a mixer until smooth. Spread between cake layers.

To frost the entire cake with raspberry buttercream, use about 1 cup lightly sweetened raspberry puree or seedless jam (for a uniform pink color with no seeds or pulp pieces) with entire batch of icing above.

Makes enough filling for a 2-layer round cake.

NoEmptyChairs.me

2 Comments

Filed under Desserts, Kids' Cakes

Birthday Trifle, Lyme Disease and Baseball

Pirates Game 006-1

Last week was a week of highs and lows for our Little A. After contracting Lyme disease last month (and a long month before a definitive diagnosis), he had some unexpected complications on Monday which landed us in Children’s Hospital for the next few days. He was released just in time to celebrate his 9th birthday on Friday: a day full of Pirates baseball (GO BUCS! Who are not only over 500 for the first time in almost 20 years, but are leading their division!) and a family celebration with one of Little A’s favorite desserts: English Trifle. A birthday party with friends on Saturday helped to erase the not-so-fun start to the week.

Trifle 022-1Happy Birthday to an amazing little boy, who was a great example of courage and patience this week.

Trifle 030.3

Late night photos do not do justice to this dessert. Layers of pound cake, fresh raspberries, strawberries and blueberries, and a homemade vanilla custard were the dessert of choice for my little guy that never eats anything made with chocolate.

Trifle 008-1Leftover Vanilla Custard

RECIPES:

English Trifle

Trifle 030.3

½ – l loaf pound cake, cut into thin cubes (or ladyfingers or angel food cake)
1 quart strawberries, sliced
1 pint blueberries
2 cups fresh or frozen raspberries
½ cup raspberry jam
1-2 Tbs sugar or small pinch of Stevia extract
Vanilla Custard (see recipe below-or use boxed vanilla pudding)
1 cup heavy cream
1 Tbs powdered sugar or small pinch of Stevia extract
1/8 tsp almond extract
Toasted almonds, for garnish

Prepare Vanilla Custard or pudding. Cool completely. In a separate bowl, mix fruits, jam and sugar/Stevia.

Layer half of the cake slices, fruit and custard in a large glass serving bowl. Repeat layers. Whip cream with powdered sugar/Stevia and almond extract. Spread on top of the trifle layers. Cover with plastic wrap and refrigerate until serving time. Just before serving, sprinkle with toasted almonds.

**NOTE: The exact amounts of cake, fruit and custard that you use will depend on the size of your bowl. Leftovers make great individual parfaits!

NoEmptyChairs.me

[–

Vanilla Custard

Trifle 008-1

¾ cup sugar
3 Tbs cornstarch or ClearJel
1 vanilla bean, optional
2 cups milk
1 cup heavy cream
4 egg yolks, lightly beaten
1 Tbs butter
1 tsp vanilla extract (if not using vanilla bean)

In a medium saucepan, combine sugar, cornstarch and vanilla bean (Split bean in half and scrape seeds into the saucepan. Place bean pod in the saucepan as well). Stir in milk and cream. Bring to a boil over medium heat. While boiling, cook and stir for 2 minutes. Remove from heat.

Stir 1 cup of the hot mixture into the beaten egg yolks. Return egg yolk mixture to the saucepan, stirring well. Return custard to a boil, reduce heat and cook for 2 additional minutes, stirring constantly.

Remove from heat. Stir in butter and vanilla extract (if using) and remove vanilla bean pod. Pour into a bowl. Place plastic wrap directly on the surface of the custard (to keep from developing a skin). Chill until cool. Do not stir while custard is cooling.

NoEmptyChairs.me

1 Comment

Filed under Desserts, Uncategorized

Strawberry Nutella Muffins

051711 074-1After bringing these muffins to our early morning seminary class, I have had several requests for the recipe. So I am going to take a break from days full of never-ending weeding in my yard and nights full of endless softball games to share them with you. Strawberries are just beginning to arrive at the farmers markets and pick-your-own farms here in western PA, so it is a perfect time to make these muffins. And everything tastes better with a little Nutella swirled in!

051711 045-1

I found this recipe on Two Peas & Their Pod, and just couldn’t resist making them. The only changes that I made to the recipe were to add more strawberries than called for, and probably more Nutella. I didn’t actually measure the Nutella; I just scooped it out of the jar to put in the center of the muffins.

As with most muffin batters, to keep them from being dry and dense, you do not want to overstir the batter. There should still be some streaks of flour in the batter.

051711 038-1

Fill the muffin cups halfway with batter. Place a dollop (about a tablespoon: I just used a soup spoon straight from the jar) of Nutella on the batter. You do not need to spread it around. Nutella can be kind of thick at room temperature. I warmed the Nutella first in the microwave for about 30 seconds. This made it really easy to drizzle the Nutella from a spoon onto the batter. My jar was almost empty, so I just heated the Nutella in the jar. If you are only using part of your jar, you might want to spoon some into a small bowl before heating it.

051711 035-1

Top with another scoop of batter, until the muffin cups are about 3/4 full. Sprinkle with Turbinado sugar. This is a coarse raw sugar. You could use regular sugar if you don’t have it, but turbinado sugar does make a nice crystally (I’m sure that’s not a real word, but it should be) crust.

051711 041-1

These are best served warm while the Nutella is soft and gooey.

051711 081-1

Here is the original recipe from Maria, with my notes at the end on the slight changes that I made.

RECIPE:

Strawberry Nutella Muffins

051711 074-1

1 ½ cups all-purpose flour
½ teaspoon salt
2 teaspoons baking powder
½ cup sugar
¼ cup canola oil
1 large egg
1/3 cup buttermilk
1 teaspoon vanilla extract
1 cup chopped fresh strawberries
1/3 cup Nutella
Turbinado sugar, for sprinkling on top of muffins

1. Preheat oven to 350°F. Line a muffin tin with paper liners or grease well. Set aside.

2. In a medium bowl, whisk together the flour, salt, baking powder, and sugar.

3. In a small bowl, combine canola oil, egg, buttermilk, and vanilla. Use a fork or whisk and mix until well combined.

5. Incorporate the wet ingredients into flour mixture.  Add slowly and gently stir, you don’t want to over mix.  The batter will be thick. Carefully fold in the strawberries.

6. Fill each muffin cup half way with batter. Next, add a small spoonful of Nutella to each muffin cup. Cover the Nutella filling with the remaining batter. Sprinkle each muffin with turbinado sugar.

7. Bake muffins for 17-20 minutes, or until muffins are golden brown and a toothpick comes out clean. Remove the muffins from the pan and let cool on a cooling rack.

Makes 9 muffins

Kelly’s notes: I used coconut oil instead of canola oil. I didn’t measure the Nutella, I just used a spoon and scooped straight from the jar, but I probably used a little more than 1/3 cup. I heated the Nutella for about 30 seconds in the microwave before using (to make for easier drizzling). I also used more strawberries than called for (about 1 ¼ – 1 ½ cups). I ended up with 12 muffins, and I needed to bake mine for 23 minutes before they were cooked through.

Recipe from Two Peas & Their Pod

NoEmptyChairs.me

3 Comments

Filed under Breads, Breakfast/Brunch, Desserts

How To . . . Make Great Waffles

buttermilk waffles sep eggs (18)-1

BWnoegg-1 (7)

Basic Waffle Tips & Strategies

BWnoegg-1 (7)

  • Make sure that your waffle iron is very hot. Cool iron = lots of sticking. My new Calphalon waffle iron is non-stick and does not require any oil or spray to keep the waffles from sticking.
  • Don’t overfill the waffle maker pockets. Spillage is not fun to clean. Start with a scant amount of batter on the first few waffles, until you are sure of the right amount. Different recipes will rise more or less while cooking, so don’t think that the same amount of batter will work with different recipes.
  • Once your batter is mixed, do not keep stirring batter between batches. The air pockets in the batter (from the baking powder/soda or whipped egg whites) will collapse with over-stirring.
  • Use a ladle or measuring cup (1/2 cup size works well for my waffle maker) to scoop batter. This minimizes the stirring or pouring which will deflate your batter.
  • If you are using add-ins like blueberries or chocolate chips, sprinkle them on the batter in the waffle iron (instead of in the batter in the bowl); then use a heat-safe rubber spatula (or the back of your ladle) to move some batter over the berries/chips so that they don’t stick to the top plate of the waffle maker. If stirred into the batter in the bowl, these heavier items tend to sink, requiring more stirring, which will deflate your batter.
  • Cool waffles on a wire cookie sheet, not a plate. Letting the air circulate around the waffles will keep them from getting soggy.
  • If you are not serving the waffles immediately, place the wire cooling rack in a warm oven (200°F or lower) until ready to serve.
  • Waffles are great for making in large batches and freezing in Ziploc bags for busy mornings. Reheat in the toaster to maintain crispy edges.
  • Buttermilk substitute: Place 1 Tbs lemon juice in a one cup measure; add milk to one cup line. Stir; let sit for 5-10 minutes before using. Or try dried buttermilk powder that stores in the fridge. Or use kefir.
  • Oil (in the batter) makes for crispier waffles; melted butter makes for softer, more cake-like waffles. I prefer using oil in most recipes. Use a mild flavored oil.

NoEmptyChairs.me

Waffle Recipes:

Leave a comment

Filed under Breads, Breakfast/Brunch, Desserts, Tips and Tutorials