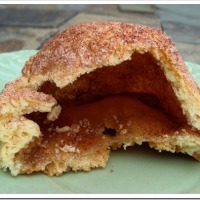
Tag Archives: dessert

Twelve Days of Christmas Cookies: Pinwheel Cookies

Christmas Pinwheel Cookies 1

DAY 1: Welcome to the 6th Annual Twelve Days of Christmas Cookies! First up is a fun Christmas Pinwheel Cookie.

This is a fun way to use a simple sugar cookie dough to make multi-colored swirled cookies. Roll dough rectangles together to form a log and then slice and bake. This dough is great for making ahead and freezing, then baking later.

The recipe comes from Just a Taste, who made them in red, white and blue for the 4th of July.

Christmas Pinwheel Cookies 2

For more Christmas cookie ideas, visit our past cookie events:
First Annual Twelve Days of Christmas Cookies
Second Annual Twelve Days of Christmas Cookies
Third Annual Twelve Days of Christmas Cookies
Fourth Annual Twelve Days of Christmas Cookies
Fifth Annual Twelve Days of Christmas Cookies

RECIPE:

Christmas Pinwheel Cookies

Christmas Pinwheel Cookies 1

3 cups all-purpose flour
½ teaspoon baking powder
½ teaspoon salt
1 cup (2 sticks) unsalted butter
1 1/3 cups sugar
2 large eggs
1 tsp vanilla extract
1 tsp almond extract (or use additional vanilla extract)
Red food coloring
Green food coloring
Christmas sprinkles

In a medium bowl, sift together the flour, baking powder and salt; set aside.

Using a mixer, beat the butter and sugar until light and fluffy. Mix in the eggs  and the vanilla and almond extracts. Add the flour mixture and beat just until combined.

Remove the dough and separate it into three equal pieces (use a kitchen scale to weigh dough, if possible). Leave one section white. Beat (or knead with hands) red food coloring into one section and green food coloring into the third section. Wrap each section in plastic wrap and refrigerate for one hour.

Remove the dough from the refrigerator and divide each color in half (you will be forming 2 dough logs). Place one of the sections of dough on a piece of waxed paper. Pat into a rough rectangle. Place a piece of plastic wrap over dough and use your fingers or a rolling pin to form a rectangle about 9” x 6” and about 1/8” thick. Repeat with remaining dough sections.

Stack the dough into two rectangles (remove plastic wrap and waxed paper): red, then white, then green. Use a rolling pin to lightly press the dough rectangles together. Starting at the longer edge of the rectangle, roll the dough into a tight log. Place the Christmas sprinkles on a large platter or rimmed baking sheet and roll the dough logs in the sprinkles, lightly pressing them into the sides of the dough.

Wrap the 2 dough logs in plastic wrap and refrigerate for at least one hour before baking.

To bake: Preheat oven to 350°F. Line baking sheets with parchment paper or a silicone mat. Remove dough from refrigerator. Use a sharp knife to slice logs into 1/4” rounds. Place 2 inches apart on baking sheet. Bake for 9-11 minutes. Cool on a wire rack.

Makes about 4 dozen cookies

NOTE: Dough logs can also be frozen. Thaw in fridge overnight before cutting and baking.

(Adapted from Just a Taste)

NoEmptyChairs.me

Leave a comment

Filed under Cookies, Desserts

Chocolate Raspberry Truffle Cake

Chocolate Raspberry Truffle Cake 3

I have made three of these cakes in the last month. One for a Boy Scout fundraising auction and two more for a dinner for a visiting Apostle of the Church of Jesus Christ of Latter-Day Saints (Elder Jeffrey R. Holland) who was here with Elder Hallstrom of the Seventy giving training to local missionaries and ward and stake leaders. Elder Holland was president of BYU when I was there, and is one of my favorite speakers, so it was really nice to meet him.

I dragged four of my kids along to help me serve, and they were really great about it, even Big J, (who returned home from serving a mission just the night before and only complained slightly about having to put his suit back on the day after coming home) and Middle K (who was celebrating her 17th birthday that day and chose to come help serve instead of having her own birthday celebration). They even washed and dried TONS of dishes! I was certainly proud of all of them that day.

We did have cake left over, so we were able to wish Middle K a very happy 17th birthday with leftover cake. She didn’t mind one bit.

Chocolate Raspberry Truffle Cake 5

This cake is made with 2 layered chocolate cakes, cut in half to make four layers. Two of the layers are drizzled with a very thin layer of chocolate ganache and then it is filled with a Raspberry Swiss Meringue Buttercream Icing. The entire cake is then frosted with the raspberry frosting and the top is drizzled with more ganache. It is finished with stars piped from cooled ganache topped with fresh raspberries. I am not usually a big chocolate cake eater, but chocolate and raspberry are such a great flavor combination that I make an exception in this case!

Chocolate Raspberry Truffle Cake 4

I first saw this cake on Annie’s Eats, but used my own chocolate cake and frosting recipes to assemble it.

RECIPE:

Chocolate Raspberry Truffle Cake

Chocolate Raspberry Truffle Cake 1

Ingredients (recipes below):
Chocolate Layer Cake
Raspberry Swiss Meringue Buttercream
Chocolate Ganache
Fresh Raspberries, for garnish

Chocolate Layer Cake
2 cups flour
½ cup regular cocoa powder
½ cup Dutch process cocoa (or Hershey’s Special Dark)
1 ½ tsp baking soda
½ tsp salt
¾ cups (1 ½ sticks) unsalted butter, softened
1 cup sugar
1 cup brown sugar
3 eggs, at room temperature
2 tsp vanilla extract
1 ½ cups buttermilk

Preheat oven to 350°F. Lightly grease 2 9” cake pans; line bottom of pans with parchment paper. Grease paper and then dust entire pan with cocoa powder.

Combine flour, cocoa powders, baking soda and salt. Mix with a whisk. In a large mixing bowl, beat butter and sugars for 5 minutes. The mixture should be very pale and fluffy. Beat in eggs and vanilla. Add flour mixture alternately with buttermilk, beginning and ending with flour mixture. Beat just until smooth.

Divide batter into prepared pans and bake for 28-30 minutes or until toothpick comes out clean. Cool in pans for 10 minutes. Invert onto wire racks, remove parchment paper and cool.

Cooled cake layers can be wrapped in plastic wrap and frozen until you are ready to assemble them. (For this cake, if you are freezing the layers: cut each layer in half before freezing to make 4 layers).

Raspberry Swiss Meringue Buttercream Icing
1 ½ cups egg whites (about 12 large egg whites, or use pasteurized egg whites that come in a carton)
2 ½ cups sugar
pinch of salt
3 cups unsalted butter (6 sticks), at room temperature**
1 Tbs vanilla extract
about 1 ½ cups Raspberry filling (see recipe below) or 1 cup raspberry jam

In the top of a double boiler, stir together  egg whites, sugar and salt. Bring water in bottom of double boiler to a low simmer; cook until the temperature of the egg whites reaches 160°F and sugar is completely dissolved (rub mixture between fingertips-it should not feel gritty). Mixture will be foamy and not a uniform consistency.

Transfer the egg white mixture to the bowl of a stand mixer. With the whisk attachment, whip until meringue is completely cooled and glossy peaks form, about 10 minutes. DO NOT ADD BUTTER UNTIL BOTH THE BOWL AND FROSTING ARE COMPLETELY COOL. Switch mixer attachment from the whisk to paddles. Add butter 1-2 Tablespoons at a time until incorporated. Mixture may appear curdled at times. Continue beating until butter is fully incorporated and frosting is fluffy and smooth.  This will take about 10 minutes.  Add vanilla and beat smooth. Add cooled raspberry filling and beat until frosting is a uniform color (start with about 1 cup filling, beat, and then add more if you want a more pronounced raspberry flavor).

**BUTTER NOTE: butter should be room temperature soft, but not at the point of melting. If the butter is too cold, it will not incorporate well into the meringue, and you will have butter chunks. If the butter is over-soft, it will cause the icing to curdle while beating-this is okay, it isn’t ruined: it will just take longer (more beating) for the frosting to become smooth. If icing still won’t set, place in the fridge for 20 minutes, and then beat again.

Raspberry Filling
12 oz raspberries, fresh or frozen (about 2 ½ cups of not crushed fresh berries)
½ cup sugar
½ Tbs lemon juice
½ cup water
2-3 Tbs cornstarch or ClearJel
¼ cup cold water

In a heavy saucepan, combine raspberries, sugar and lemon juice. Bring to a boil. Reduce heat and simmer for 5 minutes, crushing berries slightly with the back of a spoon. Strain the berries through a fine sieve, pushing the pulp through the sieve with the back of a spoon. Gradually stir ½ cup water into the seeds in the sieve (over the bowl) and press again to remove as much pulp as possible. Return seedless puree to the saucepan (rinse saucepan first if there are seeds clinging to the sides). Mix the cornstarch and ¼ cup water in a small bowl; stir into puree in the saucepan. Return mixture to a boil; lower heat and simmer for 1-2 minutes, or until slightly thickened and no longer cloudy. Cool completely (or chill) before using.

Chocolate ganache:
8 oz bittersweet chocolate, chopped (about 1 heaping cup)
1 cup heavy cream
¼ cup corn syrup

Place the chopped chocolate into a small bowl and set aside. In a Pyrex measuring cup or microwavable bowl, combine the heavy cream and corn syrup. Heat for 1 minute; stir. Pour the hot cream over the chopped chocolate. Let sit for one minutes, then stir until smooth with a whisk.

Cake Assembly:

Completely cool cake layers. Cut each layer in half to make 4 layers. Prepare frosting and ganache.

Place waxed paper strips along edges of serving plate. Place one cake layer, cut side up, on the serving plate. Waxed paper strips should cover the exposed part of the plate, but not be too far under the cake layer. Spread a very thin layer of warm ganache (about 2-3 Tbs) over cake (it will begin to soak into the cake). Spread cake with a layer of raspberry icing. Repeat with remaining 3 cake layers (I only put ganache between the 2 cut layers of cake). Ice entire cake with a thin crumb coat of icing. Refrigerate cake for 2o minutes to set slightly (optional). Create a smooth finish with remaining icing over entire cake (top of cake should be completely flat).

Set aside about ¾ cup of the ganache. Drizzle top of cake with the remaining ganache, letting it drip down the sides. Refrigerate cake.

When ganache on cake has set and the remaining ganache has set to a piping consistency (place in the refrigerator to thicken faster), spoon remaining ganache in a pastry bag fit with a large star tip (I used Wilton 1M). Pipe stars around the edge of cake. Top each star with a fresh raspberry. Serve cake at room temperature.

Storage:  Cake can be stored in the refrigerator or at room temperature. The fresh raspberries will not keep at room temperature very long, but the cake tastes best when served at room temperature (when chilled, the icing will become VERY firm). When I am making this cake ahead of time, I store it in the refrigerator, and remove it to room temperature about 3 hours before serving.

(Inspired by Annie’s Eats)

NoEmptyChairs.me

9 Comments

Filed under Desserts

Peeps Cupcakes (with a Surprise)

Peeps Cupcakes 1

It has been a busy weekend for us around here, with a sleepover birthday party, a trip to the mall for an ear-piercing, church youth temple trip, oldest daughter returning from college, middle daughter returning from a school orchestra trip, a playdate for a little boy feeling left out of all the fun, regular Sunday church activities (plus an evening Easter devotional), followed by a child’s gall bladder removal on Monday.

Peeps Cupcakes 4

If anything can help you through the wonderful chaos that is raising kids, it is these Peeps cupcakes. We served them at Little J’s 10th birthday party, but they would also make a fun Easter dessert.

Peeps Cupcakes 5

The kids were excited to find a surprise inside of the cupcakes when they bit into them!

Peeps Cupcakes 2

I scooped out the center of the cupcakes and Little J filled them with candy Easter eggs and m&ms. I piped a swirl of the rainbow frosting onto each cupcake and then we topped each one with a Peep. We used the Vanilla, Strawberry, and Orange Crème flavors. These Peeps are separated in their package so that you don’t have white patches (with no sugar covering) where you have to break the Peeps apart from a normal package.

Peeps Cupcakes 3

To make the rainbow swirled frosting: Attach a large tip (I used a Wilton 1M) to a pastry bag. Using a clean paintbrush, paint stripes of gel food coloring along the inside of the pastry bag (the stripes do not have to touch). Carefully spoon white frosting into the bag. Squeeze out and discard a little of the frosting, until you begin to see color on the edge of the frosting. Pipe frosting onto the cupcakes: start on the outside of the cupcake, holding the bag straight up and down and proceed in a swirl, slightly overlapping layers, to the center of the cupcake.

Happy Birthday Little J! Here she is sporting her newly pierced ears:

2014-04-10 17.54.33

This week will be a much needed recovery week for all of us. A perfect time to reflect on the gift of the Atonement that we celebrate this week. Here is an Easter video on the Savior’s gift to each of us and who we can become Because of Him:

Because of Him

RECIPE:

Cooked Vanilla Frosting

Peeps Cupcakes 5

1 cup whole milk
5 Tbs flour
1 tsp vanilla
1 cup butter
1 cup granulated sugar (do not use powdered sugar)
Gel food coloring

In a small saucepan, mix the flour and milk with a whisk until combined. Heat over medium heat, stirring constantly with a whisk, until mixture thickens (and is just about to boil). Remove from heat and let it cool completely to room temperature.  Stir in vanilla.

In a large mixing bowl (a stand mixer works best for this) cream the butter and sugar until light and fluffy. Beat in the cooled milk mixture and beat for 5-7 minutes, until frosting is light, fluffy and completely uniform throughout.

FOR SWIRLED FROSTING: Attach a large tip (I used a Wilton 1M) to a pastry bag. Using a clean paintbrush, paint stripes of gel food coloring along the inside of the pastry bag (the stripes do not have to touch). Carefully spoon white frosting into the bag. Squeeze out and discard a little of the frosting, until you begin to see color on the edge of the frosting. Pipe frosting onto the cupcakes.

For a peaked swirl pattern: start on the outside of the cupcake, holding the bag straight up and proceed in a swirl, slightly overlapping layers, to the center of the cupcake. For a rose pattern: start in the center of the cupcake, holding the piping bag straight up and proceed in a swirl to the outside of the cupcakes (do not overlap layers).

Yield: frosting for about 24 cupcakes

NoEmptyChairs.me

Leave a comment

Filed under Desserts, Kids' Cakes

Orange Rolls

Orange Rolls

These sweet rolls are light (not in calories, unfortunately) and soft with a slight tang from the addition of sour cream and fresh orange juice. A nice change from a traditional cinnamon roll.

To keep your rolls light and airy, do not add too much flour to your dough, and knead only until the dough begins to pull away from the side of the bowl. I roll my dough out on a buttered silicon mat (instead of a floured mat). Greased hands will also help in handling the slightly sticky dough.

An easy way to cut your dough logs into rolls without crushing the dough and having the knife stick to the dough is to use dental floss (not mint!) or a strong sewing thread. The (really out of focus) picture below shows the floss in action.

Cutting Rolls 2

I like to first make shallow knife cuts in the dough so that I have a cutting guide. Then place the floss UNDER the dough. Cross the ends of the floss over the top of the dough (lining up with the knife cuts) and pull crossed floss ends until the dough is cut through.

RECIPE:

Orange Rolls

Orange Rolls

½ cup freshly squeezed orange juice
1 tsp orange zest
3 Tbs butter
1 cup sour cream
½ cup sugar
3 eggs
about 4 – 4 ½ cups flour
1 Tbs instant yeast**
2 tsp salt

Filling:
6 Tbs butter, softened
½ cup sugar
2 tsp orange zest

Glaze:
3 cups powdered sugar
3 Tbs butter, softened
3 Tbs freshly squeezed orange juice
1 Tbs heavy cream
1 tsp orange zest
dash salt

Combine orange juice, 1 tsp orange zest, 3 Tbs butter and sour cream in a small saucepan or microwave safe bowl. Heat slowly until butter melts and mixture is warm to touch, but not hot (do not allow mixture to boil).

Transfer mixture to a large mixing bowl or stand mixer with a dough hook attached. Mix in ½ cup sugar. Add eggs all at once and mix well. Mix in flour (start with 4 cups), yeast and salt. Knead dough, adding additional flour if necessary, until dough pulls away from the edge of the bowl, but is still soft and slightly sticky. Cover and let dough rest 10 minutes.

Combine filling ingredients in a small bowl; stir well.

Divide dough in half. On a buttered surface, roll each dough half into a large rectangle about ½” thick. Spread each with half of the filling. Roll dough beginning with the long edge; press edge to seal seam. Slice each dough roll into about 12 rolls (use dental floss or sewing thread for easy cutting). Place rolls in a buttered pan. Cover and let rise in a warm place for about 1 hour, or until doubled in size.

Bake at 375°F for about 15-20 minutes, or until barely golden brown. Cool at least 15 minutes before spreading with glaze.

Combine glaze ingredients and mix well. Add additional cream or orange juice if glaze is too thick to spread. Spread on warm, but not oven-hot rolls.

**NOTE: If you are using regular, and not instant yeast, proof yeast for 5 minutes in ¼ cup of the orange juice (or water), warmed, before mixing into the dough. Allow dough to rise in a covered bowl until doubled before rolling and shaping into rolls.

Yield: about 24 rolls

NoEmptyChairs.me

1 Comment

Filed under Breads, Breakfast/Brunch, Desserts

Triple Chocolate Bundt Cake with Chocolate Ganache Glaze

Triple Chocolate Bundt Cake 1

This is definitely a cheater recipe, starting with both a chocolate cake mix and chocolate pudding mix. But it is easy, delicious and super-moist. Perfect. And baked in a bundt pan it makes a beautiful dessert suitable for serving company.

This is especially delicious served with a scoop of vanilla ice cream on top of each slice.

RECIPE:

Triple Chocolate Bundt Cake

Triple Chocolate Bundt Cake 1

1 box chocolate cake mix (I used a dark chocolate fudge flavor)
1 small box (3.9 oz) instant chocolate pudding mix
1 cup sour cream
1 cup vegetable oil
4 eggs
½ cup warm water
1 cup finely chopped bittersweet chocolate

Preheat oven to 350°F . Grease and flour a bundt pan (or spray with baking non-stick cooking spray: the kind with flour in it).

In a large bowl, mix together the cake and pudding mixes, sour cream, oil, eggs and water. Stir in the chopped chocolate and pour batter into prepared bundt pan. Bake for 45-50 minutes, or until a toothpick inserted in the center comes out clean. Cool cake completely in the bundt pan for about 90 minutes.

Invert onto a serving plate and drizzle with glaze. If desired, serve each slice topped with a scoop of vanilla ice cream.

Chocolate ganache glaze:

4 oz bittersweet chocolate, chopped (a little more than ½ cup)
½ cup heavy cream
2 Tbs corn syrup
1 Tbs granulated sugar

Place the chopped chocolate into a small bowl and set aside. In a Pyrex measuring cup or microwavable bowl, combine the heavy cream, corn syrup and sugar. Heat for 1 minute; stir. Pour the hot cream over the chopped chocolate. Let sit for one minutes, then stir until smooth with a whisk.

Use a spoon to generously drizzle the glaze over the cooled cake, allowing it to drip down the sides.

(Adapted from SixSistersStuff)

NoEmptyChairs.me

13 Comments

Filed under Desserts

Twelve Days of Christmas Cookies: Peppermint Bark Snowflakes

Peppermint Bark 1

DAY 12: Peppermint Bark Snowflakes

Layers of dark and white chocolate with crushed candy canes. You can spread the bark into a large slab and then break apart when hardened. OR: Use a silicone mold to make fun individual Peppermint Bark Snowflakes.

The bottom chocolate layer in this mold ends up with a fun imprinted design.

Peppermint bark is simply layers of dark and white chocolate flavored with peppermint extract and sprinkled with crushed candy canes between the layers and on the top.

I like to use very finely crushed candy canes (the “dust” that you get when you crush them) in between the layers, and the more coarsely chopped candy canes on the top layer.

Peppermint Bark 2

Let harden in the mold and pop them out for a fun treat. Or an easy, no-bake gift.

RECIPE:

Peppermint Bark Snowflakes

Peppermint Bark 1

8-10 candy canes
8 oz dark melting chocolate
8 oz white melting chocolate
½ tsp peppermint extract, divided

Crush candy canes in a Ziploc bag or bowl. Reserve the larger pieces of crushed candy canes to use on the top of the peppermint bark.

In a microwave safe bowl, melt dark chocolate in the microwave. Stir in ¼ tsp peppermint extract. Spoon into a Ziploc bag. Cut off a small corner and use bag to pipe chocolate into 12 silicone snowflake molds. Use a toothpick, if necessary to smooth chocolate into crevices of molds. Sprinkle top of melted dark chocolate with finely crushed candy canes. Let dark chocolate harden for about 20 minutes in the refrigerator before adding white layer.

In a microwave safe bowl, melt white chocolate in the microwave. Stir in ¼ tsp peppermint extract. Spoon into a Ziploc bag. Cut off a small corner and use bag to pipe white chocolate over the dark chocolate. Use a toothpick to spread to the edges of the mold. Sprinkle with the more coarsely chopped candy cane pieces. Let bark harden completely. Pop out of molds and store at room temperature.

If you are not using molds, spread layers of dark and white chocolate onto a baking sheet lined with a silicone mat or non-stick foil. Let harden and break into large pieces.

Makes 12 snowflakes

NoEmptyChairs.me

Leave a comment

Filed under Candy, Desserts