How to Roast Pumpkins and Winter Squash

DSC03886

Winter squash is a wonderfully versatile vegetable, but can be intimidating if you are unfamiliar with cooking it.

To use winter squash in recipes, roasting is a great way to get tender squash with deep flavor without the excess water that comes from boiling.

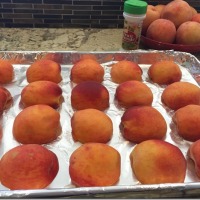
A few of the varieties of winter squash that you can choose from (pictured):

  • pumpkins (smaller will be less stringy)
  • butternut squash
  • acorn squash
  • delicata squash

DSC03861_DSC03870.JPG Crop

  • Preheat oven to 425°F.
  • Wash the outside of the squash to remove any dirt. Dry.

DSC03874

  • Cut squash in half using a large sharp knife. If your butternut squash is really large, or you do not have a large knife, you can cut the butternut squash in half crosswise first (right at the point where the neck begins) and then in half lengthwise. The narrower neck of a butternut squash does not have any seeds, just the rounder base.
  • Remove seeds and stringy pulp from inside the squash. Save those seeds for roasting! They are the best part of the squash (Yes-you can roast squash seeds too, not just pumpkin seeds).

DSC03880

  • Place squash cut side up on a rimmed baking sheet. Brush inside of squash halves with olive oil.

DSC03886

  • Turn squash over, cut side down, on the baking sheet.

DSC03887

  • Bake at 425°F for about 30 minutes, depending on the size of your squash or pumpkin. Check softness by turning squash over and piercing with a fork. The squash flesh should be soft, but not mushy.

DSC03893

  • Cool 10-15 minutes, until cool enough to handle. Scoop flesh out of shell. Puree or dice for use in recipes. Squash is easily frozen in Ziploc freezer bags. Freeze in 1 cup portions (be sure to label your bags with how much of what kind of squash you put in them).

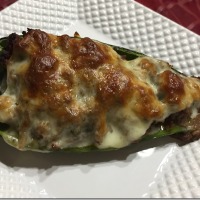
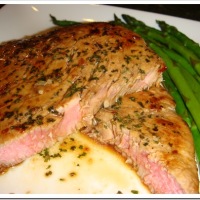
Recipes using roasted squash/pumpkins:

Squash Equivalents:

  • 1 pound peeled squash = 1 cup cooked, pureed
  • 2-1/2 pounds whole squash = about 2-3/4 to 3 cups pureed
  • 1 large (15 to 20 pounds) pumpkin = about 5 quarts (20 cups) of cooked, pureed pumpkin
  • 1 large butternut squash or 1 medium sugar/pie pumpkin = about 2-3 cups pureed

Leave a comment

Filed under Side Dishes, Tips and Tutorials

Create-Your-Own Stir Fry

Chicken Stir Fry 3

Today’s post comes to you courtesy of Little J.

JGS0917162

For a class assignment, Little J had to make a Family Favorite Recipe all on her own. This included planning, shopping, cooking and clean-up. This is my very favorite type of homework assignment! She chose to make a chicken stir-fry. Definitely one of her favorite meals.

My favorite thing about stir-fries is how adaptable they are to whatever you can find in your freezer and produce drawer. Little J chose to use chicken, fresh green beans, celery, carrots and onion in her stir-fry.

The recipe below is for a basic stir-fry that you can customize to your family’s taste. I also included Little J’s customization.

JGS0917161

I look forward to more amazing creations from this amazing daughter!

RECIPE:

Create-Your-Own Stir Fry

Chicken Stir Fry 3

1-2 lb thinly sliced chicken breasts OR thinly sliced beef (flank steak, skirt steak, or leftover roast beef) OR thinly sliced pork tenderloin

3-4 cups chopped fresh vegetables (onions, broccoli, green beans, carrots, celery, mushrooms, pea pods, asparagus, cabbage, red or green peppers, green onion—whatever is in the fridge!)

2-3 Tbs oil

Sauce:
½ cup chicken broth
¼ cup soy sauce
1 Tbs cornstarch
1 Tbs honey
1 Tbs rice wine vinegar
1 clove garlic, minced
2 tsp grated ginger
2 tsp chili paste
2 tsp sesame oil

Combine sauce ingredients in a small bowl or glass measuring cup. Stir until cornstarch and honey are completely dissolved. Place sliced meat in a Ziploc bag and add ¼ cup of the sauce to the bag with the meat. Close bag and set aside.

Heat 1 Tbs oil in a large skillet or wok. Sauté vegetables over high heat until crisp- tender. Work in small batches, removing vegetables from the pan when they are cooked (add additional oil if needed). Place cooked vegetables in serving dish.

Add 1 Tbs oil to pan; heat until hot. Add meat to pan and cook over high heat until meat is cooked through (about 5 minutes). Reduce heat to medium-low and add sauce to pan. Cook until sauce thickens (2-3 mins). Stir in cooked vegetables. Cook 1 minute to heat through.

Serve over rice.

NoEmptyChairs.me

Little J’s Chicken Stir-Fry

Chicken Stir Fry 3

4 boneless chicken breasts, thinly sliced
2 cups fresh French green beans, cut into 1-2” pieces
1 onion, thinly sliced
2 stalks celery, sliced
1 medium carrot, peeled and sliced
2-3 Tbs olive oil
Hot cooked rice

Sauce:
½ cup chicken broth
¼ cup soy sauce
1 Tbs cornstarch
1 Tbs honey (or golden low-carb sweetener)
1 Tbs rice wine vinegar
1 clove garlic, minced
2 tsp grated ginger
2 tsp chili paste
2 tsp sesame oil

Combine sauce ingredients in a small bowl or glass measuring cup. Stir until cornstarch and honey are completely dissolved. Place sliced chicken breasts in a Ziploc bag and add ¼ cup of the sauce to the bag with the chicken. Close bag and set aside.

Heat 1 Tbs oil in a large skillet or wok. Sauté vegetables over high heat until crisp- tender. Work in small batches, removing vegetables from the pan when they are cooked (add additional oil if needed). Place cooked vegetables in serving dish.

Add 1 Tbs oil to pan; heat until hot. Add chicken to pan and cook over high heat until chicken is cooked through (about 5 minutes). Reduce heat to medium-low and add sauce to pan. Cook until sauce thickens (2-3 mins). Stir in cooked vegetables. Cook 1 minute to heat through.

Serve over rice.

NoEmptyChairs.me

1 Comment

Filed under Main Dishes

Cinnamon Rolls with Cream Cheese Icing

Cinnamon Rolls 2

The best way to start a 6:00am day? Homemade cinnamon rolls, of course.

Cinnamon Rolls 1

To keep your rolls light and airy, do not add too much flour to your dough, and knead only until the dough begins to pull away from the side of the bowl. Because the dough is sticky, it needs to sit for a while in the refrigerator before rolling out the dough. To keep the rolls soft, I also roll my dough out on a buttered silicon mat (instead of a floured mat). Greased hands will help in handling the slightly sticky dough.

An easy way to cut your dough logs into rolls without crushing the dough and having the knife stick to the dough is to use dental floss (not mint!) or a strong sewing thread. See THIS POST for more details.

This recipe makes a lot: 36  large rolls. You can scale the recipe back if you don’t want as many OR Rolls can be frozen either after or before cooking.

To freeze before cooking: Prepare dough. Fill and roll dough into log. Slice into rounds and place each round on a foil lined baking sheet, not touching. Freeze until solid and then place in Ziploc bags and return to freezer. Place frozen rolls in prepared pan and allow to rise in a warm place until doubled (about 2-3 hours). Bake and frost as directed.

RECIPE:

Cinnamon Rolls with Cream Cheese Icing

Cinnamon Rolls 2

2 ½ cups buttermilk*
1 cup butter
1 cup sugar
4 large eggs
2 tsp salt
9 – 9 ½ cups flour, divided
1 ½ Tbs instant yeast

½ cup butter, softened
1 cup brown sugar
½ cup white sugar
2-3 Tbs cinnamon

Place buttermilk, butter, and sugar in a medium saucepan. Stir over medium heat until butter is melted. Pour into a large mixing bowl (stand mixer) and let cool for 15-20 minutes. Mix in eggs and salt. Add 4 cups of flour and the yeast and mix until smooth. Add additional 5 cups of flour and knead until smooth. Add additional flour, if necessary, to make a soft dough that barely pulls away from the edge of the bowl. Dough will be slightly sticky. Cover dough with plastic wrap touching the dough and refrigerate for at least 60 minutes, or until the dough is chilled and not sticky when touched.

Lightly butter rimmed baking sheets or 9”x13” pans. Mix brown sugar, white sugar and cinnamon in a small bowl.

Divide dough into two halves. On a lightly buttered surface, pat each dough half into a rectangle about 12”x18”. Spread ½ stick of butter (¼ cup) on each dough half and sprinkle with half of the sugar/cinnamon mixture. Starting from long edge, form a roll. Pinch long edge to seal. Use a knife to lightly score dough into 18  sections about 1” apart. Place a strand of dental floss under the dough and cross over the top of the dough at the scored marking. Pull dental floss to cut through dough log. Place in prepared pan. Cover with a thin towel and allow rolls to rise in a warm place for 45-60 minutes.

Preheat oven to 350°F.  Bake for 18-20 minutes. Cool for 5-10 minutes. Spread warm rolls with cream cheese glaze.

Makes 36 rolls

*Buttermilk substitute: Scald 2 cups milk (bring to boiling point) and stir in ½ cup plain yogurt

Cream Cheese Glaze
8 oz cream cheese
6 Tbs heavy cream
3-4 Tbs milk
2 tsp vanilla extract
4 cups (1 lb) powdered sugar

Use a hand mixer to mix all of the glaze ingredients. Add additional milk or cream if needed to make a smooth glaze.

To freeze rolls before cooking: Prepare dough. Fill and roll dough into log. Slice into rounds and place each round on a foil lined baking sheet, not touching. Freeze until solid and then place in Ziploc bags and return to freezer. Place frozen rolls in prepared pan and allow to rise in a warm place until doubled (about 2-3 hours). Bake and frost as directed.

NoEmptyChairs.me

Leave a comment

Filed under Breads, Breakfast/Brunch, Desserts

Grilled Pork Tenderloin with Peanut Sauce

Grilled Pork Tenderloin with Peanut Sauce

It might not be traditional American Labor Day BBQ food, but it is a favorite around here. If there is soy sauce involved, my kids will always eat it. Add some peanut butter, and Little J is in heaven!

I like to serve this with either grilled zucchini or asparagus. Set aside a little bit of the marinade before you add it to the pork and use it to marinate your vegetables for about half an hour before grilling.

Pork tenderloins almost always come two in a package at the store. Our family at home keeps shrinking, so now I usually divide the marinade in half and freeze one tenderloin in the marinade to cook another day. This also makes a good freezer meal to prepare ahead of time and have on hand for busy days.

RECIPE:

Grilled Pork Tenderloin with Peanut Sauce

Grilled Pork Tenderloin with Peanut Sauce

2 (1-2 lb each) unseasoned pork tenderloins (usually sold 2 per package)
Optional: vegetables to grill: zucchini, yellow squash, asparagus
Hot cooked rice

Marinade:
½ cup soy sauce
½ cup rice wine vinegar
2 Tbs olive oil or peanut oil
2 Tbs honey (or low carb sweetener)
1 tsp grated fresh ginger
2 cloves garlic, minced
2 tsp chili paste
1 tsp lemon pepper

Peanut Dipping Sauce:
½ cup soy sauce
¼ cup water
2 Tbs rice wine vinegar
1 Tbs toasted sesame oil
2 Tbs honey (or low carb sweetener)
1 tsp grated fresh ginger
2 cloves garlic, minced
1 tsp chili paste
½ tsp lemon pepper
½ cup natural creamy peanut butter

Place pork tenderloins in a Ziploc bag. (**See note below if planning to freeze one or both)

Combine Marinade ingredients. If you will be grilling vegetables as well, set aside ¼ cup of the marinade. Add remaining marinade to the bag with the pork tenderloins. Place the meat in the refrigerator and marinate for 4-6 hours (up to several days). Remove from refrigerator 30 minutes before grilling.

Slice squash lengthwise (or trim asparagus ends) and place in a Ziploc bag with reserved marinade for about 30 minutes.

In a Pyrex measuring cup, combine all of the Peanut Dipping Sauce ingredients except for the peanut butter. Heat in the microwave for 45 seconds. Stir in peanut butter. Add additional water if the sauce is too thick or too strong. Heat for an additional 30 seconds, just before serving.

Prepare and oil grill. If you are using a gas grill, leave one burner of the grill unlit so that you can cook the tenderloin with indirect heat (so it doesn’t burn).  Remove the tenderloin from the marinade and place on the unlit side of the grill. Close grill cover. Grill the tenderloin for about 5 minutes per side (4 sides) until the internal temperature registers 145-150°F in the center. Remove from grill and let rest for 5-10 minutes before slicing.

While meat rests, grill the marinated vegetables over direct heat for about 3 minutes per side.

Slice pork diagonally into ½ – 1” slices. Serve the pork and grilled vegetables with peanut sauce and hot steamed rice.

**FREEZER NOTE: If you do not plan to eat both tenderloins (or just want to prepare a freezer meal ahead of time), place tenderloins in separate freezer bags and add half of the marinade to each bag and place in the freezer until ready to cook. The peanut sauce can also be prepared ahead and frozen. Thaw completely in the refrigerator before cooking. Do not freeze raw vegetables.

NoEmptyChairs.me

1 Comment

Filed under Main Dishes

Grilled Beef Kabobs

Beef Shish Kabobs 2

Summer may be ending for school kids, but it is still perfect grilling weather and fresh corn and zucchini are still plentiful at the farmers’ markets.

You can alternate the beef and vegetables on the same skewer, or separate them into meat skewers and vegetable skewers. I usually grill them separately so that I can better control the rareness of the beef (we like it medium) and how cooked the vegetables are.

I made these with fresh corn, mushrooms and zucchini, but you can use any combination of fresh vegetables that you like (including peppers, yellow squash, onions, cherry tomatoes). I especially like these with fresh rosemary in the marinade. It pairs really well with the beef, but you can also use other herbs like thyme or oregano.

RECIPE:

Grilled Beef Kabobs

Beef Shish Kabobs 2

Marinade:
¼ cup vegetable oil
¼ cup soy sauce
¼ cup red wine vinegar
3 Tbs lemon juice
3 Tbs Worcestershire sauce
2 tsp dry mustard
½ tsp salt
½ tsp coarse ground black pepper
1 tsp dried parsley
2 cloves garlic, crushed
Fresh (2 Tbs) or dried herbs (2 tsp): Rosemary, thyme and/or oregano
Kabobs:
2 lb top round or sirloin beef steak, cut into cubes
Vegetables: Choose a combination of: fresh corn (cut into 1” rounds), onions, peppers, whole mushrooms, zucchini, yellow squash, cherry tomatoes
Hot steamed rice

Combine marinade ingredients. Place the beef cubes and half of marinade in a Ziploc bag or lidded container and marinate in the refrigerator for 6-8 hours (or up to 3 days). Set remaining marinade aside to marinate vegetables later. Add vegetables to reserved marinade and refrigerate for 1-4 hours (don’t over marinate the vegetables).

Place meat and vegetables on skewers, discarding meat marinade and saving vegetable marinade. Grill skewers until cooked to desired temperature.

Heat vegetable marinade to boiling. Set aside. Serve over rice with heated marinade.

NoEmptyChairs.me

Leave a comment

Filed under Main Dishes

Chinese Chicken & Eggplant in Garlic Chili Sauce

Chicken & Eggplant

One of our favorite dishes at a Pittsburgh Chinese restaurant is their Chicken and Eggplant. Here in Baltimore, we haven’t yet found a restaurant that serves quite the same dish. But we do have a fabulous Asian grocery store not too far away, so I went about recreating it at home.

When using eggplant in a stir fry, be sure to use a small variety of eggplant.

Nasu

Chinese/Japanese Eggplant (Nasu)

Sicilian striped eggplant

Sicilian Striped Eggplant

The skin on the larger eggplants is often too thick to chew in a quick stir fry. The texture of the eggplant in this dish will also be a lot better if you can cut the eggplant so that each slice has skin on one side. If all you can find are the large eggplants, you can use it, but you should peel it first.

Eggplant absorbs a lot of oil when it is cooked, so to keep this dish from being too oily, sear the eggplant with just a small amount of oil in a very hot pan until it just begins to char. Then remove it from the pan while you cook the remaining ingredients.

The sauce is a little spicier than a normal teriyaki sauce, but you can tone down the spice if you don’t like it quite soo hot. One special ingredient that I also bought from the Asian market is this Spicy Bean Sauce, which has a garlic chili base:

Spicy Bean Sauce

RECIPE:

Chinese Chicken & Eggplant in Garlic Chili Sauce

Chicken & Eggplant

Sauce:
2 Tbs spicy bean sauce
2 Tbs soy sauce
2 Tbs rice wine or cooking sherry
2 Tbs garlic chili sauce or 2 tsp chili paste
1 Tbs sugar (or low-carb sweetener)
1 tsp sesame oil
1 tsp fish sauce
1/4 tsp ground Szechuan peppercorns

Other ingredients:
4 thinly sliced chicken breasts
1 Tbs olive oil
1 tsp cornstarch
Pinch of salt
2 Tbs oil, divided
3-4 small Asian eggplants (or other small variety eggplant), cut into wedges
4 cloves of garlic, finely minced
(use 6 cloves of garlic if using chili paste instead of garlic chili sauce)
1 tsp grated fresh ginger
6 green onions, cut into 2-inch pieces
Hot cooked rice

Combine sauce ingredients and set aside. In a Ziploc bag or small bowl, combine chicken, 1 Tbs oil, cornstarch and salt. Set aside.

In a large wok or skillet, heat 1 Tbs oil until very hot. Add eggplant to hot skillet and stir  over high heat until eggplant begins to char, about 5 minutes. Do not crowd the pan; cook in two batches, if necessary. Remove eggplant from pan and set aside. Add additional 1 Tbs oil to pan. Add chicken to pan and cook, stirring, until chicken is cooked through. Reduce heat to medium and add garlic and ginger. Cook for 2 minutes, and then add green onions and cooked eggplant slices. Stir in sauce and heat through. Serve over rice.

NoEmptyChairs.me

1 Comment

Filed under Main Dishes