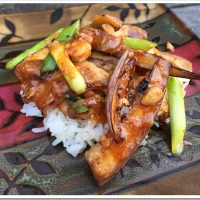
Asian Chicken Salad and Scallion Pancakes

021910 043-1

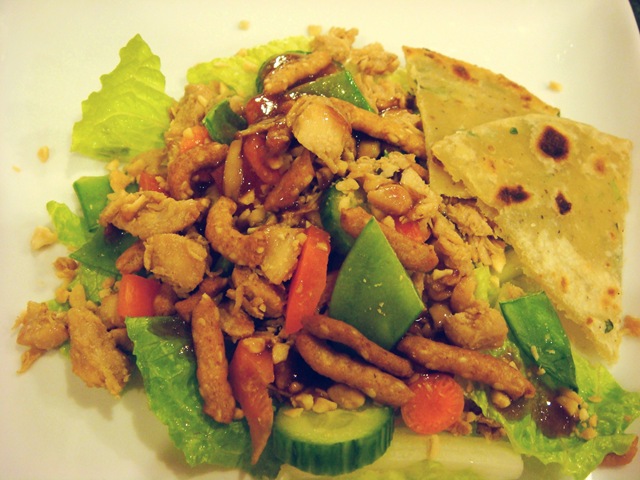
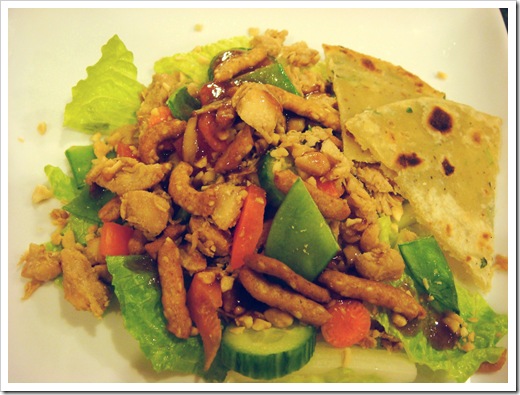
This chicken salad recipe comes from a good friend Heather. I love that it is both warm and cold. The cold, raw crunchy vegetables together with warm chicken and a warm soy dressing (that serves as both marinade and dressing) are fabulous! I served it this time with some homemade scallion pancakes, which my children ask me to make all the time.

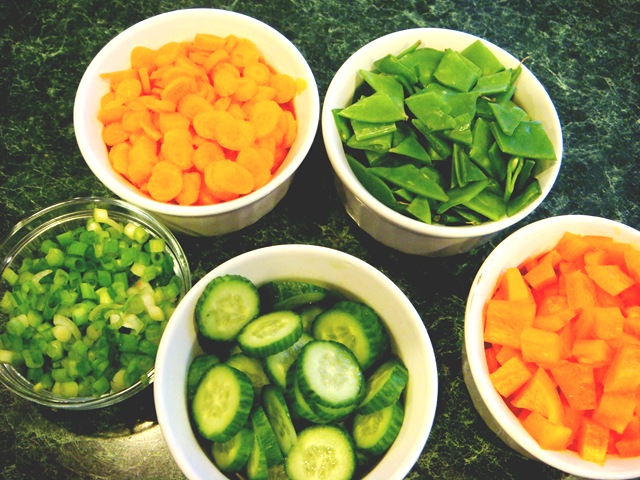
I serve this “smorgasbord” style, lining up all of the ingredients on the counter and letting everyone make their own salad. This is mostly for a selfish reason, as I don’t have to wait for each person to pick around the vegetables they don’t like before the salad makes it way around the table to me (why is it that moms are always served last-or is it just in my house?)
021910 022-1

021910 001-1

021910 025-1 We love these crunchy sesame sticks! They make a perfect topping.
021910 043-1

Below I have included Heather’s original recipe, with my slight modifications.

Scallion Pancakes
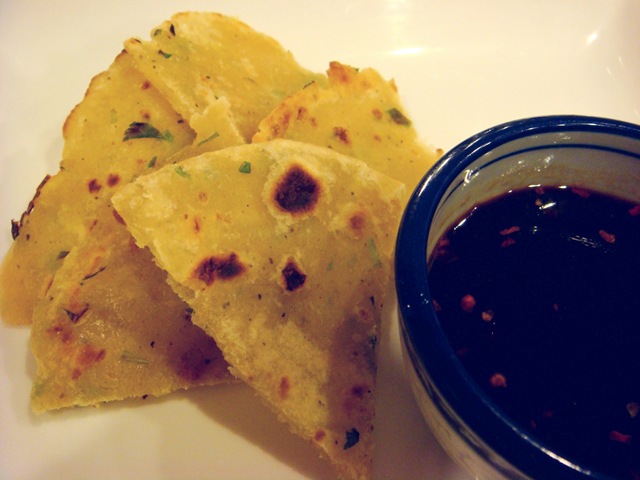
021910 053-1 Scallion Pancakes are my children’s favorite Chinese restaurant appetizer (except for maybe gyoza- they love those too). When I finally decided to try them at home, I definitely won Mother of the Year in their eyes. That title lasted about as long as it took them to gobble down these treats and for me to enlist their help in cleaning up.

The following recipe makes a lot, maybe 12-15 full size pancakes, which are cut into wedges to eat. But it can easily be scaled back.

021910 007-1 Little J is always my helper at the mixer. She is a great button-pusher (or turner in this case).

The scallion pancake dough is a simple non-yeast dough made from flour, salt & pepper, chopped scallions and sesame & olive oils. These ingredients are bound together with some boiling water. The boiling water helps to start cooking the dough before it even gets to the pan.
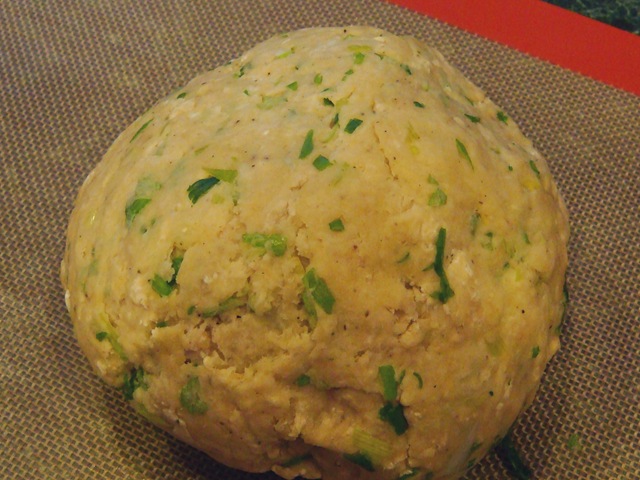
021910 009-1

Roll the dough into thin circles, about 6-inches in diameter.
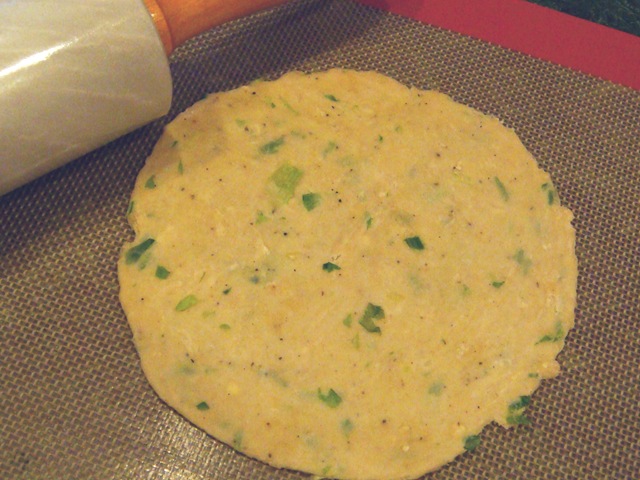
021910 014-1

Cook, one at a time, in a small hot skillet with about 1 tsp of oil.

021910 017-1

Cook over medium-high heat for 1-2 minutes per side. Place on a paper-towel lined plate while cooking remaining pancakes.

021910 018-1

Cut each pancake into 6-8 wedges and serve with this dipping sauce made from soy sauce and Mirin (a sweet Japanese vinegar). We like things a little spicy, so it also has some crushed red pepper flakes mixed in, but you can adjust those to taste. Sometimes I add a little grated ginger to the sauce, but I actually prefer it without the ginger. Mirin is available in most supermarkets in the Asian section. It may also be called “seasoned rice vinegar”.

021910 053-1

RECIPES:

Asian Chicken Salad

021910 043-1

Dressing/Marinade:
¼ cup brown or white sugar (I used a few drops of Stevia)
¼ cup soy sauce
¼ cup rice vinegar or cider vinegar (I used the rice vinegar)
¼ cup canola oil (I used olive oil)
1 Tbs sesame oil
2 tsp minced fresh ginger
4 cloves minced garlic
½ tsp salt (I left this out)
½ Tbs cornstarch
1 Tbs water

2 boneless skinless chicken breasts

Salad:
2 heads of romaine lettuce, washed and chopped
1 red pepper, diced
2 carrots, peeled and grated (I used sliced baby carrots)
3 green onions, diced
1 cup sugar snap peas, chopped (I used snow peas)
½ cup salted peanuts
½ cup sesame sticks (we used a lot more than this)
**I also used some sliced mini-cucumbers and sliced celery

Cut chicken into small, bite-sized pieces.

Mix the remaining dressing ingredients (except cornstarch and water) in a large skillet. Bring to a boil over medium-low heat and boil just until the sugar is dissolved, whisking vigorously to combine the oil with the rest of the ingredients. Mix the cornstarch and water and add it to the skillet, stirring until the dressing is thickened.

Reserve ¾ cup of the dressing in a separate bowl (to be used as dressing on the salad).

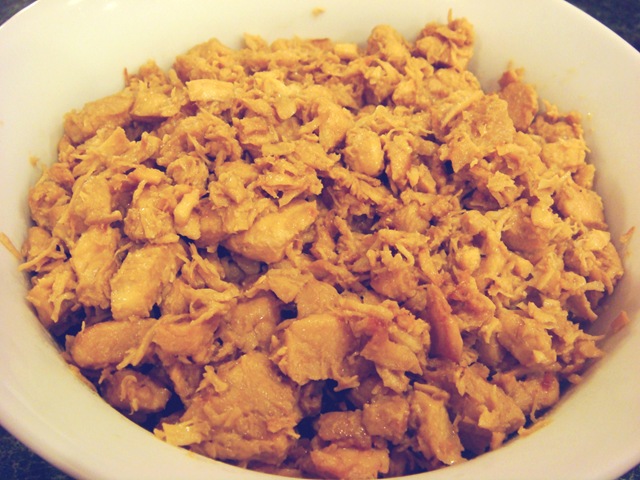
Add the chicken to the remaining dressing in the skillet. Cook over medium-low heat until all of the liquid is evaporated and the chicken just starts to brown (this will take a while, up to 30 minutes).

While the chicken is cooking prepare the rest of the salad ingredients (chopping and assembling). You can mix all of the salad ingredients together, or serve them in separate bowls. Top salad with warm chicken and reserved dressing.

From friend Heather, modified slightly by Kelly

**NOTE: I doubled the dressing and chicken amounts and got about 6 servings.

NoEmptyChairs.me

Scallion Pancakes

021910 053-1

4 ¼ – 4 ½ cups flour
1 tsp salt
½ tsp pepper
1 ½ cups boiling water
1 Tbs sesame oil
3 Tbs olive oil
1 cup sliced scallions (green onions)
Peanut oil/olive oil/or coconut oil

Combine flour (start with 4 ¼ cups, add additional flour if needed to make a stiff, but workable dough), salt and pepper in a stand mixer. While mixer is running (with a dough hook), gradually add boiling water, sesame and olive oils. Continue mixing and add scallions. Mix until dough pulls away from the edge of the bowl and forms a smooth ball. Roll dough into small pancakes about 6” in diameter, keeping unused dough covered while you are rolling.

Heat 1-2 tsp oil in a small skillet. Cook pancakes over medium-high heat for 1-2 minutes on each side. Add more oil to the pan as necessary.

Drain on a paper towel. Cut into wedges and serve with dipping sauce.

Dipping Sauce:

¼ cup soy sauce
1 Tbs Mirin (sweet rice vinegar)
½ tsp red pepper flakes
½ tsp grated ginger (optional)

Mix all ingredients. Flavor will intensify the longer it sits.

Yield: 12-15 full-sized pancakes

NoEmptyChairs.me

4 Comments

Filed under Appetizers, Breads, Main Dishes, Salads

Roasted Squash with Bacon & Gorgonzola

Jan2010 026-2

Just a quick post this weekend about a delicious way to prepare winter squash. I am coming to the end of my stockpile of winter squash (procured in the fall at an Amish produce auction-thanks Cynthia!). I have loved being able to go into our “root cellar” – read cold garage- and pick out a good squash for dinner.

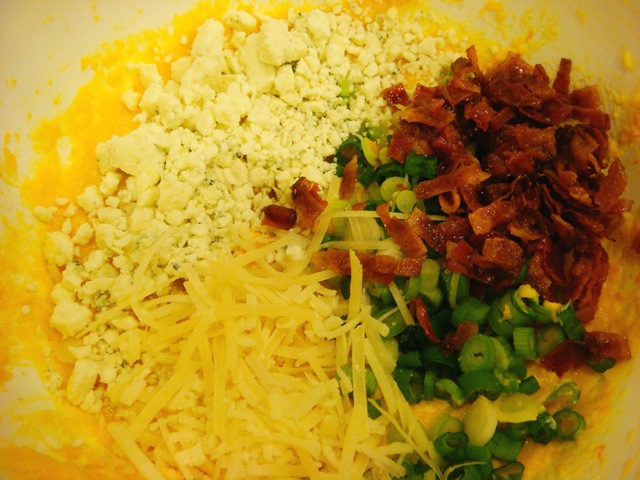
In this roasted, mashed squash dish, I loved how the mild flavor of a roasted butternut squash was complimented by the stronger taste of gorgonzola. The bacon and green onions make for some great texture.

This dish starts with a roasted butternut squash, but you could use any winter squash variety that mashes well (butternut, acorn, delicata, pumpkin; I probably wouldn’t use a spaghetti squash). For a “How to” on roasting squash, read How To Roast Winter Squash.

Mix your roasted, mashed squash with some crumbled gorgonzola cheese, cooked & crumbled bacon, sliced green onions and a little Parmesan. The cheeses and bacon made the squash plenty salty to me, but I did add just a little fresh ground pepper.

Jan2010 014-1

I cooked mine in these cute shallow individual baking dishes that I never seem to have a use for. I only have two (a 20+ year old wedding gift that usually sits high in my cupboard), but knowing that my kids weren’t going to touch this, I got out my stepstool and hauled them down.

Jan2010 017-2 I divided one butternut squash between the two dishes, and it ended up being more than the two of us could eat as a side dish. It was hearty enough (and very rich) that this amount (with a salad on the side) would have made a perfect main course for two.

Bake in a moderate oven until squash is heated through, cheese has melted and edges just begin to brown.

RECIPE:

Roasted Butternut Squash with Bacon & Gorgonzola

Jan2010 026-2

1 large butternut squash (or other winter squash variety)
2 Tbs gorgonzola cheese
1 Tbs Parmesan cheese, fresh grated
2 Tbs cooked and crumbled bacon
1 Tbs thinly sliced green onions
fresh ground pepper, to taste

Roast squash (see How to Roast Winter Squash). Mash until smooth (an immersion blended works really well). Stir in remaining ingredients. Spoon into individual baking dishes, or one larger dish (about 8×8” or a 1-qt casserole dish).

Bake at 375°F for 20-25 minutes, or until squash is heated through, cheese has melted and edges are golden brown.

Yield: 2 main dish or 4 side dish servings

NoEmptyChairs.me
Leave a comment

Filed under Main Dishes, Side Dishes

Fettuccine Alfredo with Garlic Breadsticks

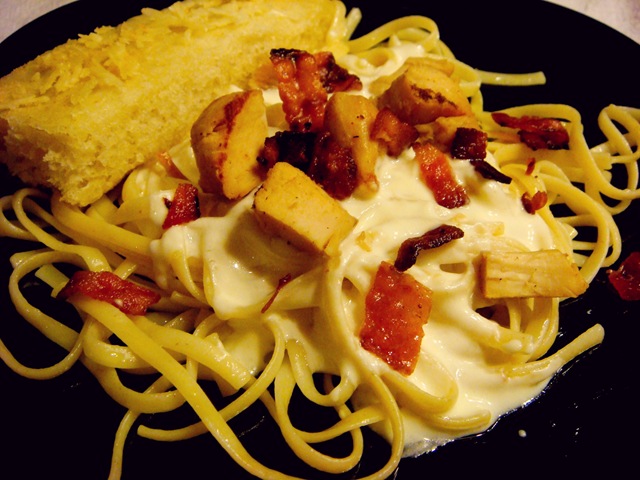
FEB 6, 2010 044-1 Okay, technically this is linguini. But if you close your eyes, it all tastes the same anyway.

This is one of Big J’s favorites. It ranks in his top 5 meals (maybe even higher), and is the only non-Asian based meal on the list. It is easy enough to put together that when I’m looking to score some “Good Mom Points”, I will even make it for him for lunch. He definitely counts this as one of the homeschool perks: hot home-cooked lunches instead of soggy PB&J.

I didn’t get any prep pictures of the the Alfredo Sauce, but it is basically a wonderfully rich blend of  chicken broth, cream, cream cheese and Parmesan cheese. There is no need for added thickeners (flour, cornstarch, etc). The cheeses make it plenty thick all on their own! It can easily be put together while your pasta is cooking.

You can serve it on its own, but I usually have several “toppings” on hand as well: chopped grilled chicken, cooked & crumbled bacon, steamed or roasted broccoli, barely-cooked baby peas (these are my favorite!).

Garlic Breadsticks

This is an easy to work with dough (very similar to the Cinnamon Twist dough, just without the egg and sugar).

Divide dough in half and roll out into rectangles. Use a sharp knife to cut dough into strips (a pizza cutter works great).

FEB 6, 2010 002-1

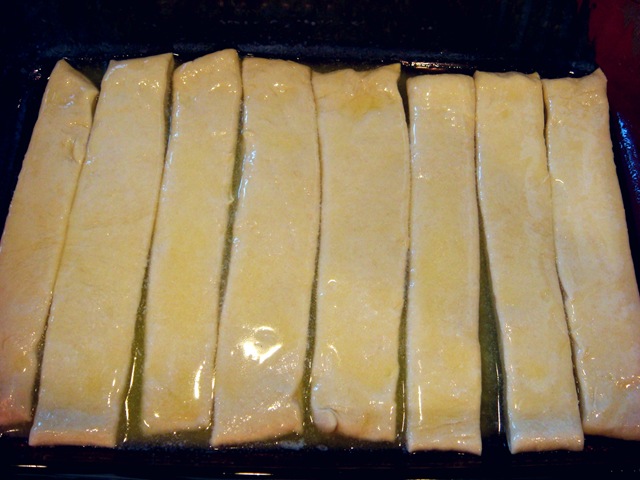
Melt butter in a jellyroll pan (here I have half of a batch of dough in a 9×13” pan). Place strips in pan, and turn each strip over to coat both sides with butter. Cover pan and let rise 30-60 minutes.

FEB 6, 2010 004-1

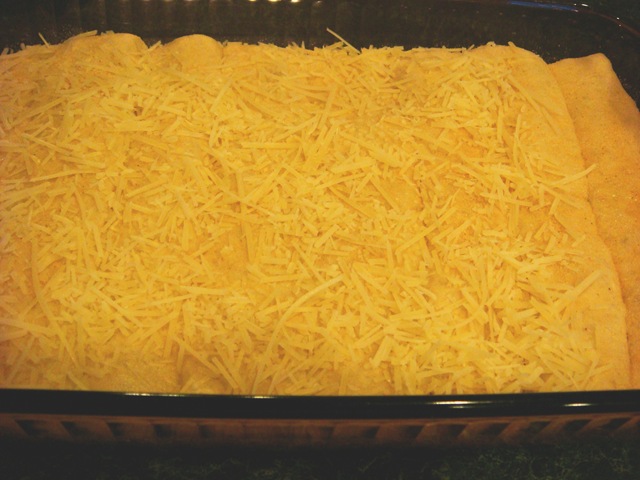
Sprinkle with garlic powder and cheese and bake for 10-12 mins.

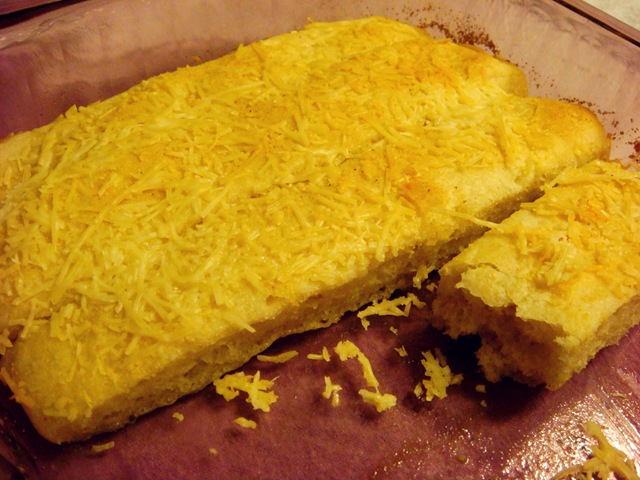
FEB 6, 2010 018-1

Serve with your favorite pasta or soup dish.

FEB 6, 2010 064-1

RECIPES:

Fettuccine Alfredo

FEB 6, 2010 044-1

¼ cup butter
1 clove garlic, minced
4 oz cream cheese, cut into cubes
½ cup heavy cream
1 cup chicken broth
1-2 Tbs white wine, optional
½ tsp freshly ground pepper
¾ cup fresh grated Parmesan cheese

Fettuccine (or other pasta)

Optional Toppings:
Grilled chicken, cut into bite sized pieces
Bacon, cooked and crumbled
Roasted or steamed broccoli
Baby peas, cooked until just tender

In a saucepan over low heat, melt butter slowly. Add garlic and cream cheese and stir until melted. Add cream, chicken broth, white wine and pepper. Stir in Parmesan. Stir with a whisk as it heats to get a smooth sauce. Cook until sauce is smooth and heated through.

Prepare fettuccine as directed on package. Serve fettuccine with alfredo sauce and desired toppings.

NoEmptyChairs.me
Garlic Breadsticks

FEB 6, 2010 064-1

1 ½ cups warm water
1 Tbs sugar
1 Tbs yeast
1 tsp salt
3 ½ – 4 cups flour
½ cup melted butter
Garlic powder
Parmesan cheese, optional

Mix water, sugar, yeast, salt, and flour. Add more flour, if needed, to make a soft dough. Knead.

Melt butter in a jellyroll pan. Set aside.

Divide dough in half. Roll dough into 2 rectangles. Cut into 1-inch wide strips. Place dough strips ½ inch apart in pan, turning over to coat both sides with butter. Let rise 30-60 minutes (until doubled). Sprinkle with garlic powder and Parmesan, if desired. Bake at 400°F for 10-12 minutes.

Makes about 18 breadsticks.

NoEmptyChairs.me
2 Comments

Filed under Breads, Main Dishes

Cinnamon Twists

FEB 6, 2010 077-1 There is something about a soft dough rippled with cinnamon and oozing sweet cream frosting that almost makes you forget about the water dripping into your house from the slowly melting snow on your roof. Almost.

These cinnamon twists are a variation on cinnamon rolls, and just as certain to please.

The dough is easy to put together and easy to work with. It goes together quickly, not requiring an initial rise. So you can have warm cinnamon twists on your plate in under an hour. Unless you have a bunch of girls staying at your house, and then you will be lucky to snag even one to try and snap a picture of. You might have to settle for the broken one shown above.

This is half of the batch of dough.

FEB 6, 2010 006-1

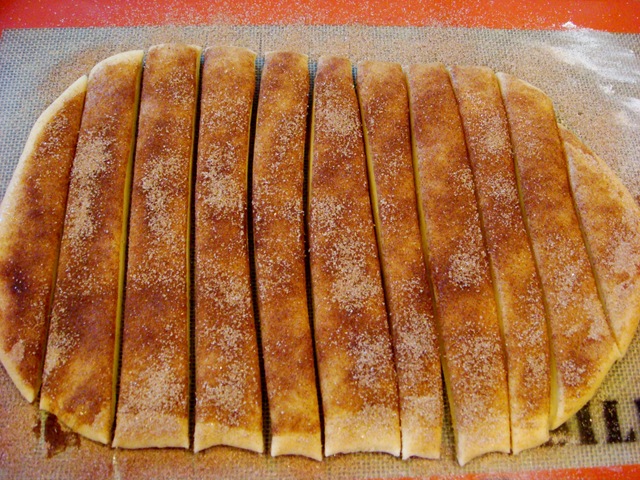
Be sure to use a sharp knife to cut the dough into strips. A round pizza cutter works amazingly!

FEB 6, 2010 010-1

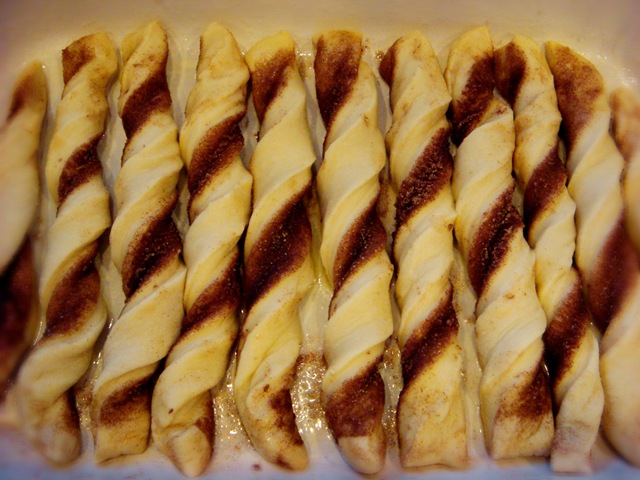
Twist the strips and put into a pan coated with melted butter. This pan is actually a little too crowded. I should have separated them a little more.

FEB 6, 2010 012-1

Let rise in a warm place until doubled in size, and then bake for about 10 minutes and you are ready to eat!

I like to use a basic powdered sugar glaze to top these. If I have it on hand, I use cream and powdered sugar. Cream gives the glaze a wonderfully rich taste. You can also use milk, but the cream is definitely worth the extra calories-and if you’re eating cinnamon twists it’s not like you’re counting calories anyway!

On a side note: if you make these on the same night you make Fettuccine Alfredo, be sure to label your leftover icing and alfredo containers. While making Big J’s breakfast the next morning (yes, he was having the pasta alfredo and not the cinnamon twists for breakfast), I topped his pasta with a big scoop of icing. Luckily I licked my finger before putting the concoction in the microwave!

RECIPE:

Cinnamon Twists

FEB 6, 2010 077-1

1 ½ cups warm water
½ cup sugar
1 egg
1 Tbs yeast
1 tsp. salt
3 ½ – 4 cups flour
½ cup butter, divided
¼ cup sugar
2 tsp cinnamon

Glaze:
1/2 cup powdered sugar
about 2 Tbs cream (or milk)

Mix water, sugar, egg, yeast, salt, and flour. Add more flour, if needed, to make a soft dough. Knead until a soft dough forms.

Melt ¼ cup butter in a jellyroll pan. Roll dough into rectangle. Spread with ¼ cup softened butter. Mix ¼ cup sugar and cinnamon. Sprinkle dough with cinnamon and sugar mixture; cut into 1-inch wide strips (a pizza cutter works really well for this); twist each strip gently and place in buttered pan, about ½ inch apart. Let rise 30-60 minutes (until doubled).

Bake at 400°F for 10-12 mins.

Prepare glaze: Mix powdered sugar with cream, a small amount at a time, until mixture can be drizzled with a spoon.

Cool twists slightly, and then drizzle with powdered sugar glaze.

Yield: about 18 twists

NoEmptyChairs.me

1 Comment

Filed under Breads, Breakfast/Brunch, Desserts

Super Simple Szechuan Shrimp

DSC06557-1

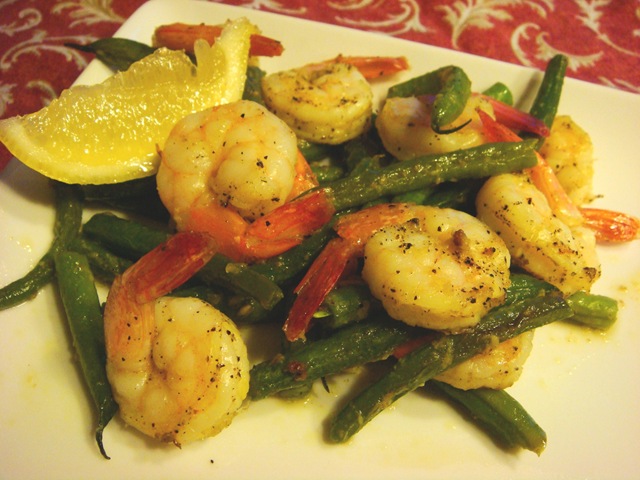
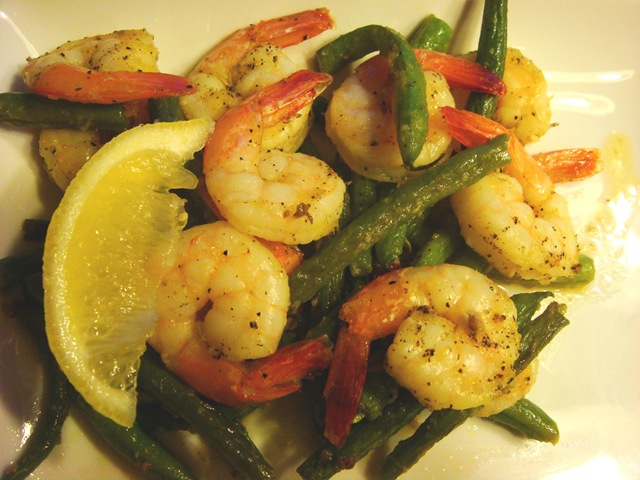
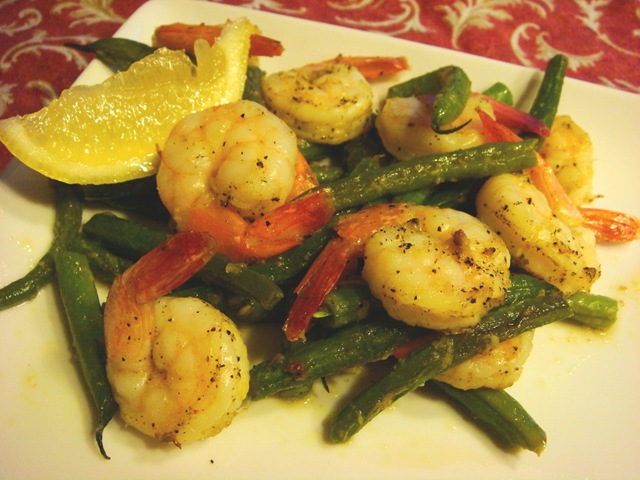
Easy prep, easy cooking, easy clean-up, and ready to eat in under 30 minutes, start to finish (even if your shrimp are frozen). Simple enough for a quick mid-week meal, but elegant enough to serve to company.

This is a recipe that I adapted from Kalyn’s Kitchen. I had bought some Szechuan peppercorns from Penzeys and thought that this would be a great recipe to add them to. Szechuan peppercorns are not spicy in the same way that some other hot peppers are. Rather than a burning feeling, they produce kind of a “numbing” sensation on your tongue. But when used sparingly, they add a great flavor!

To save on clean up, I like to prepare this recipe using Ziploc bags and a foil lined roasting pan.

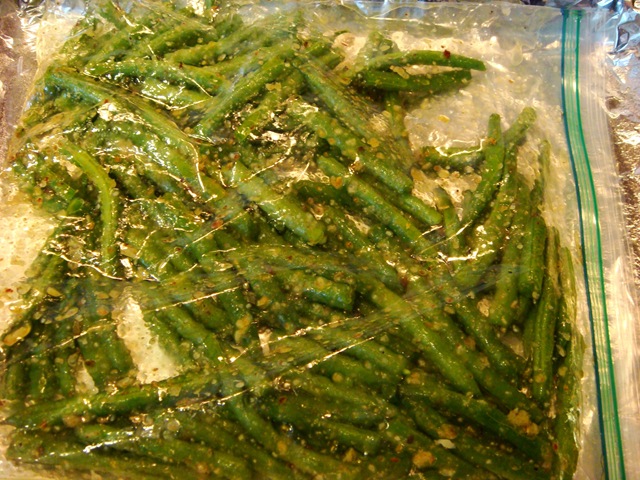
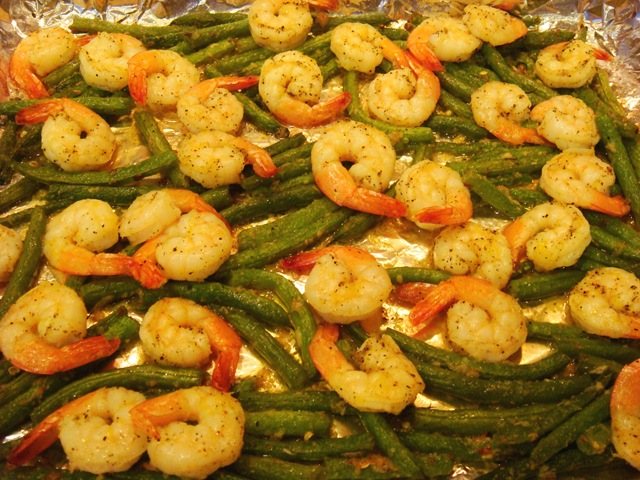
Combine fresh green beans with a little olive oil, coriander, cumin and ground Szechuan peppercorns (you could also use red pepper flakes or other spicy pepper if you don’t have the Szechuan ones).DSC06536-1

To save on time, I bought raw, peeled shrimp (they still had tails, and I left them on). To thaw frozen shrimp, place them in a colander and run cool water over them until thaw.

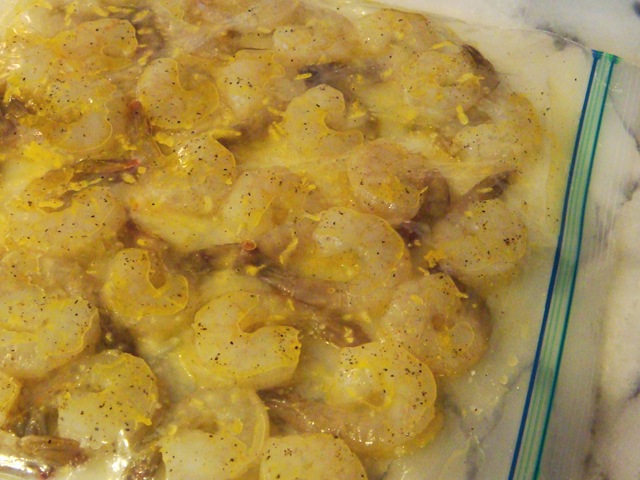
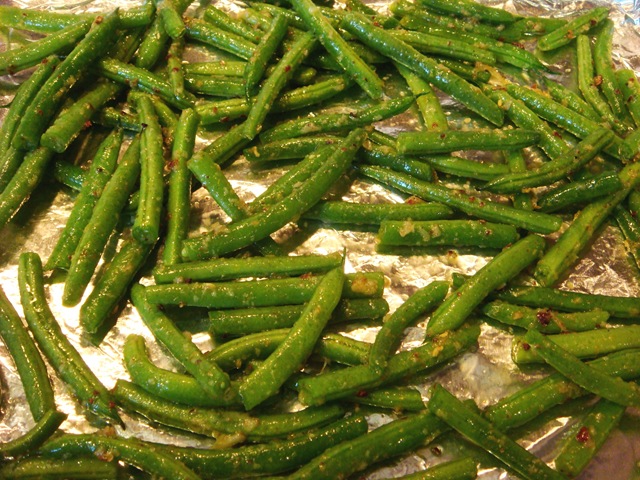
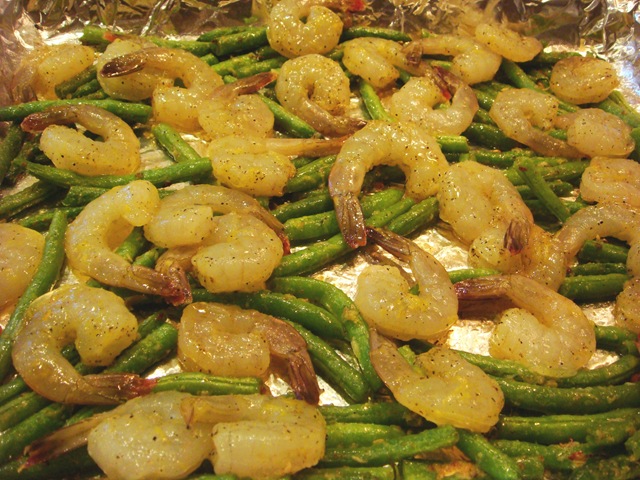
Combine shrimp with olive oil, lemon zest and salt and pepper.DSC06545-1 Arrange beans on a foil-lined pan in a single layer .DSC06541-1

Roast  beans at 425°F for 5 minutes.

DSC06549-1

After 5 minutes, arrange shrimp on top of beans and roast 8-10 minutes more, until shrimp are done but still tender and juicy. DSC06550-1 Serve with lemon wedges.

DSC06554-1 __

RECIPE:

Szechuan Shrimp and Green Beans

DSC06557-1

For the green beans:
1 lb green beans
1 Tbs olive oil
½ tsp ground coriander
½ tsp ground cumin
¼ tsp salt
½ tsp whole Szechuan peppercorns, ground**

For the shrimp:
1  lb medium-large raw shrimp, thawed and peeled
2 Tbs olive oil
zest from one lemon (save the lemon and cut into wedges)
¼ tsp salt
¼ tsp fresh ground black pepper

Preheat oven to 425°F.

If shrimp are frozen, place in a colander and rinse with cool water until thawed. Peel and de-vein.

Grind whole Szechuan peppercorns (I use my regular black pepper grinder). Place with green beans in a Ziploc bag with remaining “green bean” ingredients.

Combine shrimp and remaining “shrimp” ingredients in a separate Ziploc bag. Reserve lemon wedges for later.

Line a roasting pan with foil. Spray with non-stick cooking spray. Arrange beans on pan in a single layer as much as possible. Roast  beans at 425°F for 5 minutes. After 5 minutes, arrange shrimp on top of beans and roast 8-10 minutes more, until shrimp are done but still tender and juicy.

Serve the shrimp and beans immediately with lemon wedges.

**NOTE: If you don’t have Szechuan peppercorns, you can substitute crushed red pepper flakes, or other hot peppers. I get my peppercorns from Penzeys.

Adapted from Kalyn’s Kitchen

NoEmptyChairs.me

1 Comment

Filed under Main Dishes

Dulce de Leche Mini Cheesecakes

DSC04531-3

What says “I Love You” more than cheesecake, dulce de leche, chocolate and whipped cream all in one hand-held mini dessert? In my book, dessert doesn’t get much better that this. And these pocket-sized cups of bliss are small enough that it is easy for me to justify that I’m not really cheating on that healthy-eating-plan, right?

Unless of course, you make THIS MANY, which destroys any illusion of willpower:

DSC04528-1

This recipe is a loose interpretation of Smitten Kitchen’s Dulce De Leche Cheesecake Squares.

The impetus for trying this recipe came when I found these great free-standing baking cups (technically they are for brioche) from Plastic Container City. I knew that I wanted to make cheesecakes in them, and what better than a dulce de leche flavored cheesecake!

DSC04275-1

Rather than a graham cracker crust, I used my favorite cheesecake crust which is a simple combination of finely chopped almonds, vanilla wafer cookies and butter.

DSC04286-1 Place your crust-lined baking cups on a large baking sheet (or use a muffin tin with foil baking cups) and bake for 5 minutes, to toast the almonds.

Cool and pour in the batter. This cheesecake batter is a most delicious combination of cream cheese and dulce de leche, which you can easily make yourself, or purchase premade (look in the Latin section of the ethnic food aisle in the grocery store). But it is really easy to make yourself with just a can of sweetened condensed milk. Check out these tutorials for 6 different ways to make your own Dulce de Leche.

DSC04297-1

Bake until center is barely set and allow to cool completely.

DSC04307-1

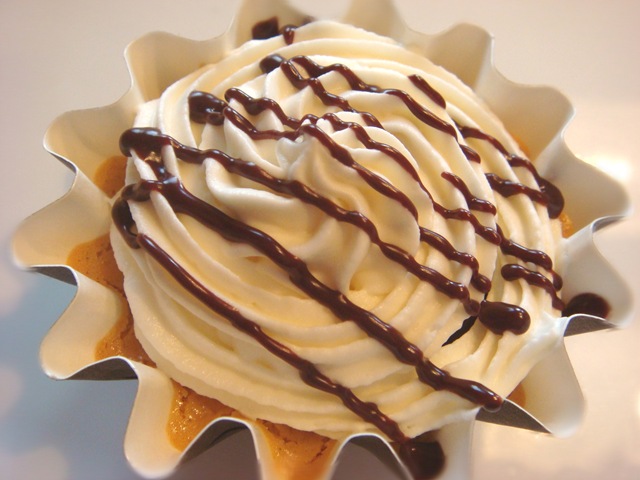
I drizzled a chocolate glaze over the cooled cheesecakes.

DSC04513-1 Not wanting to clean chocolate out of my pastry bag, I used a plastic zip-close bag to do the drizzling. (Either snip one corner of the bag, or poke a bamboo skewer through the inside corner of the bag before filling with chocolate). I do recommend using a quality brand freezer-bag, however, so that the bag will not burst at the seams when you squeeze it, leaving you with one VERY chocolatey cheesecake:

DSC04499-1After cleaning up my chocolate mess and making an additional batch of chocolate glaze:

I then topped each cheesecake with a swirl of whipped cream. The whipped cream is a stable whipped cream from Coleen’s Recipes. It will hold it’s shape for days in the refrigerator and is stiff enough to pipe with a pastry tip (this time I did use my pastry bag). I would have liked to have used a larger tip, but I don’t own one (yet!). The cream cheese in the whipped cream topping was a perfect complement to the cheesecake. Coleen’s blog has some great family friendly recipes, and I have gotten many practical tips from her!

DSC04528-1 A final drizzle with the chocolate glaze and they are ready for a few hours of chilling in the fridge-if you can wait that long!

DSC04531-1

RECIPE:

Dulce de Leche Mini Cheesecakes

DSC04531-3

INGREDIENTS:
Crust:

½ cup crushed vanilla wafers or shortbread cookies**
½ cup finely chopped whole almonds**
2 Tbs melted butter
1/8 tsp salt

Filling:
1 tsp unflavored gelatin (about half an envelope of Knox brand)
¼ cup whole milk
8 oz cream cheese, softened
2 large eggs
½ tsp salt
1 cup dulce de leche

Glaze:
¼ cup (heaping) chopped bittersweet chocolate
2 Tbs butter, cut into small pieces
1 Tbs light corn syrup

Whipped Cream Topping (from Coleen’s Recipes):
4 oz cream cheese
¼ cup sugar
½ tsp vanilla
¼ tsp almond extract
1 cup heavy cream

PREPARATION:
Crust:
Preheat oven to 350°F.

Mix all crust ingredients. Press into baking cups (use 1-2 tsp crust mix per mini cheesecake). Place baking cups on a large baking sheet. Bake at 350°F for 5 minutes. Cool.

**I use a food processor to chop the cookies and almonds

Filling:
Sprinkle gelatin over milk in a small bowl and let stand 2 minutes to soften. Beat together cream cheese, eggs, salt, and gelatin mixture in a bowl with an electric mixer at medium speed until well combined, about 2 minutes, then beat in dulce de leche  thoroughly. Pour filling over crust in baking cups.

Place an empty broiler or roasting pan on the lowest oven rack. Pour 2 cups of boiling water into the empty pan.

Place baking sheet with cheesecake batter on the center rack in the oven. Bake at 350°F for 15 minutes, or until center is barely set. Remove from oven and cool completely.

Glaze:
Place all ingredients in a microwave safe bowl. Cook on high power for 20 seconds. Remove and stir well. Add 10 seconds, if necessary. Be careful not to scorch. You can also use a double boiler to melt ingredients together.

Place melted (but not hot) chocolate glaze into a freezer bag (good quality, so it doesn’t burst) or pastry bag with a fine tip. If using a freezer bag, cut a corner (or poke a bamboo skewer through the corner). Pipe a swirl of chocolate glaze over cooled cheesecakes.

Set aside remaining glaze. Prepare whipped cream topping. Pipe an additional swirl of chocolate glaze over the whipped cream.

Whipped Cream:
Combine the cream cheese, sugar and extracts in a large mixing bowl. Beat with an electric mixer until very smooth (scraping sides often). While the mixer is running, slowly pour in heavy cream. Continue beating on high speed until stiff peaks form.

Place whipped cream mixture in a pastry bag with a large star tip. Pipe onto cheesecakes. Pipe an additional swirl of chocolate glaze over the whipped cream.

Chill cheesecakes in the refrigerator for 2-3 hours. They will keep, refrigerated (even with the whipped cream frosting!) for several days.

Adapted from Smitten Kitchen

NoEmptyChairs.me

4 Comments

Filed under Desserts