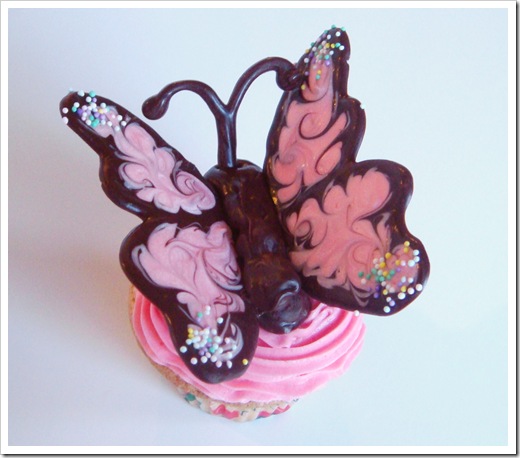
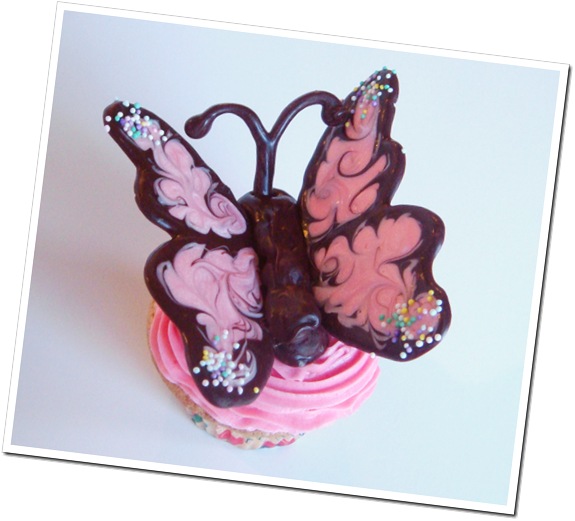
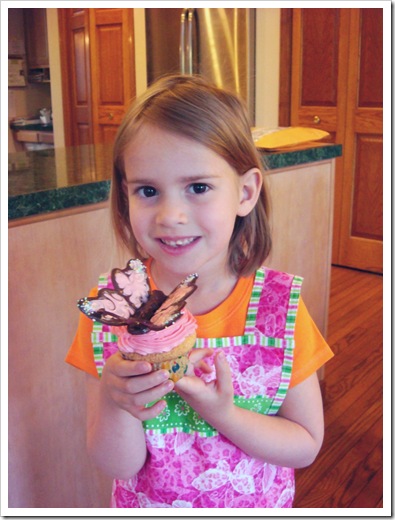
These are the cupcakes we made for Little J’s 6th Birthday Party. The butterflies were easy to make, and look so cute sitting on top of a brightly frosted cupcake!
I first saw these butterflies on the blog Annie’s Eats. They are also shown in the book Hello Cupcake!
I used a boxed mix (as I had 6 party-going 6 year olds helping bake and decorate) for the cupcakes, but made a homemade frosting for the girls to tint and ice their cupcakes with. The frosting was absolutely decadent! I normally dislike most frostings: buttercream, royal icing, fondant—they all get scraped off onto the side of my plate. But this frosting is amazing; it tastes like a rich buttery whipped cream. Maybe I like it because it doesn’t use powdered sugar. That and the butter!
The frosting recipe is below, at the end of the post. It is different from many frostings in that it is thickened with a cooked milk and flour concoction (that looks like glue!), and uses granulated sugar instead of powdered. This will be my go-to cake frosting from now on!
What really makes the cupcakes, of course, are the butterflies. They were surprisingly easy to make.
—
Making Chocolate Butterflies
—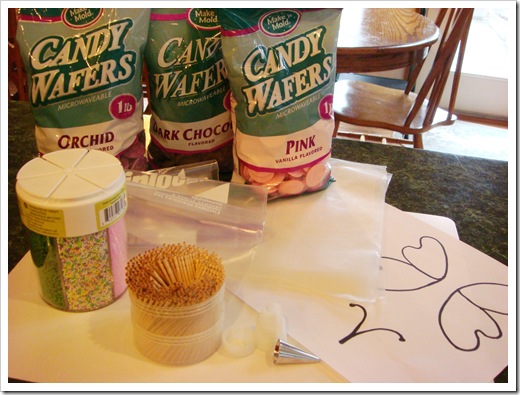 Assemble ingredients: Melting chocolate (both chocolate and colored), waxed paper, toothpicks, writing tip, Ziploc bags or pastry bags, butterfly stencil, “sprinkles”
—
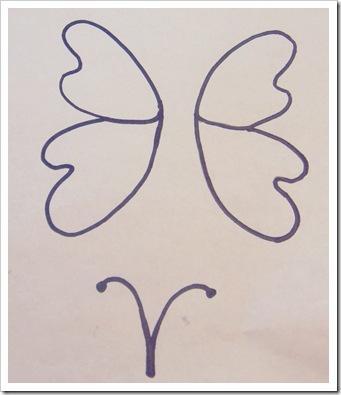
Trace wing and antennae pattern onto a piece of white paper.
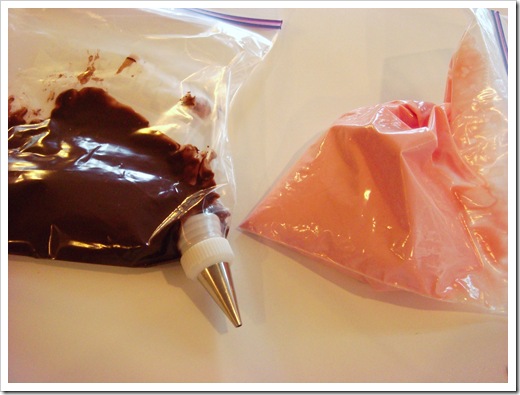 Place a small amount of colored and chocolate melting disks into separate Ziploc bags (or small bowls). Melt in microwave—Start with 30 seconds, squish bags, then add an additional 10 seconds if not completely melted.
I used a writing tip to pipe the chocolate, but I just cut off a small end of the bag to squeeze out the melted colored vanilla candy. I used Ziploc bags simply because I did not want to clean out pastry bags. I don’t recommend store-brand bags for this; I have had the seam rip while squeezing out the chocolate. Huge mess!
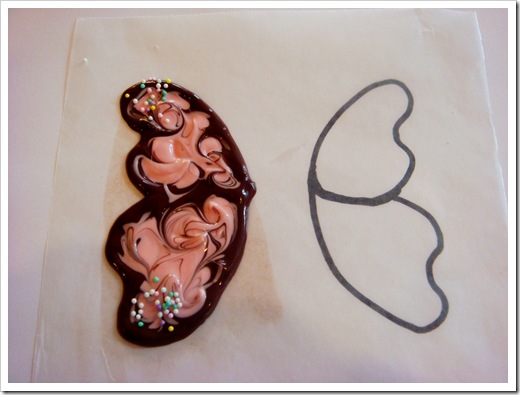
Place a small square of waxed paper over your stencil paper.
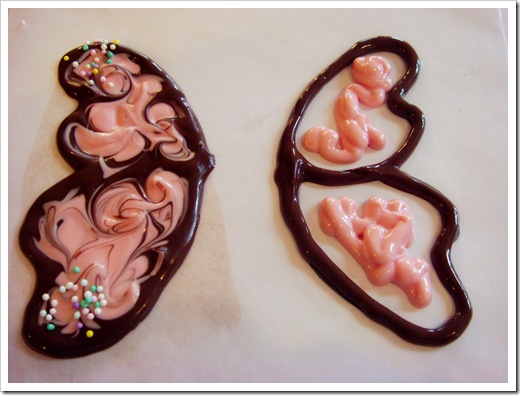
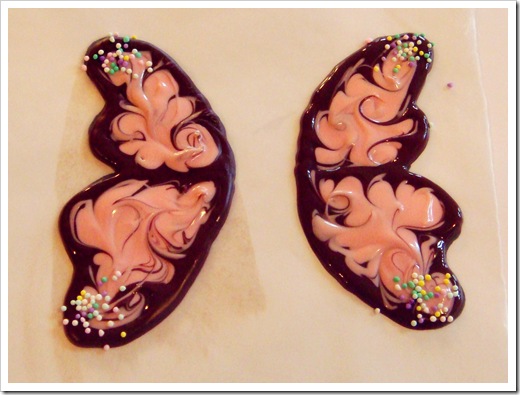
Pipe chocolate around the edge of one wing at a time. Squeeze a small amount of colored chocolate into the center of each wing section. Use a toothpick to spread colored candy to fill the wing. Use a toothpick to gently swirl chocolate and colored candy. Sprinkle edges of wings with sprinkles, if desired.
Work with just one wing at a time. The chocolate hardens quickly!
Place your bag of chocolate back in the microwave for a few seconds if it becomes too stiff (don’t forget to take off the metal writing tip!).
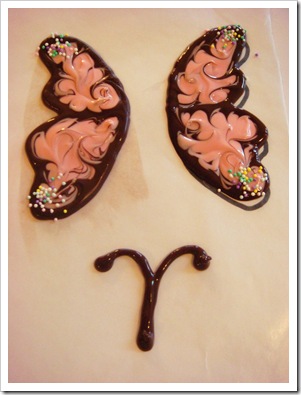
Trace the antennae. Let wings harden completely.
There are two ways to assemble the butterflies: create self-standing butterflies, or assemble the butterflies on the cupcakes.
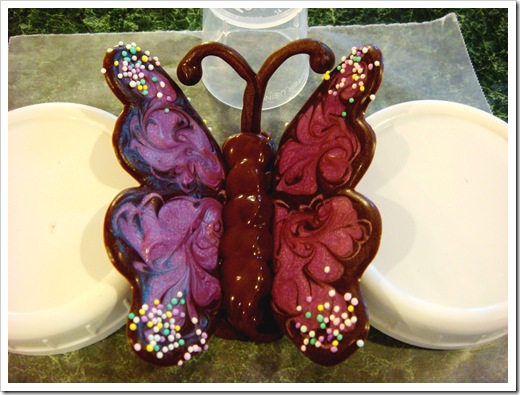
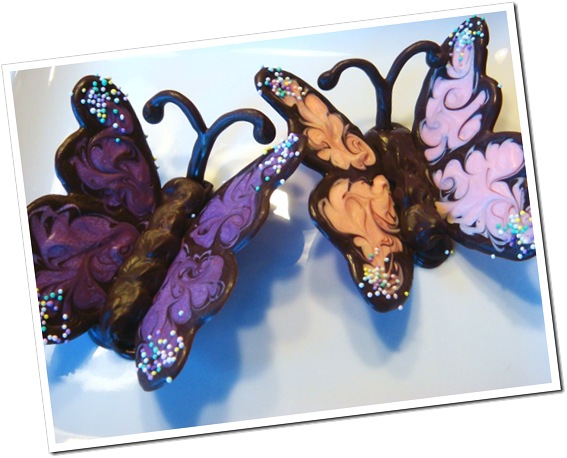
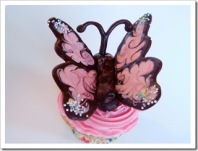
I was making these for Little J’s party, where the girls were making and decorating their own cupcakes. I thought assembling them on the cupcakes would be too time consuming for the party, so I made mine self-standing. The down side of trying to make self-standing butterflies is that the cute little segmented bodies (see picture below) don’t stay quite so cute when you are trying to balance the wings in the still-wet chocolate.
For a great tutorial on how to assemble the butterflies on the cupcakes, visit Annie’s Eats.
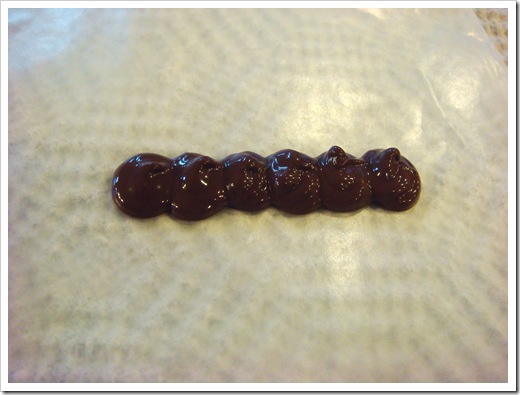 For self-standing cupcakes: using the melted chocolate, pipe a body onto a separate piece of waxed paper. Make little dollops of chocolate, being sure that they touch.
Now for the tricky part: find some odds and ends in your kitchen drawers to use to prop up your butterfly wings and antennae while the chocolate body hardens (I used plastic mason jar lids and medicine cups). Place the wings at an angle in the still soft chocolate body. Prop them up underneath. Place the antennae at the head of the butterfly and prop that as well.
I tried just holding the wings while the chocolate hardened, but the wings started to melt in my fingers before the body was hard enough to support the wings. Propping them was much easier!
Gently peel the butterflies off of the waxed paper when you are ready to put them onto your cupcakes.
—
RECIPE:
Vanilla Cupcake (or Cake) Frosting
1 cup whole milk
5 Tbs flour
1 tsp vanilla
1 cup butter
1 cup granulated sugar (do not use powdered sugar)
Optional: food coloring
In a small saucepan, mix the flour and milk until combined. Heat over medium heat, stirring constantly with a whisk, until mixture thickens (and is just about to boil). Remove from heat and let it cool completely to room temperature. Stir in vanilla.
In a large mixing bowl (a stand mixer works best for this) cream the butter and sugar until light and fluffy. Beat in the cooled milk mixture and beat for 5-7 minutes, until frosting is light, fluffy and completely uniform throughout. Beat in food coloring, if desired.
This frosting looks best when piped with a large decorating tip (1M), but can also be spread with a spatula.
Yield: frosting for one cake or about 24 cupcakes
NoEmptyChairs.me












Beautiful butterflies. What little girl wouldn’t love them. Thanks.
LikeLike
Five stars beautiful!!! I’ve been decorating cakes for YEARS, and I know a “hit” when I see one. These are just fantastic.
LikeLike
Beautiful! I’ve seen them before but haven’t made them myself. I don’t have enough patience. 🙂
~ingrid
LikeLike
These are gorgeous! Thank you for sharing how you did it 🙂
LikeLike
OKay you won me over I must subscribe! I really like your creativity!
LikeLike
Pingback: All Things Supercinski » Blog Archive » Annalise’s Birthday
these butterflies are easier than i thought thanks to you awesome cupcakes!
LikeLike
These are so cute!! I’m making them for my daughter’s first birthday, the theme is butterflies so these are perfect! For me they are a bit time consuming but hopefully well worth it! Something I found that helps: I heated up a travel hot/cold pad for a casserole dish, laid a paper towel over it & kept my pastry bags of candy & chocolate on it, that way I didn’t have to heat it as often! I tried to make the frosting but I think something went wrong because it looked like curdled milk 😦 I’m sure it’s tasty though! Thank you for sharing this!!! God Bless!
LikeLike
Great tip for keeping the chocolate soft. I will have to try that next time!
The frosting starts out looking like curdled milk, but if you are patient and keep beating, it does eventually set up. I use a stand mixer to make the frosting. I have never tried with a hand mixer; it may take longer that way. Also be sure to have your butter and room temp and have the flour mixture cooled.
LikeLike
That must have been my problem, I don’t have a stand mixer! That’s something I’m asking for for Mother’s Day 😉
The party was a success & the butterflies were a HIT! People couldn’t believe I actually made them! I did make the butterflies a bit smaller because I put the cupcakes on a stand, but they were still super cute! Thank you!!!
LikeLike
I’m glad the party turned out well! Best wishes for a happy mother’s day (complete with a new stand mixer).
LikeLike
They look. Good
.
LikeLike
Thank you they’re fantastic – just seen a tip on how to assemble butterflies – use a box corner – the hard cardboard will then be supported by anything you like no problem – hope this helps for next time and thanks again
LikeLike
Thanks for the tip; I may try that next time. I made the butterflies again this spring to make these cupcakes:
I used folded aluminum foil to prop them up that time and it was much easier.
LikeLike
These butterflies for my cupcakes for my great grandsons christening and they were amazing thank you keep up the good work
LikeLike
I’m glad they turned out well for you. Congratulations to you and your family on your grandson’s christening!
LikeLike